If you’re a fan of leather patch hats and want to learn how to make them from scratch, this tutorial from Josh Wright, the owner of Wright’s Woodworks, has everything you need.
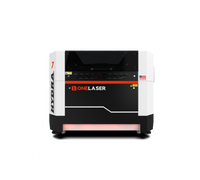
In this project, Josh walks through every step to create laser engraved leather patches using the OneLaser Hydra 9 Dual Source Laser. The entire project is powered by the 38W RF tube, known for its clean engraving and detailed results.
From design setup to heat pressing the final patch on a hat, this guide shows you how to get professional-quality results - perfect for custom caps, branding, or gift ideas.

1. Why the Hydra 9? The Laser Behind the Magic
Josh uses the OneLaser Hydra 9 Dual Source Laser, a machine featuring both:
- A 100W CO2 Glass Tube
- A 38W RF Tube
Although both tubes have their strengths, Josh used only the RF tube for this project to highlight its ability to both engrave and cut with exceptional precision.

2. What You Need to Make Laser Engraved Leather Patches
Materials:
- OneLaser Hydra 9 Laser Engraver
- Leatherette or genuine leather patches
- Vector logo or design with cut & engrave layers
- Hat heat press
- Silicone or neoprene mat (to prevent scorching)
- Richardson 511 hat (or similar)
This setup is ideal if you’re looking for a reliable laser engraver for leather hat patches.
3. How to Make Laser Engraved Leather Patches for Hats
Step 1: Design Setup
Josh starts his leather patch hat build with a fun and personal design: a golfing bear logo.
The design is split into two layers:
- Green Layer: Engraving
- Purple Layer: Cut outline
Make sure your layers are properly color-coded and that your cut path is offset slightly to avoid overlapping engravings. Most design software like LightBurn or Adobe Illustrator works well for this kind of setup.

Once your design is ready, import it into your laser control software and assign the engraving and cut parameters accordingly.
Step 2: Engraving with the RF Tube
Next, Josh moves on to engraving using the 38W RF tube. Despite being less powerful than the 100W glass tube, the RF source shines in finesse and consistency.
Engraving Settings:
- Speed: 800 mm/s
- Power: 38%
- Line Spacing: 0.010
- Air Assist: Minimal (half turn on screw valve)
Josh emphasizes engraving with minimal air assist to avoid lens contamination while maintaining a clean burn. He uses the autofocus function to lock in precise focus before engraving.

The results are stunning: crisp detail on every element, from trees and grass to the dimples on a golf ball.
Step 3: Cutting the Leather Patch
Once engraving is done, it’s time to cut out the patch. Josh switches to a high-powered pass - still using the RF tube.
Cut Settings:
- Speed: 40 mm/s
- Power: 95%
- Air Assist: Max (15 PSI on stock air system)

Josh manually adjusts the screw valve to increase air for the cut pass. He recommends testing your setup using a sample test card to refine your speed and power.
Despite the RF tube typically being better suited for engraving, it handled the cuts with precision - especially in tight corners.
Step 4: Pressing the Patch to a Hat
The final step is to attach the laser engraved leather patch to the hat using a heat press.
Hat Press Steps:
- Preheat the Hat: 275°F for 15 seconds
- Peel Off the Patch Backing
- Place Patch on Hat (center it visually)
- Press: 275°F for 40 seconds
- Remove Mat and Inspect
Josh uses a heat-resistant silicone mat to protect the hat during pressing. This helps avoid shiny spots or scorching caused by direct contact with the heated platen.

After pressing, the patch adheres smoothly and permanently—creating a high-quality leather patch hat that’s ready to wear or sell.
4. Why Use an RF Tube for Leather?
If you’re exploring how to laser engrave leather patches, here’s why Josh highly recommends using an RF tube:
- High detail and clean lines
- Less burning and residue
- More consistent engraving output
- Low maintenance and long lifespan
This makes it perfect for DIY businesses and creators who want top-tier results with minimal fuss.
Learn more: RF Laser Tube Frequency Tips for Precise Engraving
5. Highlights from Wright’s Woodworks Tutorial
- The Hydra 9 RF Tube is fully capable of both engraving and cutting leather
- A clean lens and minimal air assist help during engraving
- Adjust air assist to full for cutting tasks to prevent burn
- Preheat hats before pressing patches for better adhesion
- Test your engraving and cutting settings using a sample card or scrap piece
6. FAQs: Laser Engraved Leather Patches
Q: What kind of leather is best for laser engraving?
A: Leatherette and vegetable-tanned leather are most commonly used. Always do a test run first.
Q: Can the Hydra 9 do both engraving and cutting?
A: Yes. This entire project was completed with the RF tube only, showing its full versatility.
Q: How do I choose the best hat press settings?
A: Josh used 275°F for 40 seconds, but every machine is different. Start with a test hat.
Q: Is the RF tube better than the CO2 glass tube?
A: For engraving detail, yes. The RF tube offers cleaner, crisper engraves.
Learn more: RF CO2 Laser Vs Glass Tube CO2 laser - Which Better?
Create Your Own Custom Leather Patch Hats
Thanks to Josh Wright from Wright's Woodworks, you now have a complete breakdown of how to make laser engraved leather patches and press them onto hats using pro techniques and tools.
This tutorial proves that even with a single laser source, you can create detailed, high-end leather patches for personal or commercial use.