 Liquid error (sections/image-banner line 171): invalid url input
The first time I engraved a tumbler for a customer instead of just for fun, my hands were genuinely a little sweaty. It was a groomsmen gift order — six stainless tumblers, each with a different nickname wrapped around the base — and I remember thinking, "If this comes out crooked, there's no fixing it." It didn't. But that nervous first run taught me almost everything I now tell people about laser engraving tumbler projects: the machine matters, the rotary setup matters more, and a little patience on your first piece saves you from a costly mistake on your fifth.
Laser engraving tumblers is a genuine game-changer for stylish, long-lasting custom drinkware — for gifts, corporate branding, or a full-blown small business. Unlike a vinyl decal, a properly done laser engraved tumbler won't fade, chip, or peel, because the design is part of the material, not sitting on top of it.
In this guide: what tumbler engraving is, the best materials to use, the machines that make it easy, and everything I've learned about getting pro-level, distortion-free results.

1. What is a Laser Engraving Tumbler?
Laser engraving tumbler work is a precise way to permanently change the surface of cups, mugs, and bottles using a focused laser beam. Unlike printing or decals, it doesn't add any ink or material to the surface — instead, it interacts directly with the tumbler's outer layer to create a mark that's physically part of the material.
The laser either removes a thin layer of coating (on powder-coated tumblers) or changes the metal surface itself through oxidation or micro-ablation (on bare stainless steel). Either way, you end up with a sharp, high-contrast design that has nothing to peel or fade off of.
This is exactly why it's become such a popular way to make personalized gifts, branded drinkware, promotional giveaways, and custom retail tumblers—I've made everything from wedding favors to a 200-piece corporate order off the same basic process.
1.1 How Laser Engraving Works on Curved Surfaces
Because tumblers are cylindrical, the laser and the rotating cup need to move in perfect sync for the engraving to line up correctly.
A rotary attachment slowly turns the tumbler while the laser head moves across the design path. This combination:
- Prevents image distortion
- Maintains consistent focus across the curve
- Allows full wrap-around and seamless designs
When it's set up correctly, this is genuinely how you get laser engraving on stainless steel without distortion — the rotary handles the geometry so your design doesn't stretch or warp as it wraps around the curve. Get the rotary speed and laser speed even slightly out of sync, though, and you'll see it immediately: text that looks perfectly straight on your screen comes out subtly slanted on the tumbler.
1.2 Differences Between Laser Marking, Etching, and Engraving for Tumblers
Not all laser customization techniques are the same, even though people (myself included, before I knew better) tend to use "marking," "etching," and "engraving" interchangeably. Each process interacts with the material differently and produces a genuinely different result.
Knowing the difference matters when you're customizing tumblers, since depth, contrast, and durability vary significantly between them:
|
Process |
Depth & Appearance |
Best for |
Durability |
|
Laser Engraving |
Deep, permanent mark that removes material |
Powder-coated & stainless steel tumblers |
|
|
Laser Etching |
Shallow mark, slightly raised effect |
Anodized aluminum & coated metals |
Moderately durable, may fade over time |
|
Laser Marking |
Color change on metal without removing material |
Stainless steel & titanium |
Permanent but not textured |
1.3 Durability and Dishwasher Resistance
A properly laser-engraved tumbler is genuinely tough. Because the design is physically part of the surface:
- It will not peel, chip, or crack
- It resists fading from UV exposure
- It stays fully visible after repeated dishwashing
Most engraved and powder-coated stainless steel tumblers are dishwasher safe, though I still recommend hand-washing—not because the engraving needs it, but because repeated dishwasher cycles are harder on the tumbler's overall insulation and finish, engraved or not.
2. How Does Laser Engraving Work on Tumblers and Mugs?
Laser engraving on tumblers and mugs uses controlled laser energy paired with precise rotational motion to produce a design that holds up on curved drinkware. Whether you're working on stainless steel, powder-coated tumblers, or coated mugs, the underlying process stays the same — and it's built to be accurate and repeatable, order after order.
2.1 Step-by-Step Engraving Process
Design Preparation: The artwork or text is created or imported into laser software and scaled to match the tumbler's dimensions. Placement is adjusted for single-side or full wrap-around engraving.
Machine Setup: The tumbler is mounted securely on a rotary attachment, level and centered. Getting this alignment right the first time is genuinely the single biggest factor in whether the whole job comes out clean.
Focus & Parameter Settings: Laser focus, speed, power, and DPI are adjusted based on the tumbler's material and coating to get clean contrast without overheating the surface.
Engraving Execution: As the laser fires, the rotary attachment rotates the tumbler in sync with the laser's movement, producing a seamless design around the curved surface.
Inspection & Cleanup: After engraving, residue is wiped away, and the design is checked for consistency, depth, and contrast before it ships or goes on the shelf.
2.2 Handling Cylindrical Objects (Rotary Engraving)
Tumblers and mugs are cylindrical, which means a standard flatbed engraving job would badly distort your design—text stretches near the edges of the curve, logos warp, and nothing lines up the way it looked on your screen.
A rotary engraving attachment solves this by rotating the object at a controlled speed while the laser moves horizontally, matching the tumbler's curve step by step instead of trying to engrave it flat.

Rotary engraving gets you:
- Even engraving depth across the entire curve
- Distortion-free text and logos
- Full 360-degree wrap designs
- Stable engraving on tall or handled tumblers
Without a rotary system, accurate tumbler engraving just isn't realistically possible—I've seen people try to fake it with a flat-bed jig, and the distortion around the curve is obvious the moment you spin the piece in your hand.
2.3 Coated vs. Bare Metal Engraving
Laser engraving behaves differently depending on the tumbler's surface:
- Powder-Coated Tumblers: The laser removes the outer coating, revealing the bare metal underneath. This creates high-contrast designs with sharp edges and excellent visibility—this is the look most people picture when they imagine a custom laser-engraved tumbler.

- Bare Stainless Steel: The laser alters the metal surface through oxidation or micro-etching, producing a subtle, professional finish without removing much material at all.

Each surface needs different power and speed settings to avoid discoloration or uneven marks — what looks perfect on a powder-coated tumbler can easily overheat and discolor bare stainless steel at the same settings.
2.4 Precision Laser Engraving Explained
Precision, in the context of tumbler engraving, really just means the laser can hold onto:
- Consistent depth across the whole curved surface
- Sharp line definition for small text and logos
- Uniform contrast from the first letter to the last
That level of control comes from accurate motion control, stable rotary rotation, correct focus, and well-tuned engraving parameters working together. It's essential for professional results—especially once you're engraving branded drinkware or running tumblers in volume, where one inconsistent piece in a batch of fifty stands out immediately.
3. What Do You Need to Laser Engrave Tumblers?
To get started with laser engraving tumbler projects, you'll need more than just the machine itself. Here's the real checklist—the one I actually keep near my workbench.
3.1 Best Laser Engravers for Tumbler
The machine is obviously the heart of the operation, and OneLaser has a few different paths depending on how much tumbler work you're actually planning to do.
VertiGo — Built Specifically for Drinkware
If tumblers, mugs, and bottles are most of what you'll be engraving, VertiGo is worth serious consideration before anything else. It's a dedicated vertical rotary engraver with a self-centering grip, which means you're not manually re-centering and re-leveling every single tumbler the way you would on a flat-bed machine with a bolt-on rotary attachment.
Its RF laser runs without water or a compressor, so it's genuinely practical to run behind a retail counter or bring to a market.
What to watch for: because it's purpose-built for cylindrical drinkware, it's not the machine to reach for if you also need to engrave flat signage or cut acrylic regularly—it does one job extremely well rather than everything reasonably well.

X Series (XRF) with Base Booster — The Flexible Desktop Option
The OneLaser XRF is a 38W RF laser engraver with genuinely high resolution (up to 2,000 DPI) and an RF tube rated for around 30,000 hours — real numbers that matter for tumbler work, since fine text and logos need that resolution to stay crisp when wrapped around a curve. Paired with a rotary attachment like the PiBurn Grip 2.0, it handles most standard tumblers well straight out of the box.
What to watch for: taller items—40 oz tumblers and similar—need the optional Base Booster (riser base) add-on, which raises the machine and unlocks straight-through material clearance of up to 160 mm. It's not included by default, so budget for it separately if bigger tumblers are part of your regular lineup.
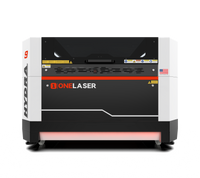
Hydra Series (Gen 1) — Built-In Room for Volume Work
The original Hydra Series pairs a glass CO₂ tube with a 38W RF tube in one machine, with a larger workspace and pass-through door design. That extra bed height means many tumblers—including taller ones—fit without needing an add-on riser at all, and the dual-laser setup means the same machine can also handle cutting or engraving other materials between tumbler batches.
What to watch for: it's a bigger footprint and investment than the X Series, so it makes the most sense once tumbler orders are a regular, ongoing part of your workflow rather than an occasional project.

Hydra Gen2 — For Scaling Production
Hydra Gen2 moves to a full RF-based dual-laser system with faster motion and modular expansion, including an optional fiber upgrade path if you also want to mark metal components alongside your drinkware work.
What to watch for: it's genuinely built for scale—if you're running a handful of tumbler orders a month, Gen2's extra speed and modularity is more machine than you need; it earns its keep once you're producing in real volume or need the fiber option for other product lines.

3.2 Rotary Attachment
Tumblers are cylindrical objects, which makes engraving them more involved than flat materials. A rotary attachment is essential for holding and rotating the tumbler securely throughout the job, ensuring even coverage around the entire surface without distortion.
3.3 Laser Engraving Software
To get your designs onto the tumbler, you'll need laser software like LightBurn, which works with OneLaser engravers. This lets you upload and adjust your designs — size, alignment, and engraving parameters — to fit the specific curve of your tumbler.
Learn more: Best Laser Engraving Software
3.4 Tumbler Material
Picking the right tumblers for laser engraving is genuinely half the battle. Stainless steel, powder-coated, anodized aluminum, and certain glass tumblers are all solid choices. Different materials need different power settings, so match the tumbler to what your engraver actually does well.
3.5 Cleaning Supplies
Once engraving is done, a microfiber cloth and a polishing agent like brass polish are essential for cleanup. These remove leftover residue from the engraving process and genuinely enhance the final contrast—skipping this step is a common reason a finished piece looks duller than it should.
3.6 Safety Gear
Laser engraving involves powerful machines and real fumes. Make sure you have adequate ventilation or a fume extractor to capture anything potentially harmful. Safety goggles and protective gloves are also a good idea, especially when working close to the laser's focused light and heat.
With the right setup, you're genuinely well-equipped to take on tumbler engraving projects with both precision and safety in mind.
4. How to Choose a Tumbler for Laser Engraving?
Picking the right tumbler for engraving is genuinely as important as picking the right machine—tumblers vary a lot in material, finish, and quality, and that choice will shape your final result more than almost any setting you dial in.
Here's how I'd walk through it for your own laser engraving projects:
4.1 Material Considerations
Different tumbler materials interact with lasers differently. The most common are stainless steel, powder-coated finishes, anodized aluminum, and glass.
a. Stainless Steel
The most popular choice, thanks to its durability, sleek look, and smooth surface. Stainless tumblers give excellent contrast and longevity, making them a safe bet for both personal and corporate gifts.
b. Powder-Coated Tumblers
Smooth, colorful coatings that are genuinely ideal for intricate designs. The engraving depth stays shallow, since it only needs to remove the coating to reveal the base metal beneath.
c. Anodized Aluminum
It can be engraved, but usually produces a lighter mark. A good pick for subtle, elegant designs that don't need heavy contrast.
d. Glass Tumblers
A genuinely unique material—engravable, but it needs specific settings and real caution to avoid breakage. Done right, glass produces some of the most striking, high-end engraved results out there, especially for commemorative pieces.
4.2 Surface Finish and Coating
Make sure the tumbler's surface is actually suited to engraving. Smooth, clean surfaces give the best results—avoid tumblers with irregular texture or damaged coatings. Powder-coated tumblers are popular for exactly this reason: the coating gives you vibrant color contrast in the engraved areas.
4.3 Size and Shape
Cylindrical tumblers with a uniform shape are the easiest to work with. Anything with indents or handles can pose real challenges and may need extra adjustments to your rotary setup.
Also factor in tumbler size relative to your engraver's bed and your rotary attachment's capacity—this is exactly where the Base Booster/riser conversation from Section 3.1 comes back into play.
4.4 Quality of the Tumbler
Invest in decent tumblers. Low-quality stock often has inconsistent coatings or surface finishes that show up as uneven engraving no matter how good your settings are.
Reputable brands known for durable drinkware — Yeti and Stanley tumblers, for example — tend to give consistently good engraving surfaces and last for years.
4.5 Customer Preference
Finally, think about who's actually receiving the piece. Corporate gifts, special events, and personal keepsakes all call for slightly different choices — Yeti and Stanley tumblers, in particular, tend to be favored for their premium feel and rugged durability, which makes the finished engraving feel like a genuine upgrade rather than an afterthought.
Get the material, finish, and quality right, and your laser-engraved tumbler work consistently looks like something worth paying for.
5. Ultimate Guide to Laser Engraving Stanley Tumblers
5.1 Materials to Prepare
- OneLaser Hydra 9 Laser Engraving Machine
- A Stanley Tumbler
- Brass Polish (for finishing touches)
5.2 How to Engrave a Creative Tumbler
Step 1: Prepare the Tumbler
Clean the surface to remove dust and oils. If engraving a powder-coated tumbler, check the coating is intact for even results.
Step 2: Connect and Set the Rotary
Attach the rotary tool to the engraver and secure the tumbler firmly to prevent slipping mid-job—this is the step I'd never rush, even on your fiftieth tumbler.
Step 3: Upload the Design
Import your engraving design into LightBurn or your preferred laser software. Adjust size and placement as needed for your specific tumbler.
Step 4: Check the Parameters and Speed
Set power and speed based on the tumbler's material. If you're unsure, run a test engraving on a similar scrap surface first.
Step 5: Locate the Design on the Tumbler
Use the laser's preview function to align the design accurately before you commit to the actual engraving pass.
Learn more: How to Align a Laser Beam
Step 6: Start Laser Engraving
Begin the engraving process, keeping an eye on accuracy and precision as it runs.
Step 7: Clean the Tumbler with Brass Polish
After engraving, use a microfiber cloth and brass polish to remove residue and bring out the final contrast.
6. Creative Ideas for Laser Engraving Tumblers and Yeti Cups
6.1 Personalized Names & Monograms
Names, initials, or monograms wrapped around a stainless-steel tumbler add a genuinely bespoke touch — one of the most requested laser tumbler designs I get, and for good reason, since it turns an ordinary tumbler into a keepsake for birthdays, weddings, or any personal gift.
6.2 Corporate Logos
Engraving offers a refined way to put corporate logos on tumblers and Yeti cups, turning them into real branding tools. High-precision engraving captures every detail of a logo, reinforcing brand identity in a way a printed sticker never quite manages. These pieces work well for promotional events, trade shows, or employee gifts.
6.3 Themed Designs
Seasonal patterns — frosty winter motifs, spring florals, festive birthday designs — translate beautifully into engraved tumblers. Picture a Yeti cup with delicate snowflakes or a tumbler with a bold tropical motif for summer. These add real seasonal flair and a lasting, tailored feel.
6.4 Inspirational Quotes & Art
Motivational quotes or original illustrations turn everyday drinkware into something a little more personal. Whether it's an uplifting line to start the morning or an abstract pattern that just looks good, these designs consistently turn into conversation starters.
7. Short FAQs About Tumbler Laser Engraving
7.1 How long does it take to laser engrave a tumbler?
Usually 1 to 4 minutes per tumbler with Vertigo machine, depending on design complexity and machine speed.
7.2 How do you clean a tumbler after laser engraving?
Wipe with a damp microfiber cloth, or use brass polish to boost contrast and remove leftover debris.
7.3 Can you remove laser engraving from a tumbler?
Not really — it's permanent by design. Sanding down the surface or repainting a powder-coated tumbler is the only real workaround.
7.4 What laser is best for tumblers?
Fiber lasers suit bare stainless steel best, while CO₂ or RF lasers handle powder-coated and glass tumblers well.
7.5 Which OneLaser machine should I start with for tumblers?
If tumblers are most of your business, start with VertiGo. If you want flexibility for other materials too, the XRF with a Base Booster or the Hydra Series is a better fit.
Laser engraving turns ordinary tumblers into genuinely high-quality, customized pieces. With the right machine, the right settings, and a bit of patience on your first few pieces, professional results are well within reach — whether you're making one gift or building a real business around it. Demand for custom drinkware isn't slowing down, and the opportunity is there for anyone willing to learn the process properly.