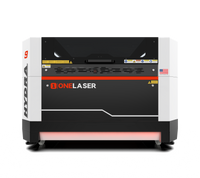
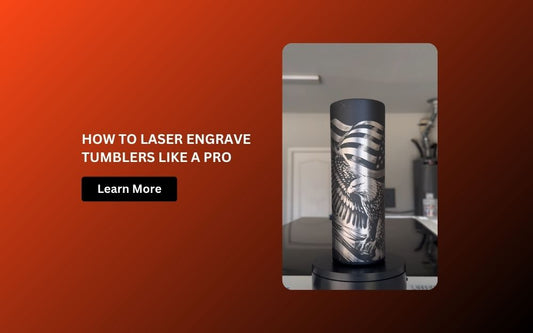
Want to add a name, logo, or custom artwork to your favorite thermos? Laser engraving gives you a clean, permanent, and professional finish on any insulated bottle, like a Stanley thermos or a Hydro Flask. We'll show sho you how to make a beautiful laser-engraved thermos with the OneLaser Hydra 9 and and a rotary tool in this tutorial.
Key Takeaway
You'll learn everything you need to know to get started, from how to set up your rotary attachment to how to change the engraving settings in LightBurn. This guide will help you do it right, whether you're personalizing your gear or planning to start a small business selling custom-engraved thermoses.
1. Why Laser Engrave a Thermos?
A laser engraved thermos is both stylish and functional. It makes for a great personalized gift, corporate swag item, or custom product to sell online.
Here’s why laser engraving is the go-to method:
- Permanent results – no peeling or fading like vinyl or stickers
- Detailed engraving – from monograms to full illustrations
- Scratch-resistant – engraving cuts into the surface coating
- Custom branding – perfect for logos, events, or giveaways
- Gift-worthy – ideal for weddings, birthdays, or holidays

2. What You Need to Get Started
Here’s a checklist of the tools and materials required for this project:
Materials:
- 1x Thermos (e.g., Stanley, Hydro Flask, Yeti, or any powder-coated model)
- Laser Engraving File (SVG/DXF or raster image)
Equipment:
- OneLaser Hydra 9 CO₂ Laser Engraving Machine
- PiBurn OMNI 2 Rotary Attachment (for cylindrical engraving)
- LightBurn Software
- Clean microfiber cloth or painter’s tape (optional for masking)
3. Step-by-Step: How to Make a Laser Engraved Thermos
Step 1: Set Up the Rotary and Thermos
Start by installing your PiBurn OMNI 2 rotary attachment inside the OneLaser Hydra 9 machine.
- Connect the rotary to the designated rotary port on the machine.
- Power on both the Hydra 9 and the rotary unit.
- Place your thermos horizontally onto the rollers, ensuring the logo area or engraving zone is centered and level.
- Adjust the height and width of the rollers so the thermos rotates smoothly and evenly.
✅ Pro Tip: Use a small level or test spin to make sure the cup rolls evenly. If it wobbles, your design could skew during engraving.

Step 2: Load the Design File in LightBurn
Now, start the LightBurn program and bring in the file you want. This could be a logo for a business, a custom monogram, an inspiring quote, or even a detailed drawing.
Make sure to:
- Convert text to path (for font compatibility)
- Resize the design to fit the flat engraving area of the thermos
- Center the graphic vertically and horizontally using LightBurn’s alignment tools

Step 3: Apply Laser Engraving Settings
For powder-coated stainless steel thermoses, these are the recommended settings with the OneLaser Hydra 9:
Engraving Settings:
- Speed: 600 mm/s
- Max Power: 50%
- Min Power: 10%
- DPI (Resolution): 300
- Passes: 1
These settings are optimized for coated metals. The laser will remove the outer layer of powder coating to reveal the bare metal underneath.
⚠️ Important: Always run a small test job on a spare or hidden section of the thermos to confirm settings.

Step 4: Align and Start the Engraving Process
Switch to Laser 2 mode on the Hydra 9 touchscreen (this activates the laser head for rotary jobs).
- Open the TouchScreen Interface.
- Select Alignment > choose Laser 2.

Use the “Frame” feature in LightBurn to preview the engraving area on the thermos.

Once aligned, press Start and watch the laser bring your design to life.

Finishing Touches
After engraving:
- Let the thermos cool down before handling.
- Wipe away any residue with a microfiber cloth.
- Optionally, apply a light coating of stainless steel cleaner for a polished finish.

4. Design Ideas for Your Custom Engraved Thermos
Looking for engraving inspiration? Here are some popular and profitable ideas for personal or commercial projects:
Corporate Branding
- Company logos
- Employee appreciation gifts
- Conference or trade show giveaways
Personalized Gifts
- Names or initials
- Birthdays or anniversaries
- "Best Dad Ever" / “Adventure Awaits”
Outdoor & Adventure
- Mountain graphics
- Camping slogans (“Coffee First, Then Hike”)
- Coordinates of a special location
Pet & Animal Lovers
- Dog breeds or paw prints
- “Dog Mom” or “Cat Dad” designs
Sports & Fitness
- Gym logos
- Motivational quotes
- Sports team mascots
5. Can You Engrave Any Thermos?
Here’s a quick comparison of what works best:
|
Thermos Type |
Engravable? |
Notes |
|
Powder-Coated Stainless |
✅ Yes |
Best results; coating reveals clean metal |
|
Brushed Stainless |
✅ Yes |
Produces contrast through etching |
|
Plastic |
⚠️ Caution |
Not recommended unless using fiber laser |
|
Glass |
❌ No |
Not suitable for CO₂ laser |
🛑 Never engrave insulated items with plastic coatings unless you're sure the material is laser-safe. Burning plastic can release toxic fumes.
6. Selling Laser Engraved Thermoses – Quick Tips
If you're planning to start a side hustle or add to your engraving business, here's how to market your custom engraved thermoses:
- Niche targeting: Focus on campers, gym-goers, pet lovers, or companies.
- Batch production: Make sets for wedding parties or employee teams.
- Photos sell: Use natural lighting and close-ups to show the engraved detail.
- Offer customization: Allow buyers to upload their own logos or names.
- Gift packaging: Add value with custom gift boxes or tissue wrap.
Platforms like Etsy, Shopify, and Instagram are perfect for showcasing and selling your thermos creations.
Learn more: Start a Tumbler Laser Engraving Business - A High-Profit Path for Makers
FAQs
Q. Can I engrave a full wrap-around design?
Yes, with a rotary attachment like the PiBurn OMNI 2, you can engrave full 360° designs—just be sure to account for object circumference in your layout.
Q. Will the engraving wash off or fade?
No. Laser engraving is permanent. It removes the surface coating, revealing the raw stainless steel underneath. It won’t peel, fade, or wash away.
Q. How long does it take to engrave a thermos?
Typically 3–10 minutes, depending on design size and detail level.
Final Thoughts
Making a laser-engraved thermos is not only fun, but it's also a smart way to make everyday items more personal or add to your product line. You have everything you need to make beautiful, long-lasting designs with the OneLaser Hydra 9, the PiBurn OMNI 2 rotary, and LightBurn software.
Laser engraving gives you professional-quality results with a personal touch, whether you're making a one-of-a-kind gift or starting your own drinkware brand.

 Liquid error (sections/image-banner line 171): invalid url input
