Liquid error (sections/image-banner line 171): invalid url input
If you’re looking for a simple yet impressive laser project, a laser cut bottle opener is one of the best choices. It’s functional, stylish, and perfect as a gift or for your own home bar setup.
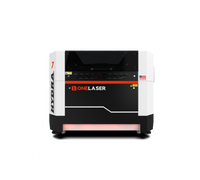
Using a CO₂ laser machine like the OneLaser Hydra 9, you can easily create a custom bottle opener design out of plywood and mount it on your wall for convenient use.
Key Takeaway
In this tutorial, we’ll walk you through every step—from material preparation to laser settings, assembly, and finishing touches. This guide is ideal for DIYers, small business owners, and makers who want to explore functional laser projects that sell well on Etsy or at craft fairs.

1. Materials and Tools You’ll Need
Before starting your bottle opener laser cut project, make sure you have the following:
|
Item |
Purpose |
|
3mm Plywood Sheet |
For cutting and engraving the frame |
|
Design template for LightBurn |
|
|
To import, modify, and send designs to your laser |
|
|
OneLaser Hydra 9 |
|
|
Glue & Paint |
For assembling and finishing your frame |
|
Screwdriver & Screws |
To mount the metal opener |
|
Wall Mounted Opener |
The functional part that opens the bottles |
2. Step-by-Step: How to Make a Laser Cut Bottle Opener
Let’s walk through each step carefully so your final result turns out professional and durable.
Step 1: Prepare the Plywood and Machine
Start by placing your 3mm plywood sheet on the OneLaser Hydra 9 work bed.
Use hooks or clamps to secure the sheet tightly. A stable placement ensures clean cuts and prevents material shifting during engraving.
Step 2: Load the Design into LightBurn
Open LightBurn software and import your laser cut bottle opener DXF file.
You can either use a pre-made design (like “Beer and Cheers”) or customize your own text and shape.
In LightBurn:
- Adjust the design dimensions to fit your plywood size.
- Ensure vector lines are set for cutting, not engraving.
- Align the design within your working area according to your plywood placement.
This is also the best time to preview the cut path to make sure the laser won’t travel off the boundaries of your material.
Step 3: Apply Laser Cutting Settings
Now, it’s time to define the cutting parameters in LightBurn.
Here’s the recommended setting for 3mm plywood on the Hydra 9 CO₂ laser.
Frame 1 (Outer Frame)
- Speed: 5
- Max Power: 40%
- Min Power: 10%
This slower speed ensures clean edges with minimal charring. Always check that the laser penetrates fully through the wood without leaving uncut spots.

Frame 2 (Cut Text “Beer and Cheers”)
- Speed: 300
- Max Power: 95%
- Min Power: 95%
This engraving pass creates deep, bold lettering that stands out beautifully after painting or staining.

Step 4: Set Auto Focus and Start Cutting
Once your settings are ready, enable the auto-focus feature on the OneLaser Hydra 9.
The Hydra 9’s motorized head automatically calibrates the ideal laser height, ensuring precise focus and sharp cutting performance—no manual guesswork needed.

When everything is aligned and focused:
- Turn on the air assist (if available) for cleaner cuts.
- Start the cutting process.
- Observe the first few passes to confirm proper depth and focus.
The Hydra 9’s dual-layer cutting performance handles both intricate engravings and thicker edge cuts with ease, making it perfect for multi-layer projects like this one.
Step 5: Assemble, Glue, and Paint the Frame
After the laser cutting process, carefully remove your cut pieces from the bed.
Lightly sand the edges to remove burn residue if necessary.
Assembly Steps:
- Apply wood glue to attach the layers together.
- Press the pieces firmly and let them dry for a few hours.
- Once dry, apply your preferred paint or stain.

You can go for a rustic look using dark brown wood stain or a vibrant painted finish for a more modern aesthetic.
Step 6: Attach the Wall Mounted Opener
Now that your wooden frame is complete, it’s time to add the metal bottle opener.
Position the Wall Mounted Opener near the bottom center of your wooden frame and secure it using a screwdriver and screws. Make sure it’s tight and properly aligned so the cap doesn’t slip off during use.

If you want to add a cap catcher underneath, you can design a small box or tray and attach it below the opener for collecting bottle caps—an easy upgrade for functionality.

3. Why Use the OneLaser Hydra 9 for This Project?
The OneLaser Hydra 9 is a high-performance CO₂ laser engraver designed for creators who need both power and precision. Here’s why it’s perfect for projects like bottle openers:
|
Feature |
Benefit |
|
Cuts 3–6mm plywood easily and cleanly |
|
|
Motorized Auto-Focus Head |
Ensures accurate depth control every time |
|
Large Work Area |
Ideal for wall-mounted projects and large designs |
|
Advanced Cooling & Air Assist |
Prevents burn marks, improves edge quality |
|
OneLaser Live Chat Support |
Instant help from U.S.-based technicians |
|
3-Year Limited Warranty |
Long-term reliability for your business |
If you plan to sell laser cut home décor or gifts, the Hydra 9’s speed and consistency will save hours of work and give you professional-quality results with every project.
4. Customization Ideas for Laser Cut Bottle Openers
One of the best parts of this project is customization. Here are some creative ideas you can try:
- Add Personalized Names: Engrave “Dad’s Bar” or “Cheers, John!” for Father’s Day gifts.
- Business Branding: Add a company logo for bar, restaurant, or brewery merchandise.
- Layered Design: Add a second layer with contrasting wood or acrylic for a 3D look.
- LED Backlight: Incorporate LED strips behind the design for a premium appearance.
- Magnetic Cap Catcher: Hide a strong magnet behind the wood to catch bottle caps automatically.
These small enhancements make your bottle opener laser cut project unique, sellable, and more visually appealing.
5. Tips for Better Results
- Always test your settings on a scrap piece of plywood before final cutting.
- Use masking tape to reduce smoke stains during engraving.
- Enable air assist for cleaner cuts with fewer burn edges.
- Keep your lens and mirrors clean to maintain laser precision.
- Double-check your focus height for optimal engraving sharpness.
Small adjustments make a big difference in the final outcome—especially for detailed text and logos.
6. Safety Reminders
Laser cutting is fun and creative, but safety always comes first:
- Always wear safety glasses when operating the laser.
- Ventilate your workspace to remove smoke and fumes.
- Keep flammable materials away from the laser bed.
- Never leave your laser machine unattended during operation.
7. FAQs
a. What is the best wood thickness for a laser cut bottle opener?
3mm plywood is ideal—it’s lightweight, easy to cut, and strong enough to hold a mounted metal opener.
b. Where can I get a laser cut bottle opener DXF file?
You can find free or paid DXF templates on design marketplaces like Etsy or Maker forums. You can also design your own using LightBurn or Adobe Illustrator.
c. Can I engrave text or logos on the opener frame?
Yes! Use the engraving settings (Speed 300 / Power 95%) to add text, quotes, or brand logos.
d. What’s the advantage of a wall mounted opener?
It’s easy to use, adds rustic décor to your kitchen or bar, and keeps your opener always accessible.
e. Can I use acrylic instead of plywood?
Yes, but you’ll need to adjust your power and speed settings. Acrylic gives a sleek, modern finish, while wood gives a rustic look.
Final Thoughts
Creating a laser cut bottle opener is a fantastic beginner-to-intermediate laser project that combines design, functionality, and craftsmanship. With the OneLaser Hydra 9, you can achieve precise cuts, bold engravings, and a durable finished product that’s both practical and stylish.
Whether you’re making it as a personal DIY project or as part of your small business product lineup, this bottle opener laser cut project is a great way to show off your creativity and skills.