A laser cut clock is one of the most satisfying and creative projects you can make — combining design, precision cutting, and functional art into one. Whether you’re crafting it as a personalized home décor piece, a handmade gift, or even a small business product, laser cutting allows you to create intricate, precise designs that look professionally made.
Key Takeaway
In this guide, we’ll show you how to make a laser cut clock using OneLaser Hydra 9, LightBurn software, and a 3mm cast acrylic sheet. You’ll also learn the ideal settings, assembly tips, and how to customize your clock for unique, professional results.
1. Why Make a Laser Cut Clock?
A laser cut clock is not just a creative decoration — it’s a blend of art, engineering, and design. Here’s why makers and small businesses love this project:
- Practical and decorative: It’s functional art — both stylish and useful.
- Completely customizable: You can engrave names, dates, or patterns for personal gifts.
- Perfect for beginners: It introduces you to engraving, cutting, and assembly techniques.
- Great for selling: Handmade laser cut wood or acrylic clocks are popular on Etsy and craft markets.
Whether you choose an elegant acrylic finish or a rustic wooden texture, laser cutting allows you to achieve sharp edges, smooth engravings, and repeatable quality with every clock.
2. Materials and Tools You’ll Need
Before starting, prepare everything in advance for smooth production.
Materials:
- 3mm cast acrylic sheets (you can also use plywood for a rustic look)
- Clock mechanism set (hour, minute, and second hands, plus movement motor)
- Paint and glue (optional for coloring or layering)
- Free laser cut clock file (available online or designed yourself)
Tools and Equipment:
- LightBurn software (for layout and laser control)
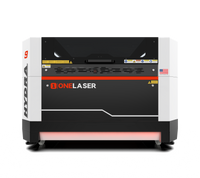
- OneLaser Hydra 9 (CO₂ laser cutting and engraving machine)
- Hooks or clamps (to secure material on the workbed)
3. How to Make a Laser Cut Clock
Let’s walk through the process from start to finish.
Step 1: Prepare the Acrylic Sheet
Start by placing your 3mm cast acrylic sheet onto the Hydra 9 laser bed. Use hooks or clamps to secure it firmly so it doesn’t move during the engraving and cutting process.
The Hydra 9’s built-in leveling gauge and Z-axis control help ensure the surface is even — essential for crisp cuts and consistent engraving depth.
If you’re using wood instead of acrylic, make sure it’s smooth and dust-free. Wipe it with a dry cloth to prevent burn marks from debris.

Step 2: Add Your Clock Design File in LightBurn
Open LightBurn software on your computer and import your laser cut clock template. You can download a free laser cut clock file online, create your own using vector software (like Adobe Illustrator or Inkscape), or customize existing designs.
Here are some fun design ideas:
- Minimalist round clock face with engraved numerals
- Mandala or floral pattern clock
- Geometric layered acrylic clock
- Custom name or business logo clock
Once your file is imported:
- Check that the design fits within your material’s dimensions.
- Assign engraving and cutting layers in LightBurn.
- Adjust object placement so your design sits centered on the bed view.
Step 3: Laser Settings for Engraving and Cutting
To achieve clean results, it’s important to use the right settings for both engraving and cutting.
Engraving Settings
- Speed: 200 mm/s
- Max Power: 12%
- Min Power: 3%
These settings are ideal for engraving the numerals, patterns, or logos onto your clock face. Adjust slightly depending on the color and type of acrylic (opaque, transparent, or mirrored).

Cutting Settings
- Speed: 10 mm/s
- Max Power: 65%
- Min Power: 10%
Use slower speed and higher power to ensure smooth, complete cuts through the 3mm acrylic. For wood materials, you might reduce the power slightly to prevent burning.

Step 4: Auto Focus & Start the Job
Before engraving or cutting, activate Auto Focus on the Hydra 9 touchscreen panel. The XFocus™ motorized head will automatically adjust the focal distance to your material’s surface — ensuring consistent accuracy and detail.
Then, click Start in LightBurn to begin the engraving process. The Hydra 9’s dual-laser system (100W CO₂ + 38W RF Metal Tube) delivers sharp results whether you’re engraving intricate designs or cutting clean edges.

While Running:
- Monitor the engraving through the Hydra’s 5M camera or observation window.
- Keep air assist enabled for cleaner cuts (reduces smoke and debris).
- Avoid opening the lid until the process finishes for safety.
Once engraving is done, the Hydra automatically moves on to cutting. You’ll hear a change in sound as the power level increases.

Step 5: Assemble and Finish Your Clock
After cutting, carefully remove the acrylic (or wood) pieces from the bed. Peel off any protective film if present.
Assembly Steps:
- Clean the edges using a soft cloth. For acrylic, use mild soap water or isopropyl alcohol.
- Glue layers if your design includes multiple pieces or accents.

- Paint or decorate details as desired. Use acrylic paint for vibrant colors, or keep it clear for a sleek modern look.
- Install the clock mechanism:
- Insert the clock shaft through the center hole.
- Attach the hour, minute, and second hands.
- Add a battery to test movement.

Hang or stand your new laser cut clock proudly — it’s functional art you made yourself!

4. Tips for Professional Finishing
- Edge polishing: For acrylic clocks, flame polish the edges for a glossy finish.
- Layering: Combine materials (wood + acrylic) for a dimensional effect.
- Contrast engraving: Spray-paint engraved sections black, gold, or white for readability.
- Custom branding: Add your logo, slogan, or name for personalization or resale.
5. Why Use OneLaser Hydra 9 for Clock Projects
The OneLaser Hydra 9 stands out for both speed and precision, making it ideal for craft makers and production businesses alike.
- Dual Laser Technology: CO₂ (100W) + RF (38W) metal tube hybrid — combine fine engraving with powerful cutting.
- 5M Precision Camera: See your work area, capture contours, and align perfectly in LightBurn.
- High Speed: Engraving speeds up to 1200 mm/s with true 3G acceleration for batch production.
- Smart Features: Built-in solenoid for air assist, motorized Z-axis, and auto-focus control.
- FumeGuard™: Keeps your workspace safe and clean during cutting.
- Wi-Fi Connectivity: Control and monitor jobs remotely.
For projects like clocks that require intricate cuts, precise engraving, and reliable material alignment, the Hydra 9 ensures every piece fits perfectly — no wasted material, no rework.

6. Design Inspiration
Here are some laser cut clock ideas that work beautifully with both wood and acrylic:
- Minimalist Modern Clock – Simple round face, clean lines, engraved numerals.
- Mandala Clock – Complex symmetrical pattern, ideal for layered acrylic or plywood.
- Nature Theme – Leaves, trees, or mountain silhouettes for rustic wall décor.
- Geometric Clock – Sharp, abstract shapes for modern interiors.
- Custom Name Clock – Add family names, quotes, or event dates for personalization.
- Retro Vinyl Style – Create a mock “record clock” using black acrylic.
- Steampunk Clock – Mix wood and metal-look acrylic for mechanical aesthetics.
- Layered Shadow Clock – Multiple stacked layers with spacing for 3D depth.
You can find hundreds of free laser cut clock files and clock templates online. Use them as a base and personalize your engraving details.
7. Troubleshooting Common Issues
|
Issue |
Possible Cause |
Solution |
|
Edges look burnt or melted |
Power too high or speed too low |
Lower power by 5–10%, increase speed slightly |
|
Incomplete cuts |
Power too low / dirty lens |
Clean optics, increase power by 5–10% |
|
Engraving too shallow |
Low power or focus off |
Re-run auto-focus, increase power slightly |
|
Clock hands not moving |
Shaft hole too tight |
Widen center hole slightly with file |
|
Material shifting |
Not secured properly |
Use more hooks or honeycomb pins |
8. Maintaining Accuracy for Future Projects
- Clean lenses and mirrors after several runs.
- Check alignment occasionally — even small misalignments can affect engraving accuracy.
- Update your LightBurn material library with working settings for acrylic, wood, leather, etc.
- Use test grids before new materials to avoid guesswork.
9. Frequently Asked Questions
Q1: What is the best material for a laser cut clock?
Acrylic and wood are the most popular. Acrylic gives a modern, sleek look, while wood adds warmth and rustic appeal.
Q2: Can I download a free laser cut clock file?
Yes! Many websites and design communities offer free laser cut clock files compatible with LightBurn or SVG/DXF formats.
Q3: Can I paint or color the clock after cutting?
Absolutely. Use acrylic paint, spray paint, or metallic markers for accents. Just avoid painting before cutting to prevent burn residue.
Q4: What’s the ideal thickness for a laser cut wood clock?
Typically, 3mm to 5mm plywood works best — lightweight yet sturdy enough for mounting.
Q5: Do I need a rotary attachment for clocks?
Not for flat clocks. A rotary is only needed for round objects like bottles or tumblers.
Have Questions? Join Our Forum!
Conclusion
Making your own laser cut clock is one of the best ways to explore the full creative potential of your laser machine. With OneLaser Hydra 9, you get industrial precision in a compact design — making each cut clean, each engraving sharp, and each assembly effortless.
From minimalist designs to layered works of art, your laser cut clock can reflect your personal style, serve as a thoughtful gift, or even become your next best-selling craft product.
So fire up your Hydra 9, open LightBurn, download a free laser cut clock template, and start engraving — one tick at a time.

 Liquid error (sections/image-banner line 171): invalid url input


