If you’re a gamer or DIY enthusiast, you know the struggle of keeping your game controllers organized. A laser cut controller stand is not only a practical solution but also a stylish way to display your gear. With laser technology, you can create sleek, personalized stands that hold controllers for Xbox, PlayStation, Nintendo Switch, or even custom arcade setups.
Key Takeaway
In this tutorial, we’ll walk through how to make your own laser cut game controller stand using plywood, design files, and the OneLaser Hydra 9. From preparation and settings to assembly and finishing, you’ll learn everything you need to craft a durable and eye-catching stand.
1. Why Make a Laser Cut Controller Stand?
A custom stand offers benefits beyond just storage:
- Organization: Keep your gaming space clean by giving controllers a dedicated spot.
- Protection: Prevents accidental drops and scratches.
- Customization: Engrave names, logos, or game-themed artwork.
- Aesthetic Appeal: Adds a touch of laser cut game controller stand artistry to your gaming setup.
- Gift Idea: Perfect for gamer friends or as a product to sell online.
Many makers sell game controller stands on Etsy and gaming forums, making this not just a fun DIY project but also a profitable one.

2. Materials and Tools You’ll Need
Here’s what you need to get started:
- 3mm plywood sheets – strong yet lightweight for cutting and assembly.
- Laser cut controller stand file – an SVG or DXF design file tailored for controllers.
- LightBurn software – to manage your design and laser settings.
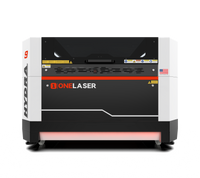
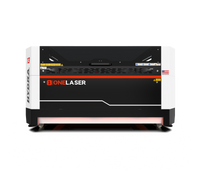
- OneLaser Hydra 9 – a high-power CO2 laser engraver and cutter.
- Glue – to secure layers and joints.
- Color spray (blue and pink) – for a stylish finish.
3. Step-by-Step: How to Laser Cut Controller Stand
Let’s walk through the process from start to finish.
Step 1: Place the Plywood Sheet on the Hydra 9 Working Bed
Begin by placing your 3mm plywood sheet onto the Hydra 9’s working bed. Make sure it’s flat and secured. The Hydra’s large bed makes it easy to work with multiple pieces at once, perfect for multi-layered designs.
Step 2: Import the Design File into LightBurn
Next, open LightBurn software and import your laser cut controller stand file. This file contains the blueprint for your stand’s parts.
In LightBurn, you can:
- Resize the design to match your controller dimensions.
- Add engravings like gamer tags, logos, or decorative patterns.
- Preview cut paths to ensure accuracy before sending it to the Hydra.
Step 3: Set the Engraving and Cutting Parameters
The right settings are key for clean cuts and crisp engravings. For the OneLaser Hydra 9 and 3mm plywood, use:
Engraving Settings:
- Speed: 600
- Max Power: 20
- Min Power: 2
Cutting Settings:
- Speed: 15
- Max Power: 70
- Min Power: 70
These settings balance precision and efficiency, ensuring fine engraving details and smooth cut edges.
Step 4: Auto Focus on the Hydra Series TouchScreen
Before starting, use the Hydra’s auto focus feature through the TouchScreen interface. Proper focusing ensures the laser beam is aligned perfectly with the plywood surface.
Benefits of auto focus:
- Cleaner engraving lines.
- Accurate cutting depth.
- Reduced risk of material waste.
Once set, hit start and watch the Hydra cut and engrave your stand parts.

Step 5: Assemble, Glue, and Paint Your Stand
After cutting, gather your pieces and start assembly:
- Arrange the Layers: Lay out the stand’s base, side supports, and holder arms.
- Glue the Parts: Apply wood glue to joints and press firmly. Allow drying time.
- Add Color: Spray paint your stand using blue and pink for a bold gamer look.
- Optional Details: Mask off sections for dual-tone designs or add stencils for logos.
Let the paint cure completely before using the stand.

4. Creative Laser Cut Game Controller Stand Ideas
Here are some creative twists to try:
- Multi-Controller Stand: Design a larger base to hold two or more controllers.
- Headset + Controller Combo: Add an arm for headphones to create a full gaming dock.
- Personalized Engravings: Gamer tags, team logos, or favorite game titles.
- Cute Laser Designs: Incorporate characters, patterns, or abstract art.
- Layered Effects: Use stacked plywood or combine wood with acrylic for depth.

5. Why Use the OneLaser Hydra 9?
The OneLaser Hydra 9 is an ideal machine for this project and many other laser cut wall decor or gaming accessories because:
- Industrial Power: Handles thicker plywood and large projects with ease.
- Precision Engraving: Produces fine detail for text and graphics.
- Large Work Area: Fits multiple controller stand parts in one run.
- Dual-Laser Capability: Increases efficiency for high-volume production.
- User-Friendly TouchScreen: Features like auto focus simplify the process.
For businesses, the Hydra 9 makes it easy to scale up and sell laser cut game controller stands online.
Need the best machine? Talk to our experts!

6. Tips for Success
- Test Cuts First: Run small samples to confirm settings before full production.
- Mask Plywood: Apply painter’s tape to minimize smoke marks.
- Sand Edges: Light sanding gives a smooth finish before painting.
- Seal the Paint: Add a clear coat for durability.
- Think Ergonomics: Ensure the angles and slots comfortably fit the controllers you design for.
Have Questions? Join Our Forum!
7. Why Laser Cut Controller Stands Are Great for Business
Custom game controller stands are popular with gamers and collectors. Here’s why they make great products to sell:
- Niche Market: Gamers love customized setups.
- High Demand: Organizers and accessories are always trending.
- Low Material Cost: Plywood is inexpensive but products sell for premium prices.
- Scalable Production: The Hydra 9 enables batch production for online stores.
- Endless Customization: Every stand can be unique with engravings and paint.
Selling stands on Etsy, gaming forums, or your own online shop can quickly turn into a profitable venture.
Final Thoughts
Building your own laser cut controller stand is a fun and rewarding project that combines functionality with creativity. Using 3mm plywood, LightBurn software, and the OneLaser Hydra 9, you can produce sleek, durable, and personalized laser cut game controller stands.
From setup to finishing, the process is simple: prepare your materials, import your design, set your engraving and cutting parameters, auto focus, and assemble. With a coat of blue and pink paint, your finished stand will not only organize your gaming gear but also add personality to your setup.
Whether you’re making one for yourself, as a gift, or to sell online, game controller stands are a fantastic way to explore the possibilities of laser cutting technology.

 Liquid error (sections/image-banner line 171): invalid url input


