When you walk into a store, the first thing that catches your eye is the signage — the brand’s personality in bold letters. For Erik Crowell, owner of Marked & Made in Roanoke, VA, crafting 5-foot store signs wasn’t just about aesthetics; it was about precision, efficiency, and cost-saving.
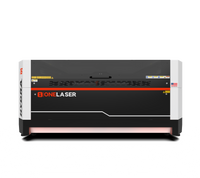
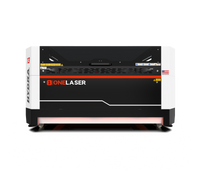
In his video “Making 5’ Store Signs with the OneLaser Hydra 16 | Save Materials with SVGNest,” Erik shows how a family-run laser-engraving business can handle oversized projects using the OneLaser Hydra 16, a 150-watt CO₂ and 38-watt RF hybrid machine engineered for serious performance.
If you’ve ever wondered how to make a store sign with a laser engraver, this guide walks through every stage, from design and setup to material nesting and finishing, while spotlighting how SVGNest helps reduce waste and maximize profit.

1. About Marked & Made
Marked & Made is a family-owned laser engraving business based in Roanoke, Virginia, founded and operated by Erik and Ashley Crowell. What started as a small creative venture has grown into a thriving brand known for its custom-made laser-engraved gifts, signage, and home décor, each piece crafted with precision, care, and a personal touch.
At Marked & Made, creativity meets technology. Erik and Ashley combine design passion with professional laser tools like the OneLaser Hydra Series to produce unique, high-quality products for homes, shops, and special occasions. From personalized cutting boards to 5-foot retail signs, every project reflects their dedication to craftsmanship and efficiency.
Their YouTube channel, Marked & Made, serves as an educational hub for makers and small business owners who want to learn more about laser engraving, LightBurn workflows, SVGNest optimization, and creative business tips. Through tutorials, project walkthroughs, and honest reviews, Erik helps the growing laser community make smarter decisions and get more from their machines.
As proud OneLaser affiliates, Marked & Made continues to inspire a generation of creators who value authenticity, innovation, and the joy of making something truly their own.
📍 Address: 4802 Valley View Blvd NW, Ste LF246, Roanoke, VA 24012
🌐 Website: markednmade.com
📸 Instagram: @markednmade
📘 Facebook: facebook.com/markednmade
🎥 YouTube Channel: Marked & Made
2. How to Make a Store Sign
Quick Checklist
|
Step |
Task |
Tools Used |
Notes |
|
1 |
Design Sign Layout |
Creative Space |
Create SVG vector designs |
|
2 |
Scale Up for Hydra 16 |
LightBurn |
Set to ~5 ft width |
|
3 |
Prep Material |
Plywood |
Cut to fit laser bed |
|
4 |
Score & Cut |
OneLaser Hydra 16 |
20 P / 100 S (Score) |
|
5 |
Paint Panels |
Acrylic Paint |
Black finish before cutting |
|
6 |
Optimize with SVGNest |
svgnest.com |
Reduce scrap |
|
7 |
Cut Letters |
LightBurn + Hydra 16 |
90 P / 30 S |
|
8 |
Sand & Stain |
Verithane Early American |
Smooth and natural tone |
|
9 |
Glue Letters |
Art Glitter Glue |
Strong adhesion |
|
10 |
Mount and Display |
Level + Mount Kit |
Enhance store interior |
Step 1: Designing Your Store Sign Concept
Every great sign begins with a clear design. Erik’s wife, Ashley, took charge of the creative concept, before exporting to LightBurn — the control software used for the Hydra 16.
“My wife Ashley designed everything inside XCS and then I scaled it up in LightBurn for cutting on the Hydra 16,” Erik explains.
Key Design Tips
- Start small, then scale up. Ashley designed the initial signs at 622 × 123 mm to visualize layout and font. Erik later scaled them to roughly 1,500 × 300 mm (about 5 feet wide).
- Maintain proportions. Always select and scale all elements together to preserve font ratios and spacing.
- Export as SVG. This ensures your designs stay vector-sharp for accurate laser cutting.
Once the SVG files were ready, they were brought into LightBurn for processing on the Hydra 16.

Step 2: Understanding the OneLaser Hydra 16 Work Area and Power
The OneLaser Hydra 16 is a large-format hybrid laser engraver that offers a work area of 1,600 × 1,000 mm (approximately 63 × 39 inches). That’s perfect for cutting large panels like the 5-foot store signs in this project.
- CO₂ Laser Tube: 150 W for powerful cutting.
- RF Laser Source: 38 W for high-precision engraving and fine details.
This dual-laser system allows users to switch between CO₂ and RF modes depending on the material and detail requirements. For the store signs, Erik used the CO₂ tube for both scoring and cutting due to its speed and efficiency.
Settings Used:
- Score : 20 % Power / 100 Speed
- Cut : 90 % Power / 30 Speed
Even at just 20 % power, the 150 W laser scored deeply enough that some stain later seeped through the back — a testament to its cutting strength.
Step 3: Preparing Your Wood Material
Erik chose standard plywood from Home Depot (8 × 4 ft sheets). Since the Hydra 16 handles about 40 in of depth on the honeycomb bed, they trimmed the sheets to fit comfortably.
Material Cut Plan:
- Cut two 5-ft sections and two 3-ft sections (40 in wide).
- Saved scraps for future projects.
This efficient approach ensures each sheet is used to its maximum potential — an idea later amplified through SVGNest optimization.

Step 4: Cutting and Scoring with the Hydra 16
Once the plywood was sized, the team loaded a 5-ft section into the Hydra 16. The machine’s massive bed made it easy to cut multiple signs in a single job without repositioning.
The Hydra 16 processed each panel flawlessly, cutting through three of the four signs on one sheet and finishing the fourth separately.
“It cut through massive plywood sections in no time at all,” Erik notes. “The speed of the 150 W CO₂ tube is insane.”
The result was a series of clean edges and sharp scored letters ready for painting and assembly.

Step 5: Painting and Prepping Your Boards
Before cutting the letters, Erik and Ashley decided to paint the plywood black so the final letters would have a consistent finish.
They painted two sheets — one for this project and one extra for future use — ensuring they’d have matching black panels on hand for upcoming jobs.

Step 6: Saving Material with SVGNest
Laser materials can get expensive fast, especially with large signs. That’s where SVGNest comes in — a free, browser-based tool that automatically arranges your cut shapes for optimal use of space.
How SVGNest Works
- Go to svgnest.com.
- Upload your SVG file from LightBurn.
- Select the “bin” shape (usually your rectangular wood outline).
- Set your spacing and curve tolerance (e.g., 8 mm spacing, 0.3 curve tolerance).
- Click Start Nest and let the software auto-arrange your letters.
Erik used this method to fit all his letters from three signs onto a single piece of wood — saving significant material and reducing waste by up to 25 %.

“Wood is expensive. Nest your designs to save money and get more cuts from each sheet,” he advises.
Once the nest was finalized, he downloaded the optimized SVG and imported it back into LightBurn for cutting.

Step 7: Cutting the Letters
The Hydra 16 handled the letter-cutting job in around 30 minutes, impressively fast given the number of small, detailed pieces.

Erik switched the cut layer in LightBurn to red, set the same speed and power parameters, and let the machine work through the entire sheet.
Compared to a 55 W CO₂ laser, which could take over 90 minutes for a similar job, the Hydra 16’s speed was a major time-saver — perfect for high-volume production or business use.
Step 8: Sanding, Staining & Finishing the Signs
After cutting, the team lightly sanded the backers to remove soot and smooth the surface. Using a hand sander and compressed air gun, they prepared the wood for staining.
Stain Used: Verithane Early American — a warm, natural tone that complements the black lettering.
They applied the stain together as a team — Erik brushed it on, Ashley wiped it off — achieving a smooth, even finish that highlighted the wood grain.
For letter assembly, they used Art Glitter Glue, a trusted adhesive among crafters for its strong bond and clean finish.

Step 9: Installation and Impact in the Store
The final result was a set of four large signs for different store sections:
- Tumblers
- Hats
- Special Occasions
- Home Décor
Mounted on the walls of their 3,000 sq. ft. store, the signs instantly enhanced navigation and added professional character to the space.
“Even these 5-foot signs look small on our walls, but they help customers find what they need and bring a nice pop of color,” Erik shares.

3. Why Choose the OneLaser Hydra 16 for Large Projects
The Hydra Series from OneLaser is built for makers who think big. The Hydra 16 model combines power and precision with an enormous work area — ideal for projects like store signs, large wall art, and furniture engraving.

Key Advantages
✅ Hybrid Dual Laser: Switch between RF and CO₂ sources for both fine engraving and deep cutting.
✅ Massive Bed Size: Accommodates full panels up to 1,600 × 1,000 mm.
✅ Industrial Build Quality: Engineered for daily use and heavy projects.
✅ Precision Optics: Mirror elevator system for perfect beam alignment.
✅ U.S. R&D Support and 3-Year Warranty: Peace of mind for business owners.
With financing options and live chat support from OneLaser, it’s easier than ever for small businesses to scale up to industrial-level performance without the massive price tag.
4. FAQs
Q1: What’s the best laser engraver for making large store signs?
For oversized projects, the OneLaser Hydra 16 is ideal. Its 150 W CO₂ laser and 1,600 × 1,000 mm workspace handle large materials with precision and speed.
Q2: Can I make a store sign without design software experience?
Yes. Beginners can use free tools like LightBurn’s built-in text features to design simple, professional-looking signs.
Q3: How can I save wood when making multiple signs?
Use SVGNest, a free nesting software that arranges your cut shapes efficiently to minimize waste and reduce material costs.
Q4: What’s the best wood for laser-cut store signs?
Plywood and MDF are great choices. Plywood offers a natural wood grain finish, while MDF provides a smoother surface for paint and engraving.
Q5: How do I attach laser-cut letters to a wood backer?
A strong craft adhesive like Art Glitter Glue or E6000 works well for permanent mounting.
Q6: Can I use the Hydra 16 for smaller projects too?
Absolutely. The Hydra’s precision RF laser makes it perfect for engraving fine details on smaller items like keychains, nameplates, or décor pieces.
Have Questions? Join Our Forum!
Final Thoughts
The collaboration between Erik and Ashley at Marked & Made beautifully demonstrates how technology and craftsmanship meet. With the OneLaser Hydra 16, they transformed raw plywood into professional 5-foot store signs — fast, clean, and cost-effective.
By adding SVGNest to the workflow, they showed how smart software can make your business more sustainable and profitable.
Whether you’re running a laser shop or starting your first project, now’s the time to make your own store sign — and let your creativity stand tall.

 Liquid error (sections/image-banner line 171): invalid url input


