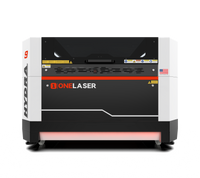
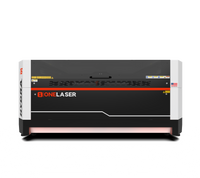
If you’ve been searching for a creative and practical laser cutting project, look no further than a laser cut coaster with a matching holder. This project is not only fun but also highly functional, making it perfect for personal use, gifting, or even selling on Etsy. With the right laser cut coaster design and a reliable machine like the OneLaser Hydra 9, you can create professional-quality coasters and holders that stand out.
Key Takeaway
In this step-by-step guide, we’ll show you how to design, cut, and assemble your coasters and holders using plywood. We’ll also cover recommended settings, preparation, and tips to help you achieve the best results.
1. Why Make Laser Cut Coasters?
Coasters are timeless items that everyone needs. From protecting your table surfaces to adding a decorative touch, they’re both practical and stylish. With a laser cut coaster design, you can add personal details such as names, logos, or seasonal patterns.
Here’s why this project is popular:
- Beginner-friendly: With the right free laser cut coaster files, even beginners can get started quickly.
- Customizable: Add engravings like monograms, floral patterns, or geometric designs.
- Profitable: Personalized coasters and matching holders sell well in online marketplaces.
- Practical gift: They make ideal handmade gifts for weddings, housewarmings, and holidays.

2. What You’ll Need for the Project
Before starting, gather the following:
- 3mm plywood sheets – Durable, versatile, and affordable.
- Laser cut coaster file – You can download free files online or design your own.
- LightBurn software – Great for preparing and adjusting your designs.
- OneLaser Hydra 9 – A High Performance CO₂ laser engraver for cutting and engraving wood.
- Glue and paint – For assembling and finishing the coaster holder and coasters.
3. How to Make Laser Cut Coasters
Let’s walk through the process from start to finish.
Step 1: Preparing the Material
Place the plywood sheet onto the working bed of the OneLaser Hydra 9. Use hooks or clamps to secure the sheet in place. This step ensures the wood doesn’t move during cutting, which is crucial for accuracy and safety.

Step 2: Importing the Design
Next, open LightBurn software and import your laser cut coaster design or coaster holder laser cut file. You can choose from:
- Free laser cut coaster files available online.
- Purchased design packs with multiple styles.
- Custom designs created in Illustrator or CorelDRAW.
Once imported, resize the design as needed to fit your plywood sheet. A standard coaster is around 90–100mm in diameter, while the holder can be adjusted based on how many coasters it will store.
Step 3: Recommended Settings
Now it’s time to set up your Hydra 9 for engraving and cutting. These tested settings are ideal for 3mm plywood:
a. Laser Cut Coaster Holder Settings
- Engraving
- Speed: 500
- Max Power: 12
- Min Power: 3
- Cutting
- Speed: 300
- Max Power: 25
- Min Power: 25
These settings balance detail and depth for engraving patterns while ensuring smooth cuts for holder parts.

b. Laser Cut Coaster Settings
- Cutting
- Speed: 5
- Max Power: 65
- Min Power: 10
These values ensure the coasters are cut cleanly with smooth edges, ready for assembly.

Step 4: Autofocus and Start Cutting
On the Hydra 9 touchscreen, set up the autofocus to ensure the laser beam is perfectly aligned. Proper focus is essential for sharp engraving and clean cuts.

Once the machine is ready, start the engraving and cutting process. Depending on your design complexity, each coaster may take 3–5 minutes to complete, while the holder may take slightly longer.

Step 5: Assemble and Finish
When all parts are cut, carefully remove them from the bed. Use fine-grit sandpaper if needed to smooth edges.
- For the holder: Apply wood glue to connect the sides, base, and supports. Clamp them until the glue dries.
- For the coasters: Paint, stain, or varnish them for durability. You can also leave them natural for a rustic look.

Optional: Add felt pads to the bottom of each coaster to prevent scratching surfaces.
4. Creative Laser Cut Coaster Design Ideas
Looking for inspiration? Here are some design ideas that work well with laser cut coaster files:
- Geometric Patterns – Circles, hexagons, or interlocking shapes.
- Nature Themes – Leaves, trees, flowers, or animal silhouettes.
- Seasonal Designs – Christmas snowflakes, Halloween pumpkins, Valentine hearts.
- Custom Logos – Great for business branding or corporate gifts.
- Engraved Maps – City skylines or map outlines look stunning.
5. Tips for Professional Results
- Use high-quality plywood: Avoid sheets with voids or uneven density.
- Optimize your design: Thinner lines engrave faster and cleaner.
- Experiment with finishes: Acrylic paint, wood stain, or metallic spray can elevate your coasters.
- Batch production: Cut multiple coasters at once to save time.
- Keep files organized: Store each coaster holder laser cut file or design variation for future reuse.
6. Selling Laser Cut Coasters
Laser cut coasters are not only great DIY projects but also excellent products to sell. Here’s why:
- Low production cost: Plywood is affordable, and small coasters maximize sheet use.
- High perceived value: Custom designs can sell for $20–$40 per set with a holder.
- Endless customization: Personalization (names, dates, quotes) adds extra value.
- Scalable: With free laser cut coaster files, you can expand your catalog quickly.
Platforms like Etsy, Amazon Handmade, and local craft fairs are perfect for selling coaster sets. Pairing them with matching laser cut coaster holders makes them even more attractive.
7. FAQs
Q1: Can I use other materials besides plywood?
Yes! Acrylic, MDF, and bamboo are also popular for laser cut coasters. Each gives a unique finish.
Q2: Where can I find free laser cut coaster files?
Many design communities and sites like Thingiverse, Etsy freebies, or design blogs offer free laser cut coaster files. Always check the license before using them for commercial purposes.
Q3: How do I make a coaster holder fit multiple coasters?
Simply adjust the size of the coaster holder laser cut file in LightBurn. Add extra width based on the thickness of your coasters.
Q4: What’s the best finish for durability?
A clear polyurethane or varnish adds water resistance and longevity to wood coasters.
Q5: Can I engrave images or text on the coasters?
Absolutely! That’s one of the biggest advantages of laser cutting—precise engraving of names, quotes, or logos.
Have Questions? Join Our Forum!
Conclusion
Making a laser cut coaster with a matching holder is an enjoyable and rewarding project. With just 3mm plywood, a laser cut coaster design, LightBurn software, and the OneLaser Hydra 9, you can create custom coasters that are both practical and stylish.
Whether you’re looking to decorate your home, make gifts, or start selling handmade products, laser cut coaster holders and coasters offer endless opportunities. By experimenting with different designs and finishes, you’ll be able to craft unique pieces that stand out in any setting.
So grab your laser cut coaster file, fire up your Hydra 9, and start creating coasters that combine creativity, craftsmanship, and functionality.

 Liquid error (sections/image-banner line 171): invalid url input


