Laser engraving is one of the fastest-growing creative industries today, from custom gifts and signage to bulk promotional products. But while creating with a laser is exciting, many makers struggle with one of the toughest challenges: laser engraving pricing.
Charge too little and you lose money. Charge too much and customers look elsewhere. That’s where having a clear laser engraving pricing guide makes all the difference. With the right formula, you can quote confidently, protect your profits, and grow your business sustainably.
1. Why a Pricing System Matters
Relying on “gut feeling” when pricing laser engraving often leads to undercharging or inconsistent quotes. Without a structured system, you risk three big problems:
- Lost Profits – Forgetting to factor in materials, labor, or machine wear can eat into your margins.
- Customer Confusion – Inconsistent pricing makes it harder for clients to trust your business.
- Unsustainable Growth – As orders increase, ad-hoc pricing slows you down and prevents scaling.
A clear laser engraving pricing calculator or spreadsheet solves these issues by giving you a repeatable framework. With it, every quote is backed by real data, ensuring you cover your costs while staying competitive. Customers appreciate transparency, and you gain the confidence to grow.
2. The Core Formula for Pricing
The good news? Pricing doesn’t need to be complicated. Almost every project can be broken down into four simple components:
Final Price = (Materials + Labor + Machine Wear + Overhead) × (1 + Profit Margin)
Let’s look at each part:
- Materials – The wood, acrylic, leather, or metal you’re engraving. Always include finishes, glue, packaging, and a 10–15% buffer for waste or mistakes. For example, if a plywood sheet costs $50 and you only use one-tenth, the material cost is $5 (plus your waste allowance).
- Labor – Your time is valuable. Count every step: design, setup, engraving, cutting, cleaning, and assembly. Whether you set an hourly rate ($30/hr) or per-minute rate, consistency ensures fair pricing.
- Machine Wear – Every job adds wear to lenses, mirrors, and tubes. A OneLaser machine might last for thousands of hours, but factoring in a small hourly depreciation (e.g., $1/hr) protects your long-term investment.
- Overhead – Don’t forget the background costs: electricity, rent, software, and insurance. Divide your monthly overhead by the number of projects to get a per-job cost.
Finally, apply your profit margin (20–40% is common). This ensures you’re not only covering costs but building sustainable profit.
Example:
- Materials: $8
- Labor: $60 (2 hours)
- Machine Wear: $3
-
Overhead: $15
= $86 total costs
Add 25% margin = $107.50 final price
This formula can be built into a laser engraving pricing spreadsheet for quick, consistent quotes on every project.

3. Step-by-Step Laser Engraving Pricing Method
Now that you know the core formula, let’s apply it in a structured way. Whether you’re quoting a small laser cut keychain or a large engraved wood sign, this method keeps your pricing consistent and profitable.
Step 1: Calculate Material Costs
Break down the cost of materials into usable portions.
For instance, if a $40 plywood sheet gives you 16 usable pieces, each piece costs $2. Don’t forget to add 10–15% for waste or mistakes, especially on intricate laser cut projects.
Step 2: Factor in Labor Time
Estimate the full time for design, setup, engraving, cutting, finishing, and cleanup. A simple engraving may only take 20 minutes, while a complex job could take hours. Multiply by your hourly or per-minute rate (e.g., $30/hour).
Step 3: Add Machine Wear & Maintenance
Every job uses a portion of your machine’s lifespan. With OneLaser XRF or Hydra, you get long-lasting performance, but it’s still smart to budget around $1 per machine hour for lenses, mirrors, or tube depreciation.
Step 4: Include Overhead Costs
Electricity, software, and workspace expenses all play a role. Divide monthly overhead (say $600) by the number of projects (30) to get $20/project. This ensures hidden costs don’t eat into your margins.
Step 5: Apply Profit Margin
Once you’ve added up all costs, apply a profit margin—usually between 20–40%. This ensures you’re building growth capital, not just breaking even.
By following this laser engraving pricing guide, you’ll produce fair, transparent quotes that protect your bottom line.

4. Sample Quote Walkthroughs
Let’s see how this method works in real scenarios using a laser engraving pricing calculator approach.
Example 1: Custom Wooden Coaster (Engraving Only)
- Materials: $2 for wood + $0.50 buffer = $2.50
- Labor: 20 minutes @ $30/hour = $10
- Machine Wear: 0.3 hours = $0.30
- Overhead: $20/project ÷ 4 coasters = $5 each
Total Costs = $17.80
Add 30% margin → $23.14 per coaster
Selling sets of four at $90 keeps your pricing competitive while profitable.

Example 2: Acrylic Business Sign (Cutting + Engraving)
- Materials: $15 for acrylic + $2 waste = $17
- Labor: 2 hours design & cut @ $30/hour = $60
- Machine Wear: 2 hours = $2
- Overhead: $20/project
Total Costs = $99
Add 25% margin → $123.75 final price
For bulk orders, you might lower the margin slightly to stay attractive while still covering costs.

5. Building a Laser Engraving Pricing Calculator or Spreadsheet
One of the smartest ways to simplify laser engraving pricing is by building your own calculator or spreadsheet. Instead of estimating numbers in your head, you can create a repeatable system that quickly generates accurate quotes.
Start with a simple Excel or Google Sheets file and create rows for:
- Material Costs (wood, acrylic, leather, etc.)
- Labor Time (design, setup, engraving, cleanup)
- Machine Wear & Maintenance (per hour depreciation)
- Overhead (rent, software, electricity, etc.)
- Profit Margin %
By inputting values into this laser engraving pricing spreadsheet, you’ll instantly calculate the break-even cost and final price.
For more advanced users, formulas can be automated with dropdowns for material types, engraving size, and power settings. This saves time, eliminates guesswork, and ensures every quote is professional and consistent.
6. Setup Fees, Minimums & Rush Jobs
6.1 Setup Fees
Even small projects take time to prepare files, align material, and test settings. A setup fee of $10–$30 per job covers these fixed tasks. Customers appreciate transparency, and you avoid working for free on file prep.
6.2 Minimum Charges
Without minimums, you risk undervaluing your work. For instance, engraving a single wooden keychain might cost only $5 in materials, but it still requires design time, setup, and cleanup. Setting a minimum (e.g., $25 per order) ensures profitability even for small jobs.
6.3 Rush Job Pricing
Last-minute requests disrupt your schedule and increase machine wear. To compensate, add a rush fee of 25–50% for expedited turnaround. Customers who need urgent delivery will understand the premium for priority service.
7. Standard vs. Custom Pricing
Not every project should be priced the same way. Separating standard vs. custom pricing keeps your business competitive and profitable.
- Standard Products: Items like laser cut keychains, coasters, or signs can have fixed prices because production steps are repeatable. Example: $15 per engraved coaster, $40 for a set of four.
- Custom Projects: Personalized or complex designs require more design time and testing. Adding a customization fee ($20–$50 depending on complexity) accounts for this extra effort.
This system helps customers understand why one-off pieces cost more than ready-made designs, while still giving you flexibility to upsell personalization.
8. Bulk Orders & Volume Discounts
Customers ordering in large quantities expect discounts, but that doesn’t mean sacrificing profits. With a laser engraving pricing calculator, you can factor in reduced labor time per piece when running jobs in batches.
For example:
- 1–10 units: Standard price
- 11–50 units: 10% discount
- 51–200 units: 15% discount
- 200+ units: Custom quote
By applying discounts strategically, you reward big clients while ensuring each piece still contributes to your profit margin. For batch jobs like promotional pens, tumblers, or laser cut wood signs, this approach works especially well.

9. How DPI, Speed & Air Assist Affect Pricing
Technical settings play a direct role in pricing laser engraving projects. The higher the detail, the longer the machine runs—and time is money.
9.1 DPI (Dots Per Inch)
Higher DPI creates sharper images but significantly increases engraving time.
For example, 1000 DPI might look amazing on a photo engraving, but it could take twice as long as 500 DPI.
You can reflect this in pricing by charging extra for high-resolution jobs.
9.2 Speed
Slower engraving or cutting speeds mean longer runtimes. When engraving at 600mm/s versus 300mm/s, the difference can double your machine time. Always account for speed in your laser engraving pricing guide, especially for dense materials.
9.3 Air Assist
Using air assist improves cut quality and reduces burn marks, but it also consumes additional power and requires compressor upkeep. Some businesses include this cost in overhead, while others add a small surcharge for premium finishing.
By combining DPI, speed, and air assist factors into your pricing spreadsheet, you can fine-tune quotes for different quality levels—standard, high detail, or premium finish.

10. Add-On Profit Centers
Beyond base pricing, add-ons can increase revenue without much extra effort. Offering upsells and complementary services makes your business more valuable to customers while boosting margins. Popular profit centers include:
- Design Fees: Charge for creating or cleaning up customer artwork.
- Finishing Services: Painting, staining, or clear-coating laser cut wood signs for a professional look.
- Assembly & Packaging: Adding keychains, magnets, or gift boxes for ready-to-sell products.
- Personalization: Custom names, logos, or dates often justify a 20–50% markup.
These extras not only cover your time but also give customers more reasons to choose your shop.
11. Example Invoice Layout
Keeping invoices clear builds trust and shows professionalism. A laser engraving pricing invoice should outline each cost so clients see the value in your work.
Example Layout:
- Item/Service – Laser engraved keychain (set of 20)
- Materials – Plywood, hardware, finish = $20
- Labor/Design Time – 2 hours @ $30/hr = $60
- Machine Wear/Overhead – $15
- Setup Fee – $20
- Rush Fee (if applicable) – $25
- Subtotal = $140
- Profit Margin Applied = +25% ($35)
- Final Total = $175
This transparent approach avoids confusion and helps justify your rates.
12. Why Machine Choice Impacts Pricing
Your choice of laser machine has a huge impact on pricing and profitability. Entry-level machines may be cheaper upfront, but slow speeds and downtime eat into earnings.
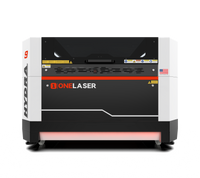
Professional-grade machines like the OneLaser X Series and Hydra Series are designed to run at 1200mm/s with 3G acceleration, cutting job times by up to 75%. This means:
- More projects completed per day
- Lower labor costs per piece
- Faster turnaround for clients (higher satisfaction)
- Ability to charge premium rates for precision and speed
In short, a reliable professional laser isn’t just an expense—it’s a profit multiplier.

13. Action Plan for Pricing Success
- Build Your Spreadsheet – Include material, labor, overhead, and machine wear.
- Set Minimums – Establish setup fees and order minimums to cover hidden time costs.
- Define Standard vs. Custom Rates – Fixed prices for repeat products, flexible rates for one-off jobs.
- Add Profit Centers – Upsell finishing, personalization, and rush services.
- Adjust Regularly – Review costs every 3–6 months to stay competitive.
- Invest in Your Machine – Faster, more reliable equipment means more accurate quotes and higher profits.
14. FAQs
How much should I charge per hour for laser engraving?
Most businesses charge between $25–$50/hour depending on location, project complexity, and experience.
Why does high-resolution engraving cost more?
Higher DPI means longer machine runtimes, which directly increases labor and equipment costs.
Can I use a flat rate instead of calculating costs?
Yes, flat rates work well for standard items like coasters or tumblers, but custom projects should still be calculated individually.
How do I price bulk orders fairly?
Apply volume discounts (5–20%) as batch efficiency reduces per-unit costs while maintaining profitability.
Do I need a minimum charge?
Yes—$20–$30 minimums ensure that setup and prep time are always covered, even for small jobs.
Conclusion
Getting laser engraving pricing right is the difference between a hobby and a thriving business. By using a structured formula, tracking materials, labor, and overhead, and building a laser engraving pricing calculator or spreadsheet, you ensure every quote protects your profit. Add-ons, rush fees, and bulk discounts give you flexibility, while professional machines like OneLaser’s X Series and Hydra Series keep your shop competitive with speed, precision, and reliability.
With clear invoices, smart pricing strategies, and a focus on value over cost, you’ll not only cover expenses but also grow sustainably. Pricing isn’t guesswork—it’s a system. And once you master it, your laser business is set to scale confidently.

 Liquid error (sections/image-banner line 171): invalid url input
