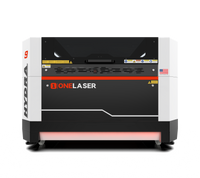
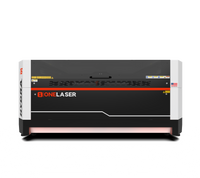
Keeping your CO2 laser engraver in top condition is essential for precision, speed, and machine longevity. Whether you own a desktop unit for small projects or an industrial-grade system like the OneLaser Hydra, proper care ensures consistent performance and minimizes costly downtime.
Key Takeaway
In this guide, we’ll explore the best practices for CO2 laser engraver maintenance, covering optical parts, hardware, and general upkeep. These tips are based on OneLaser’s Hydra Laser Equipment Maintenance Guide and are written for both RF and CO2 laser systems.
1. Why CO2 Laser Engraver Maintenance Matters
A laser engraving machine is a significant investment. Like any high-precision tool, it requires routine care to keep it working efficiently.
Here’s why maintenance is non-negotiable:
- Improved engraving quality – Clean optics and smooth axis movement deliver sharp, consistent results.
- Extended machine lifespan – Regular care prevents premature wear of lenses, mirrors, and moving parts.
- Reduced downtime – Proactive maintenance avoids unexpected breakdowns that can stall production.
- Safety assurance – Removing dust, debris, and soot lowers fire risks and ensures stable airflow.
By adopting a consistent CO2 laser engraving cutting machine maintenance routine, you’ll protect your investment and keep your workflow running smoothly.
2. Maintenance Checklist for Laser Engravers
2.1 Optical Parts Maintenance
Optics (lenses and mirrors) are the heart of a laser engraver. Dirty or damaged optics can scatter the laser beam, reducing power and engraving precision.
Tools & Supplies Needed:
- Lens cleaning solution
- Cotton swabs
- Lens removal tool
- Door cover key
Steps:
- Clean the lens – Dip a cotton swab in lens cleaning solution and gently wipe the surface. Follow up with a dry swab to remove any residue.
-
Access the mirrors –
- Open the left lower door to clean the first reflector of the RF tube.
- Open the left upper door to access the second reflector and beam-closing mirror.
- Open the upper rear door to clean the first mirror of the glass tube and the dual light source lifting mirror.
- Finish with the third reflector.
-
Remove and clean the focus lens –
- Press and hold the quick plug connector to detach the trachea.
- Rotate the golden nut counterclockwise to remove the laser head module.
- Use the lens removal tool to carefully detach the focus lens.
- Clean thoroughly and reinstall with the convex face upwards.
2.2 Hardware Maintenance
Beyond optics, hardware upkeep ensures smooth mechanical performance and prevents dust buildup that can damage components.
Tools & Supplies Needed:
- Air gun
- Dust-free cloth
- Lubricating oil
- Cotton swabs
Steps:
- Clean the nozzle – Rotate counterclockwise to remove the blowing nozzle. Wipe away dirt and debris.
- Inspect the autofocus sensor – Wipe off any dust or soot that may interfere with accuracy.
-
Maintain cooling fans –
- Open the lower left door and use an air gun to blow dust off the RF tube cooling fan.
- Clear the exhaust fan to ensure proper ventilation.
- Empty the waste bucket – Open the lower front door, remove the waste bucket, and clear debris from the interior.
-
Clean the guide rails and screw –
- Blow away dust and foreign particles from the X/Y guide rails and the Z-axis screw.
- Apply a small amount of lubricating oil using a swab on the pulleys.
- Move the X/Y/Z axes back and forth to evenly distribute the lubricant.
2.3 Preventive Maintenance Habits
In addition to optics and hardware care, adopting simple preventive habits extends the life of your machine:
- Keep your workspace clean – Dust and soot can quickly settle on sensitive components.
- Check alignment regularly – Misaligned mirrors reduce cutting efficiency.
- Monitor airflow – Proper air assist prevents flare-ups and keeps cuts clean.
- Inspect water cooling systems – For CO2 glass tubes, ensure proper water circulation and temperature control.
- Update software and firmware – Keeping LightBurn and machine firmware updated improves performance and safety.
3. Signs Your Laser Engraver Needs Maintenance
Even with routine care, you may notice signs that indicate your engraver needs extra attention:
- Reduced cutting depth at the same power setting
- Visible burn marks, charring, or smoke stains around cuts
- Noisy fans or irregular airflow
- Jerky or uneven axis movement
- Unusual smells (burnt material lingering longer than usual)
If you spot these issues, pause production and follow the laser cut engrave maintenance steps outlined above before resuming work.
4. RF vs. CO2 Laser Engraver Maintenance: What’s Different?
While both RF (radio frequency metal tube lasers) and CO2 glass tube lasers require maintenance, their needs vary slightly:
- RF lasers – More durable and require less frequent replacement. Focus on optics and fan cleaning.
- CO2 glass tube lasers – Tubes have a limited lifespan (1,000–3,000 hours) and need water cooling maintenance.
5. How Often Should You Perform Maintenance?
Here’s a simple schedule to keep your machine healthy:
- Daily: Wipe the work area, check airflow, remove debris.
- Weekly: Clean optics, inspect nozzles, check lens alignment.
- Monthly: Lubricate rails, clean fans, empty waste buckets.
- Quarterly: Inspect cooling systems, check for loose wires or screws.
- Annually: Full system inspection, including tube performance and alignment tests.
6. Safety Tips During Maintenance
- Always power off the machine before cleaning or disassembly.
- Wear gloves and safety glasses when handling chemicals or lenses.
- Avoid touching optics with bare hands; oil from skin can damage coatings.
- Use only approved cleaning solutions and lubricants to prevent damage.
7. FAQs
Q: How to maintain a CO2 laser?
A: Clean the optics regularly, lubricate guide rails, check airflow, and inspect cooling systems. A weekly and monthly routine keeps the machine performing at its best.
Q: Do laser engravers need maintenance?
A: Yes. Without regular maintenance, performance declines, optics get dirty, and parts wear out faster—leading to costly downtime.
Q: How to lubricate a CO2 laser?
A: Use a cotton swab with light lubricating oil on the X/Y guide rails and Z-axis screw. Move the axes back and forth to evenly distribute the oil.
Q: What is the lifespan of a CO2 laser?
A: A CO2 glass tube typically lasts 1,000–3,000 hours depending on usage and cooling system care. RF metal tubes often last much longer.
Have Questions? Join Our Forum!
Conclusion
Proper CO2 laser engraver maintenance is key to achieving professional results, extending machine lifespan, and avoiding costly downtime. By cleaning optical parts, maintaining hardware, and following preventive practices, you’ll keep your engraver running at peak performance.
Whether you’re maintaining an RF laser or a CO2 glass tube system, the principles remain the same: consistency, care, and attention to detail. With a structured routine, your laser machine will deliver reliable, sharp, and efficient cuts for years to come.
So, the next time you fire up your engraver, remember: a little maintenance today saves a lot of repairs tomorrow.

 Liquid error (sections/image-banner line 171): invalid url input


