Liquid error (sections/image-banner line 171): invalid url input
If you're using the OneLaser XRF and looking to improve your material handling process, installing the ONELASER Automatic Conveyor Feeder is a game-changer. This accessory unlocks continuous, hands-free material feeding, making it ideal for long-format projects, roll materials, or high-volume production.
In this guide, we'll walk you through the entire installation process clearly, step by step, so you can set up your feeder conveyor system safely and effectively.

1. What Is the ONELASER Automatic Conveyor Feeder?
The ONELASER Automatic Conveyor Feeder is a precision-engineered accessory built specifically for the OneLaser XRF desktop laser machine. It enables automatic feeding of long or flexible materials, like fabric, paperboard, leather, and vinyl, making it an ideal upgrade for small business owners and advanced DIYers.
Key Specs at a Glance:
- Compatible With: OneLaser XRF (must be used with X Series Base Booster)
- Product Size: 27.1'' × 7.8'' × 5.4''
- Weight: 8.5 kg
- Max Speed: 300 mm/s
- Work Area Dimensions:
- Max Processing Area: 118.1'' × 18.5''
- Max Material Width: 22.05″
- Min Material Width: 4.33″
- Max Material Thickness: 0.55″
Note: The Base Boost™ riser base is required to use the Conveyor Feeder with your XRF.

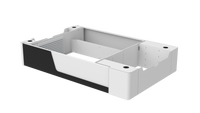
2. What Is the ONELASER X Series Base Booster?
The Base Boost™ is an add-on accessory that elevates the OneLaser X Series machine to handle taller and longer items. It also unlocks straight-through material access of up to 160mm, essential for using the feeder.
Benefits of the Base Booster:
- Enables pass-through cutting and engraving
- Provides a dust-free and cleaner workspace
- Supports larger materials, including 40oz tumblers and long rolls
- Required for feeder installation

3. Tools You’ll Need for Installation
Before you start, make sure you have the following tools ready:

- Hex wrenches (2mm and 3mm)
- Fine-tip marker or permanent pen
- Center punch (or awl)
- File (medium to fine teeth)
- 7/32 in (5.5mm) twist drill bit
- Handheld electric drill
- Laser-cut location blocks (cut using your OneLaser XRF)

4. How to Install Automatic Conveyor Feeder
Step 1: Remove the Honeycomb Bottom Plate
Start by removing the honeycomb platform from your XRF machine. This opens up the base plate for modification.

Step 2: Remove the Front Cover
- Use a 2mm hex wrench to loosen all screws securing the front cover.
- Carefully remove the front cover and set it aside.

Step 3: Detach the Drawer Assembly
- Use a 3mm hex wrench to remove the screws holding the drawer support.
- Gently slide out the drawer assembly and keep it in a safe place.

Step 4: Position the Location Blocks
- Take the laser-cut left and right location blocks and place them in the pre-marked installation zones on the base plate.
- These blocks act as templates to ensure proper feeder shaft alignment.
- Use a fine-tip marker to draw clear dots through the holes on the location blocks.
- These marks will guide your drilling holes for the feeder shaft.

Step 5: Punch Pilot Indentations
Use a center punch or awl to create shallow notches where you marked your drill points. This keeps your drill bit from slipping.

Step 6: Drill the Holes
- Attach the 7/32 in (5.5mm) twist drill to your electric drill.
- Align the bit with the punch marks.
- Keep the drill perpendicular to the base plate and drill at a steady speed until fully through.
Tip: Let the bit do the work. Don't force the drill, as this may crack or warp the plate.

Step 7: Smooth the Holes
- Use a file to remove any burrs or sharp edges around the holes.
- This ensures a clean installation and avoids damaging the feeder shaft.

If the holes feel too tight:
- Reinsert the drill bit slightly and gently tilt the drill left and right to widen the hole just enough.
Step 8: Install the Conveyor Feeder Shaft
- Align the conveyor feeder’s shaft with the newly drilled holes.
- Secure it using the provided screws and fasteners.
- Ensure the feeder sits flush and stable within the riser base.
Once the shaft is in place, you’re ready to test!

Final Checks Before Operation
Before using your newly installed feeder conveyor system:
- Reconnect the drawer and front panel if needed.
- Plug in the feeder system and confirm motor engagement.
- Use LightBurn software or the OneTouch control panel to test feeder movement at slow speed.
- Load a scrap material roll or test sheet and perform a dry run to confirm feeding alignment.

5. Tips for Smooth Operation
- Always keep the feeder rollers clean.
- Check for material jams regularly, especially with thick or curled materials.
- Test different feed speeds (start low at 100 mm/s and increase as needed).
- Don’t force oversized materials, respect max width and thickness guidelines.
Subscribe Our Youtube Channel!
6. Why Upgrade to Conveyor Feeder Systems?
Adding a conveyor feeder system to your laser setup increases your production capability dramatically. Whether you're cutting long banners, custom packaging, or fabric patterns, the automatic feeding feature eliminates the need for constant repositioning, saving you both time and material.
It’s ideal for:
- Print shops
- Packaging producers
- Apparel makers
- Leather crafters
- High-volume etching or cutting jobs
7. Why Choose OneLaser?
OneLaser is a US-based laser technology company known for quality, innovation, and small business support.
Our X Series systems, especially the XRF, are built with real creators in mind. With tools like the Automatic Conveyor Feeder and Base Boost™ system, you can elevate your engraving game with ease.
We also offer:
- Flexible financing for laser engravers through Shop Pay and ClickLease
- Live support and expert consultations
- Training and resources to help you grow
8. FAQs
Do I need the Base Boost to use the feeder?
Yes. The feeder only fits the X Series when the riser base (Base Boost) is installed.
What materials can I feed through the system?
Thin woods, leather, vinyl, card stock, thin acrylic sheets, paperboard, and more—up to 0.55″ thick.
Learn more: Laser Cutter, Engraving Settings for Different Materials
Is the feeder hard to install?
Not at all! With a few common tools and this guide, you’ll be set up in about 30–45 minutes.
Can I use the feeder on any OneLaser model?
Currently, it’s only compatible with the OneLaser XRF and requires the X Series Base Booster.
Can I engrave while using the conveyor?
Yes. The feeder supports both cutting and engraving workflows with long materials, especially useful for repeated patterns.
Final Thoughts
Installing a feeder conveyor system on your OneLaser XRF is one of the best ways to boost efficiency and expand your capabilities. From long-run production to seamless material management, the ONELASER Automatic Conveyor Feeder turns your desktop laser into a mini production powerhouse.
Want help with setup or ready to order? Schedule a one-on-one consultation with our support team today.