Liquid error (sections/image-banner line 171): invalid url input
Laser engraving is one of the most creative and rewarding ways to personalize everyday objects. Among the wide range of materials and shapes you can work with, laser engraved bowls stand out as both functional and beautiful. Whether you're crafting unique home décor, designing personalized gifts, or expanding your product line, this guide will walk you through how to laser engrave wooden bowls step by step using the powerful OneLaser Hydra 9.
In this tutorial, we’ll cover everything from machine setup to engraving parameters, including tips for using the correct lens and achieving the best alignment. Let’s dive in.

1. How to Choose the Right Wooden Bowl for Laser Engraving
Not all bowls are created equal when it comes to laser engraving. Here’s what to look for:
- Material Type: Choose hardwoods like maple, cherry, or walnut for sharp engravings. Softer woods like pine may burn too easily. Learn more: How to Choose the Best Wood for Laser Engraving?
- Smooth Surface: Ensure the bowl has minimal grain texture or knots that could distort the laser path.
- Finish: Avoid varnished or lacquered bowls, as finishes may react poorly to laser heat.
- Shape and Size: A flatter or wider curve gives you more room for design and better laser focus.
- Food Safety: If the bowl will be used for food, select untreated, food-safe wood.
Selecting the right wooden bowl makes a big difference in the quality, contrast, and clarity of your final engraving.
2. What You Need to Get Started
Before you start engraving, make sure you have the right tools and materials:
- Wooden Bowl: Smooth and untreated surfaces work best.
- Laser Design File: SVG, DXF, or compatible vector design.
- OneLaser Hydra 9 Machine: Our high-performance CO2 laser system.
- 4” Hydra Focal Lens Barrel: For engraving curved and uneven surfaces.
3. Step-by-Step: How to Laser Engrave Bowls
Step 1: Set Up the OneLaser Hydra 9
The OneLaser Hydra 9 is a dual-laser cabinet system that combines power and precision. Start your setup as follows:
- Plug in your Hydra 9 to a 110V or 220V outlet.
- Use the safety key to power on the machine.

- Ensure your exhaust system is connected and running to handle fumes.
- Check that Laser 2 (RF metal tube) is available—you’ll be switching to it later.
Pro Tip: Always wear safety goggles and operate in a ventilated environment.
Learn more: How to Set Up a Laser Engraver
Step 2: Import Your Design File
- Open LightBurn Software on your connected PC or laptop.
- Import your prepared design file.
- Supported formats: SVG, AI, DXF, PNG, etc.
- Position the graphic in a way that suits the bowl’s curvature and engraving area.
Step 3: Enter Engraving Settings
Use these settings for optimal results on wooden bowls:
- Speed: 400 mm/s
- Max Power: 65%
- Min Power: 10%
- DPI: 300 (dots per inch)
These parameters are ideal for clean, high-contrast engravings without scorching or overburn.


Step 4: Switch from 1.5” to 4” Focal Lens Barrel
Wooden bowls are curved and not flat. That’s why the 4” lens is essential:
- Remove the standard 1.5” lens and attach the 4” Hydra Focal Lens Barrel.
- This gives you better depth of field and ensures the laser beam stays focused across the bowl's curved surface.
Important: Only switch lens barrels while the machine is OFF.

Step 5: Set Up Laser Alignment
On your OneTouch Control Panel:
- Select the Alignment option.

- Change the default to Laser 2 to activate the RF metal tube.
Learn more: RF Laser Tube Frequency Tips for Precise Engraving

- Use the red dot pointer to visually position your bowl and design.
This switch ensures precise engraving, especially when working with cylindrical and curved items.
Step 6: Start the Engraving Process
Once everything is aligned and settings are confirmed:
- Place your bowl securely inside the laser bed.

- Frame your design in LightBurn to confirm placement.
- Hit Start and watch the Hydra 9 work its magic.
Tip: Monitor the job and be ready to pause if you notice any slipping or burning.


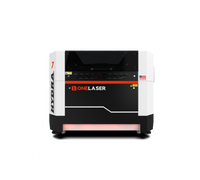
4. Why Use the OneLaser Hydra 9?
The Hydra 9 is a powerhouse for engraving professionals who want flexibility and reliability.
- Dual-Laser System: 100W Glass Tube + 38W RF Metal Tube
- Work Area: 900 x 600 mm
- Precision Control: Optimized for curved surfaces like bowls and tumblers
- Advanced Motion System: Smooth, vibration-free engraving
- Rotary Compatible: Works with optional rotary tools for cylindrical items
- Autofocus + Camera: Ensures perfect positioning
The Hydra 9 gives makers and small businesses the versatility to expand their product lines into premium custom gifts, kitchenware, home décor, and more.

5. Care Tips for Laser Engraved Bowls
- Clean gently with a damp cloth (avoid harsh detergents).
- Apply food-safe wood oil to maintain finish.
- Avoid soaking or putting in the dishwasher.
Learn more: Laser Engraver Maintenance

Final Thoughts
Creating laser engraved bowls is not only easy with the right tools but also a great way to personalize gifts or boost your business offerings. With the OneLaser Hydra 9, you get precision, power, and professional-grade performance that delivers beautiful results every time.
Whether you’re crafting for personal use or commercial sale, laser engraving wooden bowls is a fulfilling and profitable project to explore. Ready to bring your ideas to life? Visit OneLaser.comto learn more or schedule a demo today.
FAQs
What types of bowls are best for laser engraving?
Smooth, untreated hardwood bowls like maple, walnut, or cherry produce the best results. Avoid varnished or resin-coated surfaces.
Can you laser engrave inside a bowl?
Yes, but it’s best done with a longer focal lens (like a 4") and proper alignment tools, as curved interiors require depth-of-field adjustments.
Do I need a special machine to engrave bowls?
Yes. A machine like the OneLaser Hydra 9 with a 4” lens barrel and precise alignment features is ideal for curved surfaces like bowls.
Will engraving damage the bowl’s food safety?
Not if the bowl is unfinished wood. After engraving, treat it with food-safe mineral oil or beeswax to preserve and protect the surface.
What software should I use to engrave bowls?
LightBurn is highly recommended. It’s compatible with our Laser engraving machines and allows easy alignment, setting adjustments, and previewing curved surfaces.
Learn more: How to Laser Engrave a Wooden Spoon