Engraving should leave behind crisp, detailed, and professional results. But if you’ve ever seen faint horizontal lines or areas of uneven shading across your leather, leatherette, or acrylic projects, you’ve experienced what’s called engraving laser banding issue.
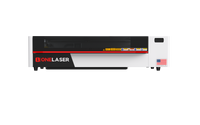
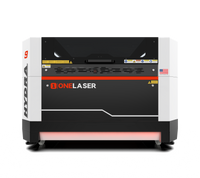
This problem is especially common among makers using RF lasers—like the OneLaser Hydra 9 or XRF desktop models that share the same 38W RF laser source. Luckily, the issue is fixable with the right knowledge and settings.
Key Takeaway
In this guide, inspired by Colby Sechelski’s tutorial and feedback from the OneLaser community, we’ll walk you through what causes laser banding and how to adjust your machine to eliminate it.
1. What Is Engraving Laser Banding?
Engraving banding looks like faint horizontal stripes or sheen differences across the engraved surface. Even when the design is fully engraved, the inconsistent finish makes the piece look lower quality and harder to sell.
There are two main types of complaints users often see:
- Engraving laser banding issue horizontal – noticeable lines running across the engraving.
- Banding issues with your RF laser – uneven shading that looks like the laser engraved with different intensities in each pass.
Community feedback confirms this issue:
- “Lines start showing up, it is full engraved but like a different sheen. Any idea besides raising the power?” – Christian

- “Any idea why the XRF has this banding when engraving some Rowmark duets?” – Derek

So what causes it—and more importantly, how do you fix it?
2. Why Banding Happens on RF Lasers
Unlike CO₂ glass tube lasers, RF lasers operate with pulse frequencies that can affect the engraving quality. Banding is often tied to:
- Line interval or DPI settings – Too wide of a line interval (fewer lines per inch) can leave visible gaps. Learn more: What is DPI in Laser Engraving?
- Laser frequency – RF lasers usually run at a default 20 kHz, but changing this can affect pulse strength and consistency.
- Focus accuracy – Even a slight defocus (e.g., 2mm off) can introduce banding.
- Material inconsistencies – Layered acrylics or textured leatherettes can naturally show more unevenness.
- Cleaning and residue – Soot or debris left on the surface can make engravings look inconsistent.
3. Tested Solutions
Laser engraving expert Colby Sechelski put these issues to the test on his OneLaser Hydra 9 and XRF desktop machine. Here are his findings:
3.1 Use the Right Speed and Power
- Best baseline setting: 1000 mm/s, 65% power, 20 kHz frequency, and 0.050 line interval (≈500 LPI).
- Result: Crisp details, no banding, even on large engravings.
3.2 Optimize Line Interval (LPI)
- 0.050 interval (500 LPI): Clean, detailed results.
- 0.080 interval (317 LPI): More likely to show banding, especially on leatherette.
3.3 Adjust Frequency Carefully
- 20 kHz (default): More powerful pulses, darker engraving, less banding.
- 80 kHz: More pulses but weaker, sometimes cleaner but lighter results.
3.4 Focus Is Critical
- Colby demonstrated that 2mm out of focus introduced visible banding.
- Always auto-focus before engraving, especially on small or curved items.
3.5 Clean After Engraving
- Colby recommends Dawn Power Wash + microfiber cloth to remove soot and residue.
- A quick clean prevents dark smudges and improves perceived engraving quality.
3.6 Material-Specific Tweaks
- Leatherette: Run 65–70% power depending on color or coating (glow-in-the-dark, golf ball texture, etc.).
- Acrylic (trilayer types): Use tighter line intervals (0.04), higher power, and sometimes two passes for smoother results.
- Real Leather: Same settings as leatherette, clean and crisp at 65% power, 500 LPI.
4. Step-by-Step Fix for Engraving Laser Banding Issue
If you’re seeing banding, follow this troubleshooting process:
Step 1 – Check Your Line Interval
- Set your engraver to 0.050 (500 LPI) or tighter.
- Avoid wide intervals like 0.080 unless speed is more important than detail.
Step 2 – Adjust Power and Speed
- Start with 1000 mm/s at 65% power.
- For lighter materials, lower the power; for thicker or coated materials, increase by 5–10%.
Step 3 – Experiment with Frequency
- Keep at 20 kHz for leatherette and leather.
- Try 80 kHz for acrylic if you want smoother finishes.
Step 4 – Confirm Focus Accuracy
- Run autofocus before each job.
- Avoid engraving with material shifts or warps that move the focal point.
Step 5 – Test with Different Materials
- Banding may appear worse on cheaper or uneven acrylics.
- For Rowmark or layered acrylics, run two lighter passes instead of one heavy pass.
Step 6 – Clean the Engraved Surface
- Use mild cleaners like Dawn Power Wash.
- Always wipe down with microfiber to remove soot and reveal a consistent finish.
5. Pro Tips to Prevent Banding in the Future
- Consistency is key: Stick to proven settings once you’ve dialed them in.
- Document your material settings: Keep a cheat sheet of speed, power, and LPI for each type of leather, acrylic, or plastic you use.
- Invest in quality materials: Cheaper acrylic often has inconsistent cores that make banding more noticeable.
- Run test patches: Before starting a big job, engrave a small square with your chosen settings to confirm quality.
- Use two passes when needed: Especially on trilayer acrylics, multiple lighter passes give better results than a single heavy one.
6. FAQs
Q1: Why is my RF laser engraving with horizontal lines?
A: This is the common engraving laser banding issue horizontal—caused by wide line intervals, focus problems, or incorrect frequency.
Q2: Does increasing power fix banding?
A: Not always. Increasing power alone won’t solve it. The solution is adjusting line interval (500 LPI), maintaining proper focus, and cleaning the surface.
Q3: What’s the best setting to avoid banding on leatherette?
A: 1000 mm/s, 65% power, 20 kHz frequency, 0.050 line interval.
Q4: Can banding be completely avoided on acrylic?
A: Not always—since acrylic cores aren’t perfectly uniform. But tighter intervals and two light passes can minimize it significantly.
Q5: Do Hydra 9 and XRF machines behave differently with banding?
A: No, both use the same 38W RF source, so the fixes apply to both models.
Have Questions? Contact Us Now!
The engraving laser banding issue is frustrating, but it’s not a machine defect—it’s almost always tied to settings, focus, or material quality.
To fix it, remember:
- Tighten your line interval (500 LPI).
- Stick with 20 kHz frequency unless experimenting.
- Run at 1000 mm/s, 65% power as a reliable baseline.
- Clean your engravings for the best final look.
Once dialed in, your RF laser—whether Hydra 9 or XRF—can produce crisp, professional engravings on leather, leatherette, and acrylic with no visible banding.

 Liquid error (sections/image-banner line 171): invalid url input


