If you’ve ever wondered how to laser engrave tumblers like a pro — crisp, full-wrap designs that look perfectly centered and etched deep into stainless steel — this tutorial will guide you through every step.
In this walkthrough, Shiju Yohannan from E&S Creative Works shares his personal process for engraving a 20oz stainless steel tumbler using the PiBurn Grip 2.0 rotary attachment on the OneLaser XRF. His approach combines precision setup, calibration, and smart use of LightBurn to achieve clean, professional results that anyone can replicate.
Whether you’re new to engraving tumblers or looking to fine-tune your settings for smoother rotations and sharper lines, this guide will help you avoid common pitfalls and get confident with your rotary workflow.
1. About E&S Creative Works
E&S Creative Works is a husband-and-wife-run laser engraving and printing studio based in McKinney, Texas. The shop specializes in custom engraved gifts, from cutting boards and tumblers to journals, leatherette items, and even apparel.
They offer personalized and bulk orders, catering to both individuals and corporate clients, with local pickup and nationwide U.S. shipping.

Shiju, the co-owner, is the creative hand behind most of the engraving work. His YouTube channel serves as an educational resource where he openly shares his learning journey, practical setups, and troubleshooting tips to help other makers achieve better engraving results — especially when working with curved drinkware like tumblers.
Follow E&S Creative Works for more engraving ideas, tutorials, and behind-the-scenes projects:
👉 Youtube: @EandSCreativeWorks
👉 Instagram: @eandscreativeworks
👉 TikTok: @eandscreativeworks
👉 Facebook: @eandscreativeworks
2. Tools and Equipment Used
Before diving into the steps, here’s what Shiju uses in his setup:
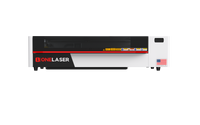
- OneLaser XRF (with Base Booster): A professional-grade RF CO₂ laser engraver known for high precision, long lifespan, and superior engraving on coated metals, leather, and acrylics.
- PiBurn Grip 2.0 Rotary Attachment: A powerful chuck-style rotary that securely holds tumblers, mugs, and cups of all sizes for 360° engraving.
- LightBurn Software: For design setup, rotary calibration, and sending engraving jobs to the machine.
- Caliper: To measure tumbler diameter and height accurately.
- Painter’s Tape / Measuring Tape: For alignment marking.
- Small Bubble Level: Ensures the tumbler is perfectly leveled during rotation.
- Protective Gloves: Keeps fingerprints and residue off the finished surface.
3. Step-by-Step: How to Laser Engrave Tumblers
Let’s walk through the full process that Shiju used to engrave a 20oz stainless steel tumbler featuring an eagle and American flag design.
Step 1: Mount the PiBurn Grip 2.0 on the OneLaser XRF
Start by placing the PiBurn Grip 2.0 inside your OneLaser XRF.
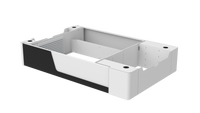
If your machine has the Base Booster, lower the bed to make space for the rotary setup and ensure the laser head aligns properly with your tumbler’s centerline.

Once installed, connect the four-pin rotary cable, but don’t turn on the rotary switch yet. You’ll first need to align your laser head manually.
Use the built-in red dot pointer to align the beam along the tumbler’s midline. Check the red dot alignment with both the white marker line on the tumbler and the PiGrip’s reference point. Once both are aligned, set your origin in LightBurn.
Step 2: Measure the Tumbler
Accurate measurements are critical for full wraps. Using a digital caliper, measure:
- Diameter – across the widest part of your tumbler.
- Height – the engraving area’s vertical distance (leave small margins on top and bottom).
For Shiju’s 20oz tumbler, the diameter measured 75.1 mm, which LightBurn automatically converted into a circumference of about 236 mm.

These numbers ensure your design wraps seamlessly without gaps or overlap.
Step 3: Configure Rotary Settings in LightBurn
In LightBurn, open Rotary Setup:
- Enable Rotary
- Select Chuck (since PiBurn Grip 2.0 uses a chuck-style grip)
- Enter your measured diameter (e.g., 75.1 mm)
LightBurn will automatically calculate the circumference.

Double-check that the rotary status indicator turns green, meaning the system is active and communicating with your XRF machine.
Step 4: Calibrate SPR (Steps Per Rotation)
This step ensures your tumbler rotates accurately for a perfect full wrap.
Start by applying painter’s tape on your tumbler surface. Mark a dot with a pen where the laser will start.

In LightBurn, run Test Rotations using different SPR (Steps Per Rotation) values until your laser red dot returns exactly to the starting point after a full rotation.
Shiju began testing at 10,000 SPR, then increased gradually:
- 15,000 (too low)
- 18,000 (closer)
- 18,500 (almost perfect)
- 18,700 (spot on)
His final correct value was 18,700 SPR — which gave him a precise full wrap with no offset.

Step 5: Align and Frame Your Design
Next, import your design (like Shiju’s eagle and flag graphic) into LightBurn.
Position the artwork within the tumbler’s engraving area and hit Frame to preview the engraving boundaries.
Make sure the frame preview doesn’t go beyond the tumbler’s physical limits. This check prevents the laser head from hitting the rotary legs or engraving off-center.
Once framed, Set Origin again and focus the laser on the tumbler surface. The OneLaser XRF’s motorized autofocus helps achieve perfect focal distance quickly.
Step 6: Engraving
Now it’s time to engrave!
Send your file to the OneLaser XRF and let the machine do the work.
For stainless steel tumblers, Shiju used approximately:
- Speed: Moderate (~200 mm/s)
- Power: Around 80–90% for visible contrast
- Passes: 1
The XRF’s RF metal tube delivers fine detail with consistent power output, which helps produce clean lines and even shading — ideal for metallic surfaces.

Shiju’s engraving took about 25–26 minutes, resulting in a full-wrap patriotic design.
Step 7: Finishing and Cleaning
Once engraving is complete, wear protective gloves to remove the tumbler from the rotary. This prevents fingerprints on the freshly marked metal.
Wipe the surface gently with a microfiber cloth or wash with mild soap and water to remove residue.
Shiju noticed a small alignment gap on his first attempt — a reminder to always double-check framing before engraving. After cleaning, the result looked crystal clear, sharp, and professional.

4. Pro Tips from Shiju
Here are Shiju’s best takeaways for anyone learning how to engrave on tumblers:
- Leveling is everything: Use a bubble level to ensure the tumbler sits evenly — even slight tilts can cause distorted engravings.
- Measure with your own tools: Don’t rely on manufacturer specs for tumbler dimensions; measure each piece with a caliper for precision.
- Test your SPR every time: Different tumbler sizes require slight SPR adjustments. Start low and increase gradually until you get a perfect rotation.
- Use painter’s tape for testing: It’s a low-cost, non-destructive way to preview rotation and positioning.
- Keep your workspace clean: Residue or fingerprints can affect engraving contrast. Clean both your tumbler and rotary parts regularly.
- Always frame before firing: Verify the engraving area visually to avoid unwanted gaps or cutoffs.
5. About the PiBurn Grip 2.0
The PiBurn Grip 2.0 is the upgraded version of the original PiBurn Grip — a chuck-style rotary attachment designed for laser engraving businesses.

Its powerful clamping system holds a variety of items — tumblers, bottles, mugs, and even odd-shaped objects — securely in place. The improved Grip 2.0 provides stronger hold, smoother rotation, and better balance for full-wrap engravings.
It’s the go-to choice for makers and engraving studios who want versatility and reliable alignment for every project.
Discover the PiBurn Rotary Grip 2!
6. About the OneLaser XRF
The OneLaser XRF is a compact RF laser engraver built for professional creators. It offers high-resolution output (up to 2000 DPI), long-lasting metal RF tube performance (rated for up to 30,000 hours), and a rigid frame that ensures perfect beam alignment.
With the optional Base Booster, it accommodates larger or taller objects — making it ideal for tumblers, mugs, and drinkware engraving.

Its touchscreen control, intelligent autofocus, and LightBurn compatibility make it one of the most user-friendly machines in its class.
7. FAQs
1. What kind of laser do you need to engrave tumblers?
A CO₂ laser engraver like the OneLaser XRF is ideal for coated metal tumblers. Its precision and power provide clean results without damaging the stainless steel.
2. Can you engrave full wraps on tumblers?
Yes. With a rotary attachment such as the PiBurn Grip 2.0, you can engrave 360° full wraps accurately, as long as your tumbler is measured and leveled correctly.
3. What settings work best for stainless steel tumblers?
For most RF CO₂ lasers, settings around speed 200 mm/s and power 80–90% work well, but it varies by material coating and machine wattage.
4. How do I avoid gaps in my engraving wrap?
Double-check framing and SPR calibration. Even a small misalignment can create a visible seam or gap.
5. How do I clean engraved tumblers?
Use mild soap, warm water, and a soft cloth. Avoid harsh scrubbing pads that might dull the engraved surface.
Have Questions? Join Our Forum!
Conclusion
Learning how to laser engrave tumblers takes patience and precision, but once you master the setup, the results are incredibly rewarding.
As demonstrated by Shiju from E&S Creative Works, the combination of PiBurn Grip 2.0 and OneLaser XRF provides a reliable and repeatable workflow for professional-quality tumbler engraving.
From accurate measurement and rotary setup to alignment, testing, and cleanup, each step plays a role in achieving that flawless full-wrap finish your clients will love.
If you’re ready to take your laser engraving projects to the next level, this tutorial is the perfect starting point — and a great reminder that a little fine-tuning can make a big difference in your final result.

 Liquid error (sections/image-banner line 171): invalid url input


