 Liquid error (sections/image-banner line 171): invalid url input
Laser cutting plywood is one of the first things almost every new laser owner tries — and one of the first things that can go sideways if nobody warns you about the quirks. I've watched plenty of makers go from "this process is magic" to "why won't the laser cut through" in the same afternoon, usually because nobody explained that plywood isn't a uniform material and that every machine has a real, physical ceiling on what it can cut.
This guide is the one I wish existed when I started: how laser cutting plywood actually works, which plywood behaves and which doesn't, real settings pulled straight from our own machine data, an honest section on why cuts sometimes fail even when your settings look right, and a full library of project ideas to get you started. Let's get into it.
1. What is plywood?
To successfully laser cut any material, you have to understand what it's actually made of. Plywood is an engineered wood product built from thin layers of wood veneer, called plies, peeled from logs and glued together with the grain of each layer rotated up to 90 degrees from the one beneath it.
This alternating grain structure is precisely why plywood is so popular for laser work in the first place:
- Dimensional Stability — the crisscrossed layers resist warping and minimize expansion, which matters a lot for interlocking designs and precise assemblies.
- Consistent Thickness (in theory) — quality plywood has uniform thickness, so the beam passes through evenly. Cheaper sheets don't always live up to these standards, which we'll get into shortly.
The part that matters most for laser work, though, is the glue holding those plies together. Since the laser vaporizes wood with intense heat, the adhesive is where most quality problems — and safety problems — actually come from.

2. How Laser Cutting Plywood Works
When plywood goes under the laser, the beam focuses a giant concentration of thermal energy onto a tiny spot.
- The Cutting Action: Heat instantly vaporizes wood fibers and adhesive along the programmed path, creating the kerf—the width of material removed—which lets the cut piece drop free.
- The Resulting Edge (Charring): Because wood is organic, the heat leaves a dark, brownish-black residue along the cut line. Controlling this char is a big part of getting settings right.
- Raster engraving scans across the surface pixel by pixel at high speed and lower power to create images and shading.

- Vector engraving follows a line path like a cut but at higher speed and lower power, producing shallow score lines instead of a full cut-through.

One laser type to rule out entirely: fiber lasers. Fiber lasers are built for metal, and their wavelength isn't well absorbed by organic material like wood. Using one on plywood tends to produce poor, inconsistent marks and a real fire risk rather than a clean cut—stick with CO₂ (or a capable diode) for plywood work.
Air Assist is non-negotiable. Because cutting plywood involves vaporization and active combustion at the cut line, air assist blasts air directly into the cutting zone to extinguish flare-ups and blow away smoke and debris—resulting in a cleaner edge and a much safer process.
3. Why Plywood Cutting Sometimes Doesn't Go as Planned (Read This Before You Blame Your Settings)
I want to be upfront about something most plywood guides skip over: sometimes the problem genuinely isn't your settings. Here are the three real culprits I see most often when someone tells me their laser "just won't cut through" plywood anymore.
You May Be at Your Machine's Power Ceiling
This issue is the big one. Every laser has a real, physical limit on what it can reliably cut, and no amount of settings tweaking gets around it.
To put real numbers behind this: according to our own published settings data, a 38W machine cuts 3 mm, 6 mm, and 10 mm birch plywood without issue—but 15 mm and 18 mm plywood simply aren't rated as achievable at that power level at all.
Even stepping up to 80W CO₂, 18mm plywood is still right at the edge of what's realistic in a single pass. This isn't a flaw in your technique — it's physics.
If you're fighting a thicker sheet and nothing seems to help, the honest answer might be that you need more watts, not a different speed number.
Plywood Isn't as Consistent as It Looks
Real plywood varies sheet to sheet and sometimes within the same sheet—internal voids, dense knots, and uneven glue distribution are all common, especially in lower-grade material.
That means settings that cut cleanly through one sheet can leave you with a stubborn, uncut corner on the next sheet from the exact same batch.
If a cut suddenly stops working after you dialed in "perfect" settings yesterday, check the material before you touch the settings again.
Kerf Taper Becomes a Real Problem at Thickness
As material gets thicker, the natural taper of a focused beam becomes more noticeable—the top of a cut can look completely done while the bottom hasn't fully released.
This is more common as you approach 1/2" and 3/4" plywood, and it's why thicker cuts often need a helping nudge (a light tap or a thin blade run along the line) even when the settings are correct.
When to Stop Adjusting Settings and Upgrade Instead
If you're consistently fighting the same thickness of plywood despite trying multiple passes, different speeds, and fresh material, it's worth honestly asking whether your machine has the wattage for the job.
A 38W machine is a great fit for 1/8"–1/4" plywood projects; pushing it to reliably cut 1/2"–3/4" sheets is a struggle that no setting will fully solve. This is the exact point where upgrading to a higher-wattage CO₂ machine, rather than a different set of numbers, is the real fix.
4. Best Plywood for Laser Cutting and Engraving
Choosing the right plywood for laser cutting can save you hours of frustration and wasted material. The goal is minimal internal voids and low-toxicity glue.
| Plywood Type | Characteristics & Best Use Case | Glue Safety Note |
|---|---|---|
| Birch Plywood | The industry standard. Consistent thickness, fine grain, and thin, uniform layers. Ideal for intricate, detailed work. | Generally low-toxicity, water-resistant exterior glue. Highly recommended. |
| Poplar/Basswood Plywood | Lightweight and soft. Cuts easily; excellent for rapid prototyping and large models. | Usually safe, but consistency can vary by supplier. |
| Bamboo Plywood | It's eco-friendly, cuts cleanly, and leaves a beautiful contrasting light-brown edge. | Typically modern, safe adhesives. |
| Maple Plywood | The lighter color provides a premium look and smooth engraving contrast. | Check for non-formaldehyde certification. |
| Walnut/Cherry Plywood | Rich, dark tones for a higher-end finished look. | Check supplier glue specs; quality varies. |
| Oak Plywood (Red/White) | Strong visible grain, durable, and suited to furniture-style projects. | Check supplier glue specs. |
| MDF-Core Plywood | Smooth, paint-ready surface, but not natural wood grain. Use with caution. | Resin content can emit fumes — ensure strong ventilation. |

The Glue Warning: A Matter of Health and Safety
Avoid any industrial or cheap construction-grade plywood containing urea-formaldehyde (UF) or phenol-formaldehyde (PF) adhesives. When heated by the laser, these glues release toxic, noxious fumes that are dangerous to inhale and can corrode your machine's optics and moving parts over time.
Never buy laser cutting plywood that isn’t explicitly marked as laser safe and that uses non-formaldehyde glues. Always source plywood for laser cutting that's certified for laser use and explicitly states non-formaldehyde adhesives.
If you’re unsure, try 3mm birch plywood for laser cutting. It’s forgiving, available everywhere, and great for getting new settings dialed in before moving to a bigger project.
5. How to Flatten Plywood for Laser Cutting
Warped plywood is one of the most common — and most avoidable — causes of inconsistent cuts. If one edge of the sheet sits even a millimeter higher than the rest, your focus shifts across the cut, and you'll get a clean cut in one corner and a stubborn, uncut line in another. Here's how to deal with it:
- Store it flat, not leaned. Plywood warps over time when it's stored standing up against a wall, especially in humid environments. Stack sheets flat, ideally with light, even weight on top.
- Let it acclimate. If you've just brought plywood in from a garage, car, or outdoor storage, give it a day indoors at room temperature and humidity before cutting—sudden temperature and moisture changes are a common warp trigger.
- Use low-profile magnets or clamps at the corners. For a machine with a metal honeycomb or slatted bed, small magnets pull a slightly bowed sheet down flat during the cut without adding bulk that would interfere with the beam path.
- Use dampening and weight as a last resort for stubborn bows. Lightly misting the concave side of a warped sheet and pressing it flat under weight overnight can relax minor warps — but let it dry fully before laser cutting, since damp plywood is a genuine safety and cut-quality risk (see Section 3).
- Use autofocus wisely. If your machine has autofocus, it will compensate for small variations across a sheet, but it can't fix a sheet that's bowed several millimeters from corner to corner. Flattening the material first is still the more reliable fix.
- When it's truly beyond saving, don't force it. A badly cupped or twisted sheet is rarely worth fighting with settings—trim around the flattest section instead or set the piece aside for smaller projects where the warp doesn't matter.
6. Best Laser Cutters for Plywood: Settings by Wattage
The right settings for laser cutting 3 mm plywood—or 1/4", 1/2", or 3/4"—depend heavily on your machine's wattage. Below are real, tested starting points pulled directly from our own material settings library, using birch plywood as the reference material.
| Thickness | 38W (RF) | 55W (CO₂) | 80W (CO₂) | 100W (CO₂) | 130W (CO₂) | 150W (CO₂) |
|---|---|---|---|---|---|---|
| Engraving | 1000mm/s, 50% | 500mm/s, 10–30% | 500mm/s, 10–20% | 500mm/s, 10–15% | 500mm/s, 10% | 600mm/s, 15% |
| 3mm (~1/8") | 10mm/s, 90% | 40mm/s, 10–90% | 50mm/s, 10–90% | 52mm/s, 10–90% | 55mm/s, 10–90% | 60mm/s, 90% |
| 6mm (~1/4") | 5mm/s, 90% | 8mm/s, 10–90% | 15mm/s, 10–90% | 20mm/s, 10–90% | 25mm/s, 10–90% | 30mm/s, 90% |
| 10mm | 5mm/s, 90% | 5mm/s, 10–90% | 10mm/s, 10–90% | 13mm/s, 10–90% | 18mm/s, 10–90% | 6mm/s, 90% |
| 15mm (~1/2"+) | Not rated | Not rated | 1mm/s, 10–90% | 2mm/s, 10–90% | 3mm/s, 10–90% | 3mm/s, 90% |
| 18mm (~3/4") | Not rated | Not rated | Not rated | 1mm/s, 10–90% | 2mm/s, 10–90% | 1mm/s, 90% |
All figures assume high air pressure for cutting passes and a properly focused, well-maintained machine. Always run a test cut on scrap material before committing to a final project—plywood batch variability (Section 3) means these are reliable starting points, not guarantees.
A few honest takeaways from this table: a laser-cut plywood machine in the 38W–55W range is a great fit for 1/8" and 1/4" plywood—the bread and butter of most coasters, ornaments, and small signage.
Once you're regularly working with 1/2" material, 80W+ CO₂ becomes far more comfortable. And 3/4" plywood genuinely needs 100W or more to cut reliably in a reasonable number of passes—below that, you're pushing the outer edge of what's realistic, exactly as we covered in Section 3.
Choosing Your Tool
The best laser cutter for your plywood project depends entirely on the thickness you need and your budget:
- CO₂ laser cutters (50W+) handle up to 18mm plywood with multiple passes and are the better choice for high-volume production, thicker material, speed, and clean cuts.
- Diode/RF laser cutters (30W–40W) are a strong entry point for thinner plywood (up to about 6mm), engraving, and hobby-scale projects.
7. Laser Cut Plywood Projects
Plywood is one of the most versatile materials for laser cutting. Here are ideas that range from simple weekend builds to genuinely sellable products, roughly ordered from easiest to most involved.
Wooden Keychains — The classic first project, and for good reason: simple, fast, and a great use for 3mm (1/8") offcuts left over from bigger cuts. Personalize with a name, initial, or small icon, and you can batch a dozen onto one small sheet in a single job.

Coaster and Holder Sets — An effortless, elegant beginner project that looks far more impressive than the effort it takes: engrave a monogram or pattern on a set of 3mm–6mm coasters, then cut a matching plywood stand to hold them together. Sand and apply a food-safe finish for a genuinely giftable result.

Door Hangers — "Welcome," "Do Not Disturb," or seasonal designs that engrave beautifully on thin plywood. These sell well in pairs or small batches around the holidays, and the hanging hole can be cut directly into the design rather than drilled afterward.

Candy Boxes — Themed boxes for holidays or parties, engraved with names or logos on the lid. A natural fit for Etsy or gift shop sales since they double as both packaging and keepsakes.

Wooden Calendars—Reusable calendars with engraved dates and movable pegs or markers—a popular office gift precisely because they get used all year instead of thrown away after the holidays.

Jewelry Stands — Delicate branches, geometric shapes, or abstract silhouettes cut from thin 3mm plywood. Simple to produce in batches, lightweight to ship, and a strong seller at craft fairs since the finished piece looks more intricate than the cut time actually requires.

Controller Stands — Precision-cut interlocking parts from 6mm or 10mm plywood, assembled into a sturdy gamer accessory. A good project for practicing tab-and-slot joinery, since the pieces need to fit snugly without glue.

Laser Cut Maps — City skylines or topographic layers turned into layered wall art. Stack a few thicknesses of plywood (say, 3 mm for fine street detail over 6 mm for a solid base) for a subtle 3D relief effect—popular as both home décor and travel souvenirs.

Wall Clocks — Layered plywood clock faces that combine engraving (numbers, patterns) with cutting (the face outline and any cutout details), finished with a simple clock movement kit. A great showcase piece since it combines both processing modes in one build.

Layered Wall Décor — Multiple plywood layers stacked with small spacers between them create real depth and shadow, especially when you mix stain tones or leave some layers natural and others painted. This is consistently one of the best-selling plywood categories because the finished piece reads as much more complex than the individual flat cuts.

Puzzle Boxes and Interlocking Organizers — Plywood's dimensional stability makes it well-suited to finger-jointed boxes and drawer organizers that need consistent, snug-fitting edges. A slightly more advanced project, but a good next step once you're comfortable with basic tab-and-slot joints from the controller stand or wall clock projects above.
Nursery and Kids' Room Décor — Personalized name signs, growth charts, and simple animal silhouettes cut from lightweight 3mm–6mm plywood. These sell consistently year-round rather than around a single holiday, and painted or stained versions can command a higher price than a plain natural-finish piece.
8. Choosing the Right OneLaser Machine for Plywood Cutting
If you're shopping for a laser cut plywood machine, here's the short version: match the machine's wattage to the thickness you'll actually be cutting most often, not the thickest sheet you might cut once.
- If you're mostly working with 1/8"–1/4" plywood—coasters, ornaments, small signage, keychains—the OneLaser X Series (38W RF or 55W Glass) is a capable, affordable starting point that handles this range comfortably.
- If you're regularly cutting 1/2" plywood or want faster, cleaner results at 1/4" and thinner, the Cobra Series (90W–130W CO₂) gives you meaningfully more headroom and speed.
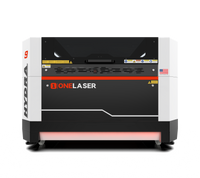
- If 3/4" plywood or heavy, repeated production cutting is part of your regular workflow, the industrial-grade Hydra lineup is built for that level of throughput without constantly running at its ceiling.

You can browse the full OneLaser lineup here to compare wattage, bed size, and pricing side by side and find the machine that matches the plywood thicknesses you'll actually be cutting. Regarding cost, a capable machine is a real investment, and you shouldn't have to buy an underpowered one just to reduce the upfront expense. smaller. OneLaser offers financing options so you can get the wattage your projects actually need now, rather than settling for a machine that will hit its ceiling on day one.
9. FAQs
Can plywood be laser cut?
Yes, plywood is one of the most laser-friendly materials available, cut cleanly by both CO₂ and capable diode/RF lasers. Fiber lasers are not recommended for plywood.
How thick of plywood can a laser cutter cut?
It depends entirely on wattage. As a general guide: 30–40 W machines handle up to about 6 mm (1/4") reliably; 80 W+ CO₂ machines comfortably handle up to 15 mm (roughly 1/2"); cutting 18 mm (3/4") reliably typically requires 100 W or more.
What are the settings for laser cutting 3mm plywood?
On a 38W machine, around 10mm/s at 90% power. On higher-wattage CO₂ machines, speeds of 40–60mm/s at similar power levels are common. Always confirm with a test cut, since plywood density varies by batch.
Can you laser cut 1/4 plywood?
Yes—1/4" (about 6 mm) plywood is comfortably within range for most desktop lasers, including 38 W machines, though it will cut slower than thinner 1/8" material.
Can you laser cut 1/2 plywood?
Yes, but it's a stretch for lower-wattage machines. 1/2" plywood sits right around the edge of what a 38W–55W machine can reliably manage; 80W+ CO₂ handles it far more comfortably.
Can you laser cut 3/4 plywood?
Yes, but this thickness genuinely needs a higher-power machine — 100W CO₂ or more — to cut reliably without excessive passes or the risk of an incomplete cut.
Why isn't my laser cutting all the way through plywood, even though my settings are "right"?
Three usual suspects: you may be at your machine's genuine power ceiling for that thickness (see Section 3), the specific sheet may have internal voids or a dense knot disrupting the cut, or kerf taper may be preventing full release at the bottom of a thick cut. Try a fresh piece of the same material before assuming your settings are wrong.
How do I flatten warped plywood before laser cutting?
Store sheets flat rather than leaning, let material acclimate to room temperature and humidity before cutting, and use magnets or clamps at the corners to hold a slightly bowed sheet flat on the bed. See Section 5 for the full method.
What type of plywood is best for laser cutting?
Birch plywood is the most popular choice thanks to its uniform layers, minimal voids, and clean engraving contrast. Always choose boards made with non-formaldehyde adhesives.
What are the optimal settings for laser cutting different plywood thicknesses?
See the settings table in Section 6 for real starting points across common wattages (38W to 150W), from 3mm up to 18mm.
What should I look for in 1/8" plywood for laser cutting?
Even internal layers without visible voids, low-glue formulation, and flat, unwarped sheets are included. The 1/8″ (3mm) Baltic birch is one of the most commonly recommended and widely used options.
What's the difference between a laser cutter and traditional cutting tools for plywood?
Laser cutters cut with high precision, without contact, and produce sealed edges that don’t need to be sanded. They are faster for complex designs. Traditional tools (saws, CNC routers) are generally better suited for very thick or heavy structural cuts beyond what a laser can handle in a reasonable time.
10. Final Thoughts
Laser cutting plywood rewards a little patience and a lot of honesty about what your machine can actually do. Get the material right (clean, dry, flat, low-toxicity glue), get your settings dialed in with a real test cut, and — just as important — know when a stubborn cut is a settings problem, not a wattage problem. That distinction alone saves more frustration than any single setting tweak.
Whether you're just starting with 1/8" birch coasters or scaling up to 3/4" production pieces, the right plywood laser cutter makes the difference between fighting your equipment and just getting the work done. Take a look at the full OneLaser lineup to find the wattage that matches your projects, and remember that financing is there if you'd rather get the right machine now than the cheaper one that hits its ceiling in a month.