Jewelry stands are not only practical for organizing necklaces, earrings, and bracelets—they can also be beautiful décor pieces. With the precision of a laser cutter, you can design, customize, and assemble your own jewelry holder in just a few hours. Whether you’re a DIY enthusiast or a small business owner selling handmade accessories, creating a laser cut jewelry stand is a rewarding project that blends creativity and functionality.
Key Takeaway
In this guide, we’ll show you exactly how to make one using the OneLaser Hydra 9, along with design files, materials, and assembly tips. By the end, you’ll know how to cut, engrave, and finish a jewelry stand that’s both sturdy and stylish.
1. Why Make a Laser Cut Jewelry Stand?
Before we dive into the tutorial, let’s talk about why this project is worth your time.
- Personalized Organization – No more tangled necklaces or missing earrings. You can design stands to perfectly fit your jewelry collection.
- Aesthetic Value – A laser cut jewelry holder can double as a decorative piece on your dresser, vanity, or shop display.
- Cost-Effective – Instead of buying mass-produced stands, you can create your own for a fraction of the cost using 3mm plywood sheets.
- Perfect for Small Businesses – Makers and sellers can use these stands as packaging or display solutions at craft fairs and boutiques.
- Easy to Customize – Add engraved designs, initials, or patterns to make your jewelry holder truly unique.

2. Materials & Tools You’ll Need
To get started, gather the following supplies:
- 3mm plywood sheets – Strong enough for stability but thin enough to cut easily.
- Laser jewelry stand file – Pre-made templates or your own custom design in SVG/DXF format.
- LightBurn software – For preparing your design file and controlling your laser cutter.
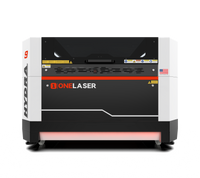
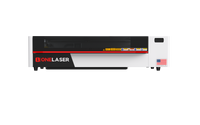
- OneLaser Hydra 9 CO₂ laser machine – A high-performance engraver and cutter with precision for wood projects.
- Glue – Wood glue works best for assembling hooks and stands.
- Paint or wood stain – For finishing and protecting your stand.
3. Step-by-Step: How to Laser Cut a Jewelry Stand
Let’s walk through the process from start to finish.
Step 1: Place the Plywood Sheet on the Hydra 9 Working Bed
Secure your 3mm plywood sheet on the laser bed of the Hydra 9. Make sure it lies flat and doesn’t shift during cutting. This ensures precise cuts for all the stand’s components.

Step 2: Import the Design File into LightBurn
Open your laser jewelry stand file in LightBurn software. You can download free or paid templates online, or design your own custom jewelry holder. The file should include the main board, base, hooks, and decorative cutouts.

Step 3: Adjust Cutting Settings
For 3mm plywood, set your Hydra 9 to the following parameters:
- Speed: 30
- Max Power: 53
- Min Power: 20
In LightBurn, switch the output to Laser 1. These settings give you clean, consistent cuts without burning the edges.

Step 4: Auto Focus and Start Cutting
On the Hydra 9’s touchscreen, enable the Auto Focus feature and confirm that the machine is adjusted to Laser 1. This ensures the beam is precisely aligned with the material.

Click “Start” in LightBurn to begin cutting. The laser will follow the path of your design file, creating all the pieces needed for your jewelry stand.

Step 5: Assemble and Finish
Once all pieces are cut, it’s time to bring your stand to life.
- Slot the main board into the base.
- Use wood glue to attach the hooks securely to the board.
- Let the glue dry completely.
- Sand any rough edges lightly for a smooth finish.
- Apply paint, wood stain, or varnish to protect the surface and enhance the look.

Congratulations! you’ve built your own laser cut wood jewelry holder!

4. Creative Variations of Laser Cut Jewelry Holders
The beauty of this project is flexibility. Here are some creative ways to customize your jewelry stand:
- Earring Trees – Add multiple holes for hanging earrings.
- Necklace Racks – Create tall designs with longer hooks to prevent tangling.
- Ring Holders – Include small pegs or slots to keep rings safe.
- Layered Stands – Combine engraved backgrounds with cut-out hooks for a stylish layered effect.
- Themed Stands – Use shapes like flowers, animals, or geometric art to make unique displays.
5. Best Materials for Jewelry Stands
While 3mm plywood is the most common choice, you can also experiment with:
- Acrylic Sheets – Transparent or colored acrylic gives a sleek, modern look.
- Bamboo – Eco-friendly, strong, and visually appealing.
- MDF – Budget-friendly, easy to cut, and great for painted projects.
- Hardwoods (maple, walnut) – For premium jewelry holders with a natural finish.
6. Selling Laser Cut Jewelry Holders
If you’re running a small business, these stands can be both products and display tools:
- Etsy & Shopify – Sell customized jewelry holders as gifts or storage solutions.
- Craft Fairs – Use them to display jewelry while also selling the stands themselves.
- Wholesale to Boutiques – Offer engraved stands with boutique branding.
- Downloadable Files – Sell your laser jewelry stand file as an SVG or DXF template for other makers.
7. Tips for Success
- Design for Stability – Ensure the base is wide enough to support the stand and prevent tipping.
- Batch Cutting – Use the Hydra 9 to cut multiple stands at once for faster production.
- Offer Customization – Personalized engraving (names, quotes, logos) makes your products more valuable.
- Experiment with Colors – Painted stands can match seasonal trends (e.g., pastel colors for spring, gold for holidays).
- Add Packaging – Include eco-friendly boxes or cloth bags to increase perceived value.
8. Safety Considerations
When working with a laser cut jewelry stand project, always:
- Wear safety glasses.
- Ventilate your workspace to avoid inhaling fumes.
- Avoid cutting materials with glue layers that release toxins.
- Never leave the machine unattended while cutting.
9. FAQs
Q: What material is best for a laser cut jewelry stand?
3mm plywood is the most common choice, but you can also use acrylic, bamboo, or MDF depending on the style you want.
Q: Can I sell laser cut jewelry stands online?
Yes! Many makers sell finished stands on Etsy and Shopify, or offer downloadable design files (SVG/DXF) for other crafters.
Q: Do I need special software to make a jewelry holder?
You’ll need design software like LightBurn to load and adjust your laser jewelry stand file before cutting.
Q: Can I customize the jewelry holder design?
Absolutely. You can engrave names, logos, or patterns to create unique, personalized jewelry holders.
Q: What laser machine is best for this project?
A CO₂ laser like the OneLaser Hydra 9 is ideal because it cuts plywood and acrylic cleanly while offering precise engraving options.
A laser cut jewelry stand is more than just a storage solution, it’s a project that allows you to combine creativity with functionality. Using 3mm plywood, a reliable laser jewelry stand file, and the power of the OneLaser Hydra 9, you can make a professional-quality jewelry holder right at home.
From simple earring racks to ornate wooden displays, the possibilities are endless. Whether you’re making one for yourself, creating gifts for loved ones, or building products for your online store, this project proves just how versatile laser cutting can be.
So fire up your Hydra 9, load your design file into LightBurn, and start crafting your very own laser cut wood jewelry holder today!

 Liquid error (sections/image-banner line 171): invalid url input


