Liquid error (sections/image-banner line 171): invalid url input
A laser cut candle holder is a perfect DIY project that combines creativity, precision, and elegance. Whether you’re decorating your home, creating handmade gifts, or designing products to sell, this project offers an amazing balance of art and functionality.
Key Takeaway
In this guide, we’ll show you how to make a beautiful laser cut wood candle holder—like the one in the photo above—using a 3mm plywood sheet, a laser cut candle holder template, LightBurn software, and the powerful OneLaser Hydra 9.
We’ll go step-by-step through design setup, cutting, and assembly to help you achieve clean, professional results that bring warm light and craftsmanship into your space.
1. Why Make a Laser Cut Candle Holder?
Laser cutting lets you create delicate, intricate shapes that are nearly impossible with hand tools. With the right design and machine, you can easily produce patterns that project mesmerizing shadows when the candle is lit.
Here’s why this project is a favorite among makers and designers:
✨ Elegant design: The layered wood pattern creates a stunning glow effect.
🔥 Functional and artistic: Perfect for tea light candles, home décor, or handmade gifts.
💼 Business potential: Laser cut candle holders sell well on Etsy and craft markets.
🪵 Eco-friendly materials: You can use sustainable plywood or bamboo sheets.
⚙️ Beginner-friendly project: Simple setup, minimal tools, and short cutting time.
Whether you want to make one for your desk or a batch for your handmade store, this guide gives you everything you need.

2. Materials and Tools You’ll Need
Materials:
- 3mm plywood sheet – Flat and smooth (birch or basswood works great).
- Laser cut candle holder template – A digital design file (DXF, SVG, or LBRN).
- Glue – Wood glue or quick-dry adhesive.
- Tea light candles – Use small LED or wax tea lights for safety.
Tools & Software:
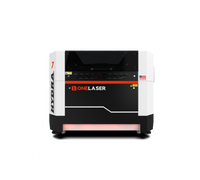
- OneLaser Hydra 9 – High-performance CO₂ laser cutting machine.
- LightBurn software – For preparing, positioning, and controlling your laser cut file.
- Soft cloth or brush – For cleaning burnt edges and dust after cutting.
3. Step-by-Step: How to Make a Laser Cut Candle Holder
Let’s go through the process step-by-step so you can achieve professional-quality results.
Step 1: Prepare Your Material and Machine
Place your 3mm plywood sheet on the OneLaser Hydra 9 cutting bed. Use small hold-down clips or magnets if available to keep the sheet flat.

Step 2: Load the Template in LightBurn
Open LightBurn on your computer and import your laser cut candle holder template. These files usually contain interlocking parts that form the curved, layered frame structure—like the one in the image above.
If you don’t have a file yet, you can easily find free or paid laser cut candle holder templates online in formats like .svg or .dxf. Many designs feature elegant geometric or nature-inspired curves that create beautiful light patterns.
Adjusting the Design
- Ensure the overall size matches your plywood sheet dimensions.
- Keep enough spacing (at least 2–3 mm) between pieces to avoid scorching.
- Use LightBurn’s camera alignment tool (available on Hydra 9) to perfectly position your design on the wood.
Step 3: Laser Cutting Settings
Once your design is ready, it’s time to set your cutting parameters.
Recommended Settings for 3mm Plywood:
- Speed: 10 mm/s
- Max Power: 85%
- Min Power: 85%

These settings are ideal for 3mm birch or basswood using the Hydra 9’s 100W CO₂ laser tube. Adjust slightly for different wood types—dense plywood may require more power or a slower speed.
Auto-Focus Setup
On the Hydra 9’s touchscreen, use the Auto Focus feature before starting. This ensures the laser beam is perfectly focused on the wood surface for optimal cutting performance.

Cutting Tips:
- Enable Air Assist to blow away smoke and prevent burn marks.
- Use vector sorting in LightBurn to minimize head travel and reduce cutting time.
- Start with test cuts on scrap wood to confirm clean edges without over-burning.
Once calibrated, hit Start and let the Hydra 9 work its magic.

Step 4: Clean and Assemble the Candle Holder
After cutting, carefully remove all pieces from the bed. Lightly brush or wipe off any residue. For a professional finish, sand the edges with fine-grit sandpaper.

Assembly Instructions:
- Dry Fit First: Arrange the curved wooden pieces in order to see how they align.
- Apply Glue: Add a thin layer of wood glue along each joint.
- Press Together: Hold or clamp the structure for a few minutes until the glue sets.
- Insert Candle Base: Many designs include a small circular base for your tea light. Fit and glue it into place.
Allow the glue to cure completely before inserting any candle.

4. Design Ideas & Customization
Laser cutting allows endless design flexibility. Here are some creative ideas to personalize your laser cut wood candle holder:
4.1 Style Variations:
- Geometric pattern: Perfect for modern interiors.
- Wave or spiral frame: Creates beautiful light projections on walls.
- Nature-inspired: Leaf, flower, or flame shapes work wonderfully with wood.
4.2 Material Options:
- Plywood (3mm–4mm): Warm and lightweight, ideal for most projects.
- Bamboo: Eco-friendly and visually elegant.
- Acrylic: For a glossy, colorful version—great with LED candles.
4.3 Finishing Touches:
- Stain or paint: Add rich tones or bright colors to match your décor.
- Clear coat: Protects wood and enhances the glow.
- Engraving: Add names, quotes, or patterns on the base for personalization.
5. Why Use the OneLaser Hydra 9 for Wood Projects?
The Hydra 9 isn’t just powerful—it’s engineered for consistent, precise work on wood and acrylic materials.

Key Features That Make It Stand Out:
- Dual-Laser Hybrid System: CO₂ glass tube (100W) + RF metal tube (38W) for both cutting strength and engraving detail.
- High-Speed Motion Control: 1200 mm/s with 3G acceleration ensures smooth, clean curves even in complex designs.
- FumeGuard™ Safety System: Controls smoke and fumes, keeping your workspace clean and safe.
- Sealed Enclosure: Prevents dust buildup, extends optics lifespan, and adds an extra layer of protection.
- Auto-Focus & Air Assist Integration: Hands-free precision and cleaner edges.
This makes it one of the best laser engraving and cutting machines for makers, small businesses, and designers producing candle holders, décor, signage, and custom gifts.
6. Troubleshooting Common Issues
|
Problem |
Likely Cause |
Solution |
|
Edges are burnt |
Too much power or too slow speed |
Increase speed slightly or reduce power by 5–10% |
|
Parts don’t fit |
Kerf not compensated |
Adjust design or sand slightly; apply tighter tolerance next time |
|
Uneven cut |
Material warped or bed not level |
Use hold-downs and check focus |
|
Glue doesn’t bond |
Burn residue on edge |
Lightly sand before applying glue |
Safety Reminders
- Never leave a lit candle unattended.
- Use metal tea light inserts or LED candles for maximum safety.
- Avoid placing candle holders near curtains, plants, or other flammable materials.
- Let the wood cool after long laser sessions before gluing or painting.
7. Frequently Asked Questions
Q1: What type of wood works best for laser cut candle holders?
Thin 3mm birch plywood or basswood provides clean cuts and strong structure. Avoid materials with heavy glue layers or resin.
Q2: Can I download free laser cut candle holder templates?
Yes, many websites and design communities offer free or paid templates in SVG, DXF, or LBRN formats. You can customize them easily in LightBurn.
Q3: How long does it take to cut a candle holder?
Typically 10–20 minutes depending on design complexity and machine power. The Hydra 9’s high-speed motion control reduces cutting time significantly.
Q4: Can I sell my laser cut candle holders?
Absolutely. Personalized candle holders are popular on Etsy, craft fairs, and décor boutiques. Just ensure safety testing before selling.
Q5: Can I engrave designs on the sides?
Yes! Use LightBurn’s engrave mode to add patterns, names, or logos before cutting. Just adjust your engraving power (e.g., 25–40%) for shallow detail.
Conclusion: Craft, Light, and Elegance in One Project
Making your own laser cut candle holder is a rewarding way to blend art, technology, and craftsmanship. With the OneLaser Hydra 9 and LightBurn software, you can bring even the most detailed designs to life—precisely cut, easy to assemble, and ready to illuminate your space.
From minimalist geometric shapes to organic flame designs, every candle holder you make becomes a unique work of art. So grab your plywood sheet, fire up your Hydra 9, and start creating light—literally!