A laser cut calendar is not only a practical way to keep track of your days, but it’s also a beautiful piece of art that you can display at home, in the office, or even sell as a handcrafted product.
With the help of a CO2 laser machine, you can turn a simple design into a stunning piece of décor. From minimalist styles to intricate engravings, a laser cut wood calendar is a rewarding project that combines creativity with technology.
Key Takeaway
In this guide, we’ll walk you through how to create a wooden calendar using 3mm plywood, LightBurn software, and the OneLaser Hydra 9. We’ll also share tips for customization, selling ideas, and why this project is perfect for DIY makers and small businesses.
1. Why Make a Laser Cut Calendar?
Before diving into the process, let’s look at why this project is so popular among laser enthusiasts:
- Functional and Decorative: A calendar is something you’ll use every day, but when laser cut, it becomes a work of art.
- Eco-Friendly: Unlike disposable paper calendars, wooden versions last for years.
- Customization Options: Add names, quotes, or company logos for personalized gifts.
- Great for Small Businesses: Many sellers on Etsy use laser cut calendar templates to create products that stand out in the market.
- Perfect Gift Idea: From corporate giveaways to personalized holiday gifts, a laser cut wood calendar makes a memorable present.

2. Materials and Tools You’ll Need
Here’s what you’ll need to get started:
- 3mm plywood sheets – lightweight and easy to cut with a CO2 laser.
- Laser cut calendar file – a digital template (SVG, DXF, or AI).
- LightBurn software – to load, edit, and prepare your design.
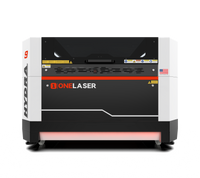
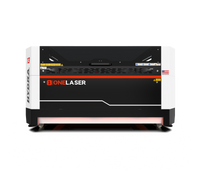
- OneLaser Hydra 9 – a powerful CO2 dual-laser engraver and cutter.
- Glue – to assemble the layers of your calendar.
3. How to Make a Laser Cut Calendar
Let’s walk through the process from start to finish.
Step 1: Place the Plywood Sheet on the Hydra 9 Bed
Begin by placing your 3mm plywood sheet on the working bed of the OneLaser Hydra 9. Ensure that the sheet lies flat to avoid uneven cuts.
Step 2: Load the Design File into LightBurn
Next, open LightBurn software on your computer. Import your laser cut calendar template file. LightBurn will allow you to:
- Scale the design to your desired calendar size.
- Adjust cut paths and engraving layers.
- Preview the project before sending it to the laser.
This step is especially useful if you plan to customize your calendar with logos, decorative patterns, or personal details.
Step 3: Set Engraving and Cutting Parameters
Correct settings are crucial for achieving clean results on plywood. For the OneLaser Hydra 9 with 3mm plywood, use:
Engraving Settings:
- Speed: 600
- Max Power: 20
- Min Power: 2
Cutting Settings:
- Speed: 15
- Max Power: 70
- Min Power: 70
These settings balance fine engraving details with precise cutting, ensuring your laser cut wood calendar looks polished and professional.
Step 4: Use Auto Focus for Accuracy
On the Hydra Series TouchScreen, select Auto Focus. Proper focus ensures that your laser beam is aligned perfectly with the surface of the plywood.
Benefits of auto focus:
- Cleaner engravings.
- Smooth cutting lines.
- Reduced risk of wasted material.
Once focused, start the engraving and cutting process.

Step 5: Assemble and Glue the Layers
When the laser finishes, carefully remove the cut pieces. Follow these steps:
- Arrange the Layers: Place the base and date pieces in the correct order.
- Apply Glue: Use wood glue to secure parts that are meant to stay fixed.
- Let It Dry: Allow at least a few hours for the glue to cure.

Now you have your finished laser cut calendar ready to use or gift.
4. Creative Laser Cut Calendar Ideas
One of the best parts of making calendars with a laser is the ability to customize them. Here are a few creative variations:
- Perpetual Wooden Calendar: Reusable year after year with movable date blocks.
- Desk Calendar: Compact and minimal, perfect for office use.
- Wall Calendar: Large-format laser cut wall calendar with decorative engravings.
- Cute Animal Themes: Ideal for children’s rooms or playful gifts.
- Corporate Calendars: Engrave logos for promotional items.

5. Why Use the OneLaser Hydra 9 for Calendars?
The OneLaser Hydra 9 is an excellent choice for creating laser cut calendar templates and final products. Here’s why:
- Dual-Laser Efficiency: Perfect for high-volume production.
- Large Working Area: Allows multiple calendars to be cut in a single run.
- Precision Engraving: Achieves sharp detail for numbers, letters, and patterns.
- Auto Focus System: Saves time and ensures consistent accuracy.
- Industrial-Grade Reliability: Handles long runs without slowing down.
If you’re planning to sell calendars or expand your product line, the Hydra 9 helps scale your production efficiently.

6. Tips for Perfect Laser Cut Wood Calendars
- Mask the Surface: Use painter’s tape to minimize smoke stains.
- Sand the Edges: Light sanding gives a smooth finish before assembly.
- Experiment with Fonts: Use clean, bold fonts for numbers to improve readability.
- Mix Materials: Combine wood with acrylic accents for modern designs.
- Test Settings First: Always run a small test piece before full production.
7. Selling Laser Cut Calendars
A laser cut wood calendar is not just a fun project—it can be a profitable product for small businesses.
- Etsy and Online Stores: Handmade and personalized calendars are popular on platforms like Etsy.
- Corporate Gifts: Businesses order branded calendars for employees and clients.
- Craft Fairs and Local Shops: Unique items like perpetual calendars stand out in artisan markets.
With the low cost of plywood and the efficiency of machines like the Hydra 9, profit margins can be very attractive.
Learning how to make a laser cut calendar is a rewarding project that combines creativity, practicality, and technology. With just plywood, a design file, and the OneLaser Hydra 9, you can create beautiful laser cut wood calendars that last for years.
Whether for personal use, gifting, or selling online, this project is a perfect example of how laser cutting can transform simple materials into functional works of art.
If you’re ready to get started, download a laser cut calendar template, prepare your plywood, and let your Hydra 9 bring your design to life.

 Liquid error (sections/image-banner line 171): invalid url input


