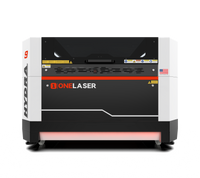
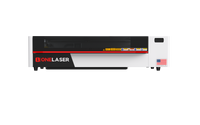
Laser engraving leather is both an art and a technical process. When done correctly, it produces crisp engravings and smooth cuts that elevate the final product—be it a custom wallet, belt, notebook cover, or branded tag. However, leather is a natural material with variable density, finish, and chemical makeup, making it particularly sensitive to laser energy.
This guide shares professional-grade laser engraving leather tips and laser cutting leather tips specifically tailored for users of the OneLaser X Series and Hydra Series. You’ll learn how to choose the right leather type, prepare accurate files, fine-tune your machine settings, and apply safety protocols to ensure every job delivers consistent, high-quality results.

1. Selecting the Right Leather for Laser Processing
Choosing the right type of leather is foundational. Many issues—like excessive smoke, poor contrast, or toxic emissions—stem from using inappropriate materials. One of the most important tips for laser cutting leather is to only work with laser-safe hides.
a. Recommended Leather Types:
- Vegetable-Tanned Leather: This is the top choice for laser engraving and cutting. It burns predictably, creating high-contrast engravings and clean cut lines. It’s also free from harsh chemicals, making it safe to process in well-ventilated workspaces.
- Chrome-Tanned Leather: Should be avoided entirely. This leather contains chromium salts that release hazardous fumes when burned, which can damage your machine’s optics and compromise air quality.
b. Material Selection Tips:
- Use natural or unfinished grain surfaces for better engraving detail.
- Avoid waxed, oiled, or glossy leather, which may melt or burn unevenly.
- For cutting, target hides in the 1–2 mm thickness range. For deep engraving, 3 mm and above is ideal.
Selecting compatible materials is the first step toward clean results and long-term machine safety.
2. Preparing Your Design Files for Optimal Results
The quality of your laser work depends as much on the digital file as on the material or machine. Design files must be precise, clean, and formatted correctly for the laser controller to interpret accurately.
File Preparation Tips:
- Use vector paths (SVG, AI, DXF) for cuts and scoring.
- Use raster images (JPG, PNG) only for photo engravings or grayscale shading.
- Set image resolution to 300–600 DPI for raster jobs—anything lower may produce pixelation.
- Convert all fonts to outlines to avoid rendering issues across machines or software.
- Simplify intricate artwork to avoid duplicate passes, overheating, or excessive burning.
Well-structured files minimize errors and reduce waste—especially in batch production with the OneLaser Hydra Series.
3. Optimizing Laser Settings for Leather Engraving and Cutting
Leather is a natural, heat-sensitive material. It reacts quickly to laser energy, making precise control over power, speed, and frequency essential for high-quality results. If the settings are too aggressive, the leather can burn, curl, or char. Too conservative, and the engraving may lack contrast or the cut may not fully penetrate. One of the most critical laser engrave leather tips is to tune your parameters specifically to the leather’s type, finish, and thickness.
Starting Settings for Engraving and Cutting
Begin with baseline settings, then refine based on actual test results. Use the following as initial parameters when working with vegetable-tanned leather, which is the most laser-compatible material:
Engraving Settings:
- Speed: 300–600 mm/s
Faster speeds reduce heat buildup, minimizing the risk of burning or over-darkening. Choose the lower end of the range for deeper engraving or thicker hides; use higher speeds for light surface branding or detailed graphics. - Power: 15–30%
Adjust according to the tonal contrast needed. Lower power works for subtle shading, while 25–30% is more suitable for bold, high-contrast burns. - Line Interval: 0.1 mm
A tight interval ensures smooth fill coverage in raster mode. This value balances quality with speed, especially when engraving detailed artwork or logos.
Cutting Settings:
- Speed: 5–15 mm/s
Slower speeds are necessary for full-depth penetration, particularly with thicker leather. Begin at 10 mm/s for 2 mm hides and adjust downward if the material resists clean separation. - Power: 70–90%
Leather requires substantial power for clean cuts, especially when you want to minimize edge soot and back-burn. A lower power level may be sufficient for thin hides but always test to ensure full pass-through. - Passes: 1–2 for 1–2 mm leather
For thicker leathers, use multiple lower-power passes instead of one high-power pass. This technique reduces edge flare and helps maintain cleaner borders.
Be aware that even leathers with the same nominal thickness may vary in density, oil content, or tanning method, all of which impact how they respond to a given laser setting.
Machine-Specific Notes
OneLaser X Series:
Designed for precision, the OneLaser X Series is ideal for light raster engraving and intricate vector linework. Its motion system supports high-resolution passes with minimal vibration, which is particularly effective for:
- Detailed logos or graphics on thin, natural hides
- Branded packaging tags or ID panels
- Custom leather accessories requiring fine engraving but minimal cutting
To get the best from the X Series, use higher speeds and dial in the power carefully—these machines thrive in engraving-focused workflows where contrast and clarity matter more than depth.

Hydra Series:
The Hydra Series offers more power headroom and stability for demanding applications. It's well-suited for batch cutting of thicker leathers or combining raster and vector jobs in a single workflow. Use it when:
- Cutting multiple leather components for stitched goods (e.g., wallets, journal covers)
- Engraving heavily tumbled or full-grain leathers that require deeper or slower burns
- Managing production-scale jobs where power, repeatability, and larger bed sizes are required
Hydra systems are also optimized for longer-duty cycles and high-volume output, making them a reliable choice when throughput is critical.

Calibration and Material Testing
Regardless of machine or leather type, always perform a material test pass before full production. Leather is inherently inconsistent—grain direction, tanning method, moisture content, and surface treatment all influence how it reacts under laser heat. Use a calibration file that includes a grayscale matrix, line weight test, and vector cut samples. This helps you dial in:
- The ideal power range for engraving depth
- The cleanest cut at the lowest necessary power
- Edge behavior with or without air assist
Testing not only improves output quality but also reduces scrap, saves time, and extends the life of your laser components by avoiding unnecessary overburning.
4. Enhancing Quality with Proper Machine Maintenance and Accessories
High-quality leather processing requires a well-maintained laser system. Without regular cleaning and proper accessories, even the best settings can yield poor results.
Maintenance and Accessory Tips:
- Use air assist to prevent edge charring and minimize soot.
- Clean lenses and mirrors weekly to ensure full beam strength and focus accuracy.
- Use a honeycomb or knife-blade bed to allow smoke to vent and prevent back-burn.
- Secure leather flat using weights or magnets to maintain focal distance during processing.
These practices improve quality and prolong the lifespan of both your machine and materials.
Learn more: Laser Engraver Maintenance - 6 Essential Parts to Clean
5. Safety Protocols and Best Practices in Leather Laser Projects
Leather can release particulates and fumes when processed, especially if the wrong type is used. Good ventilation and smart handling are vital.
Key Safety Practices:
- Always operate with an active exhaust or filtration system.
- Never engrave chrome-tanned or PVC-containing synthetic leathers.
- Use laser-rated protective eyewear, particularly during maintenance or open-bed focusing.
- Dispose of scraps responsibly—leather dust and residues can emit odors or affect future jobs.
Staying safe while achieving professional results is just as important as optimizing settings or preparing files.
6. FAQs
Q: Can I engrave leather without leaving burn marks?
Yes. Use low-to-medium power, fast speeds, and clean optics. Air assist also helps reduce edge scorching.
Q: What thickness of leather is best for laser cutting?
1–2 mm hides work best. Thicker leather is harder to cut cleanly and may require multiple passes.
Q: Can I engrave synthetic leather?
Only if it’s confirmed to be PVC-free. Always check the manufacturer’s safety data.
Q: Is air assist required for leather?
Yes. It improves edge clarity, minimizes discoloration, and protects your optics from smoke residue.
Conclusion
Successful leather processing depends on preparation, machine precision, and safety awareness. From selecting the correct type of leather to optimizing power settings and maintaining clean optics, every part of your workflow affects the end result. By applying these expert laser engraving leather tips and leather laser cutting tips on the OneLaser X Series or Hydra Series, you’ll gain more control, produce higher-quality goods, and minimize rework. Document your settings, test consistently, and refine your process with each job.

 Liquid error (sections/image-banner line 171): invalid url input


