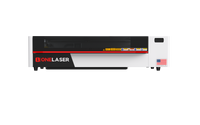
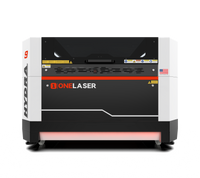
If you’ve ever looked at your cluttered desk and thought, “I really need something cool to hold my pens,” then this project is for you. In this guide, we'll walk you through how to make a custom laser cut pen holder using a Baby Groot laser engraving file, a 3mm plywood sheet, and a OneLaser Hydra 9 CO₂ laser engraving machine.
Key Takeaway
This isn’t just any ordinary pen holder—it’s a unique, character-themed design that you can proudly display on your desk or gift to someone special. Whether you're new to laser cutting or a seasoned maker, you'll find this project both fun and functional.
1. Why Make Your Own Laser Cut Pen Holder?
Custom desk accessories are a great way to show off your creativity while staying organized. A laser cut wood pen holder is especially stylish and long-lasting. You can personalize it with artwork, names, logos, or even your favorite characters—like Baby Groot!
Here are a few reasons you might want to create your own pen holder using a laser cutter:
- It’s affordable: A single 3mm plywood sheet can produce several pieces.
- It’s customizable: Use your own laser cut pen holder template or download popular designs online.
- It makes great gifts: Perfect for back-to-school season, office gifts, or birthdays.
- It’s beginner-friendly: If you’ve got access to a OneLaser Hydra 9 and LightBurn, you’re good to go.

2. Materials and Tools You'll Need
Before diving into the process, make sure you have the following:
✅ 3mm plywood sheet
✅ OneLaser Hydra 9 CO₂ laser machine
✅ Laser engraving/cutting file (we're using a Baby Groot design)
✅ Wood glue
✅ Optional: sanding block or paper for finishing edges
3. Step-by-Step: How to Make a Laser Cut Pen Holder
Let’s break it down into simple steps so you can follow along even if you’re brand new to laser cutting.
Step 1: Place the Plywood on the Hydra’s Working Bed
Start by placing your 3mm plywood sheet flat onto the working bed of the OneLaser Hydra 9. Make sure it’s aligned properly so the cut pieces will be consistent and clean.
💡 Pro Tip: Secure the edges with magnets or hold-down pins to avoid any shifting during engraving or cutting.
Step 2: Import the Design File into LightBurn
Open LightBurn software, and load your laser cutting design file— in this case, it’s a Baby Groot-themed pen holder laser cut template. You can use .svg, .ai, or .dxf files depending on what you have.
Position the design in the workspace to match the area where you placed the plywood. Check your dimensions and make sure everything is scaled correctly.
💡 Optional: Customize your pen holder with initials, company logos, or patterns before engraving.

Step 3: Set Up Your Engraving and Cutting Settings
This is where the OneLaser Hydra 9 shines. Set your laser parameters for both engraving and cutting as follows:
Engraving Settings:
- Speed: 500 mm/s
- Max Power: 60%
- Min Power: 10%
- DPI: 300
These settings provide a clean and precise engraving for the Baby Groot design, giving it that bold and defined look without burning the wood.
Cutting Settings:
- Speed: 15 mm/s
- Max Power: 90%
- Min Power: 10%
Make sure to assign your cut lines to a different layer color in LightBurn and double-check your layers before proceeding.

Step 4: Set Autofocus and Start Engraving
Use the TouchScreen panel on your Hydra 9 to activate autofocus. This ensures the laser is dialed in for optimal precision on your 3mm plywood.
Once the autofocus is set:
- Start the engraving process first.
- Allow the machine to complete the engraving before it switches to cutting mode.
Keep an eye on the process, but let the Hydra do its magic.

Step 5: Assemble and Glue Your Pen Holder
Once your parts are cut and engraved:
- Carefully remove each piece from the laser bed.
- Use a sanding block to smooth out any edges if needed.
- Assemble the pieces like a 3D puzzle—most templates are designed to interlock.
- Apply wood glue at the joints and press together firmly.
- Let it dry for at least 15–30 minutes before use.

And voilà—your personalized laser cut pen holder is ready to use!

4. Tips for Success
🪵 Choose quality plywood: Not all plywood is created equal. Use laser-grade sheets for clean cuts and fewer burn marks.
Learn more: Best Wood for Laser Engraving
🔍 Test first: Always do a small test cut to check settings before committing to the final piece.
🧽 Clean engraved surfaces: Use a soft cloth or light sanding to remove residue from engraving.
🖼️ Get creative: You can swap Baby Groot for other characters, animals, logos, or mandala patterns.
5. Where to Find Laser Cut Pen Holder Templates
Looking for the perfect pen holder laser cut template? There are many free and paid files available online. Try:
- Etsy
- Thingiverse
- Creative Fabrica
- Laser-focused maker forums
Or, create your own using vector design software like Adobe Illustrator or Inkscape.
6. Why Use OneLaser Hydra 9?
The OneLaser Hydra 9 is a professional-grade CO₂ laser engraver and cutter designed for serious makers. Here’s why it's ideal for this kind of project:
- Clean and precise cuts
- Smart touchscreen control with autofocus
- Air assist system for better cutting and less charring
- Robust build quality
Whether you’re making laser cut wood pen holders or customizing tumblers, Hydra 9 delivers consistent and high-quality results.
🌟 Bonus: OneLaser also provides US-based R&D support, 3-year limited warranty, financing options, and an amazing online maker community.

7. Creative Ideas to Personalize Your Laser Cut Pen Holder
One of the best things about making your own laser cut pen holder is the endless opportunity for customization. Whether you're crafting for yourself, gifting a friend, or selling at craft fairs, adding a unique twist can make your design stand out.
Here are some fun and creative ideas to inspire your next project:
🎨 Character Themes
Use popular characters like Baby Groot (as in this tutorial), superheroes, or anime figures. These are great for kids’ desks or themed office spaces.
🐾 Pet Portraits
Turn your pen holder into a tribute to your furry friend by engraving their photo or silhouette. Great for animal lovers!
🧠 Motivational Quotes
Add short quotes like “Create Every Day” or “Stay Sharp” to keep your workspace positive and energized.
🏫 Back-to-School Designs
Customize with names, subjects (like “Math” or “Science”), or school mascots—ideal for students and teachers.

🔲 Geometric & Mandala Patterns
Laser engraving is perfect for detailed, symmetrical artwork. These designs look sleek and stylish, especially on natural wood.
🏢 Corporate Branding
Add logos or taglines and use them as branded gifts for clients or employees—functional and memorable.
💼 Modular Organizers
Take it up a notch and design a pen holder that also holds sticky notes, USBs, or business cards—perfect for work desks.
Discover More Back-to-School Ideas!
✨ Remember: You can make your pen holder laser cut file completely unique by combining these ideas or layering multiple engraving techniques.
Final Thoughts
Making your own laser cut pen holder is a rewarding project for any DIY enthusiast, teacher, student, or home office worker. With just a few materials and the power of the OneLaser Hydra 9, you can turn a plain plywood sheet into a desk-worthy masterpiece.
From creative gifts to stylish workspace accessories, this pen holder design is a great introduction to laser cutting—and who doesn’t love Baby Groot?
FAQs
Q: Can I use a different character or design for my pen holder?
Absolutely! Simply replace the Baby Groot file with any artwork you like—just make sure it's a vector file compatible with LightBurn.
Q: Do I need to sand the wood after cutting?
Light sanding is optional but can help smooth out edges and remove smoke stains.
Q: What size plywood should I use?
3mm plywood is ideal for this type of project—it’s sturdy but easy to cut with most CO₂ lasers.
Q: Is the OneLaser Hydra 9 beginner-friendly?
Yes! The touchscreen interface and built-in autofocus make it great for beginners and professionals alike.
Q: How long does the whole process take?
From setup to gluing, expect to spend about 1–2 hours total.
If you’re ready to bring your maker dreams to life, the OneLaser Hydra 9 and a great laser cut pen holder template are all you need to get started. Happy cutting!

 Liquid error (sections/image-banner line 171): invalid url input


