 Liquid error (sections/image-banner line 171): invalid url input
Deep laser engraving gets talked about like it's one thing. It isn't. Engraving a coin so the design stands up in relief and engraving a wooden sign so the letters catch a shadow are technically the same process—material ablation, repeated passes, and controlled depth—but the machines, the risks, and the realistic outcomes are genuinely different depending on what you're cutting into.
This guide pulls together the published engineering data on how deep engraving actually behaves—on metal and on wood, on cheap desktop machines and on industrial fiber systems—and explains it in plain language. It’s all in short sections, with real numbers and a diagram wherever a picture explains it faster than a paragraph.

1. Deep Laser Engraving Overview
1.1 What Is Deep Laser Engraving?
Deep laser engraving is a process where a laser beam removes layers of material to create a mark with real, measurable depth. Standard engraving alters the surface. Deep engraving goes deeper than standard engraving, cutting through multiple layers, not just the top one.
Here's the picture that makes it click: think of a coin. The design looks raised, almost sculptural, but nothing was added to the coin's surface. The background around the design was cut away deeply enough that the design appears to stand up on its own. That's deep engraving in its purest form—depth creates the illusion of height.

Why it looks "raised": the surrounding surface is cut away, not the design itself
Coins, stamp plates, and dog tags use this exact principle
1.2 Where Deep Engraving Gets Used
Aerospace, automotive, medical device, and tool manufacturing rely on it for permanent traceability marks—logos, serial numbers, and QR codes that have to survive years of handling. It also shows up constantly in branding and decorative work, anywhere a mark needs to feel solid rather than printed on.
1.3 How Deep Can You Go?
The honest answer: it depends entirely on the material and machine. Metals like steel and titanium can reach up to about 0.13mm with the right industrial fiber setup. Softer metals like aluminum typically top out around 2mm before the process stops being practical. Wood and acrylic behave differently again—more on that in Section 5.
1.4 How Does It Actually Work?
The mechanism is ablation: concentrated light energy heats a spot fast enough that material vaporizes instead of just melting. One pass removes a thin layer. Depth comes from repeating that pass, layer by layer, over the same area — not from cranking one setting to an extreme.
Three variables control the outcome: how much heat you're delivering (power), how long the beam sits on one spot (speed), and how many times you repeat the pass. Push any one of these too far, and you trade depth for distortion—a theme that comes up again and again in this guide.
2. Deep Laser Engraving on Metal
This is worth its own section because it's genuinely a different discipline from engraving wood or acrylic—different laser type, different risks, and different realistic expectations.
2.1 What's Actually Achievable
Coins, jewelry, dog tags, stamp plates, and industrial traceability marks are the classic use cases. Precious metals—gold, silver, and platinum—engrave especially well because they're soft enough to ablate cleanly at moderate power, which is exactly why deep engraving shows up so often in custom jewelry.

All four rely on the same principle: depth for durability that survives daily handling
2.2 Why Metal Needs a Fiber Laser
Everything else in this guide uses CO₂ or RF sources, which work because wood, acrylic, and leather absorb that wavelength efficiently. Metal doesn't. A fiber laser's shorter wavelength is what bare and reflective metal actually absorbs — trying to deep engrave steel with a CO₂ source mostly just reflects the beam back at the machine, which is a real risk to the optics, not just a wasted job.
As a rough power benchmark, hobbyist fiber setups can achieve genuine depth starting around 20 W, but industrial testing consistently shows that anything under roughly 100 W turns cycle times impractically long for production work. If you're marking a handful of pieces for a personal project, lower power works — it just takes patience.
2.3 The Corrosion Risk Nobody Mentions Upfront
This is the single most important caveat in this entire guide, and it's genuinely underreported: deep engraving stainless steel or iron removes the thin protective oxide layer that keeps the metal from rusting. The engraved area — and occasionally the surrounding zone — becomes measurably more vulnerable to corrosion than it was before you touched it.
The fix is straightforward but non-optional if the piece will see moisture: apply a protective coating afterward. Clear sealant, paint, or chrome plating all work. Skipping this step on an outdoor sign or a piece that gets handled daily is how a beautiful engraving turns into a rust stain within a year.
2.4 A Practical Path for Mixed Wood-and-Metal Work
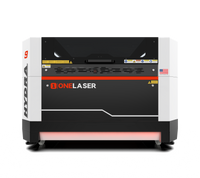
If most of your work is wood and acrylic but metal comes up occasionally—engraved hardware, a metal inlay, a branded plate—you don't necessarily need a second, separate machine. The OneLaser Hydra Gen2 platform supports an optional Q-Switch Fiber upgrade module alongside its CO₂/RF sources, which is exactly built for this scenario—one machine, both material worlds, rather than juggling two systems.
3. Best Laser Engraving Machine for Deep Laser Engraving
"Best machine" depends entirely on scale, material, and whether metal is part of the picture. Here's how the full OneLaser lineup relates to deep engraving work and which feature on each machine actually affects depth.
3.1 X Series — Precision Depth on a Desktop Footprint
The XRF (38W RF) and XT (55W CO₂ Glass) are the entry point for genuinely intricate deep engraving on wood, leather, acrylic, and fabric. Two features matter most here: the QuickSwitch™ lens system, which lets you swap lenses mid-project without downtime—useful when a job moves between fine detail and deeper material removal—and XFocus™ motorized autofocus, which keeps depth consistent across a piece that isn't perfectly flat. At 1200mm/s with 3G acceleration, it also stays fast on multi-pass jobs.
Learn more: What Makes the OneLaser XRF the Best of CES 2025 — Reviewed by Mark Ellis
3.2 Cobra Series — More Raw Power for Bigger, Deeper Jobs
The Cobra Series (Cobra 8, 10, and 14 — 90W to 130W CO₂ Glass) raises the power ceiling considerably compared to the X Series. For deep engraving specifically, that extra wattage means fewer passes to reach the same depth on larger wood and acrylic pieces, plus a bigger bed for projects where the design itself is large, not just deep.
Learn more: Why is the Cobra Series the Best Laser Engraver for Small Business?
3.3 Hydra Series (Gen 1)—Dual-Laser Depth and Cutting Combined
The original Hydra 9 pairs a 38W RF tube with a 100W CO₂ glass laser in one machine—RF for fine detail and CO₂ glass for real cutting-edge depth on top. Its 230 mm Z-depth working area is the standout spec for deep engraving: material thickness stops being a limiting factor even on large or thick projects.
Learn more: Review the OneLaser Hydra 9
3.4 Hydra Gen2—Faster Motion, and a Real Path Into Metal
The newer Hydra Gen2 lineup (Hydra 7, 9, 13, and 16) moves to a full RF dual-laser platform with meaningfully faster motion, which shortens the time cost of multi-pass deep engraving.
The feature that matters most for this specific guide, though, is the optional Q-Switch Fiber upgrade module—it's what turns this platform from "excellent at wood and acrylic" into a machine that can also handle genuine metal deep engraving (see Section 2) without needing a second, separate machine.
3.5 VertiGo — Built for Curved Surfaces, Not Maximum Depth
Worth mentioning honestly: VertiGo is a dedicated rotary engraver for drinkware and other cylindrical items. Its self-centering rotary is excellent for consistent engraving on curves, but it's tuned for personalization depth on tumblers and bottles rather than the multi-pass, maximum-depth work this guide focuses on.
If deep engraving on curved metal or wood pieces is genuinely your goal, one of the flatbed machines above paired with a rotary attachment is the better fit.
You can browse the full OneLaser lineup here to compare power, bed size, and pricing side by side.

4. What Are the Most Important Parameters of Deep Laser Engraving?
4.1 Laser Power
Power is the biggest lever. More optical power means deeper penetration per pass, which directly improves how many pieces you can realistically produce per day.
For nonmetal deep engraving, a minimum of roughly 30W RF or 50W CO₂ glass is the practical starting point. Metal, as covered above, generally wants at least 20W of fiber power — and considerably more for production speed.
4.2 Speed
Slower speed means the beam dwells longer on each spot, concentrating more energy there—which is what drives depth. Push it too far, though, and that same dwell time causes overheating and visible discoloration. Depth and clean appearance pull in opposite directions past a certain point.
4.3 Laser Frequency
Frequency, measured in Hz, is easy to confuse with speed, but they're different things: frequency is how many pulses per second; speed is how long the beam stays on the target. Higher frequency (5–20 kHz) means more, weaker pulses—good for fine surface work. Lower frequency (1–5 kHz) means fewer, stronger pulses—the setting that actually drives deep, clean material removal.
Learn more: How Frequency Affects Engraving Results
4.4 Lens Choice — the Parameter Everyone Underrates
Here's a genuinely counterintuitive finding: the lens matters more than raw power for engraving speed. A shorter focal length concentrates the beam into a smaller, more intense spot, and that intensity — not just wattage — is what determines how fast material actually ablates.
Real test data clearly shows the gap between a 2.5" lens and a 4" lens on the same machine:

The 2.5" lens's concentrated beam roughly doubles engraving speed on wood compared to the 4" lens under otherwise identical settings. If your machine supports interchangeable lenses, this is a genuinely free speed gain — no extra power, no extra passes.
Learn more: How to Clean Laser Lens on XT/XRF OneLaser Machines

4.5 The Time-vs-Quality Trade-off
Here's a piece of published industrial data worth internalizing: you can reach the same target depth two completely different ways. Run the process fast—fewer, more aggressive passes—and you'll hit depth quickly, but risk warping the material as heat builds up unevenly. Run it slower, with many more, gentler passes, and you avoid warping entirely, at roughly triple the processing time.
Neither approach is "correct"—it's a real trade-off. A production batch where speed matters more than perfection favors the fast path. A single high-value piece—an award or a commissioned inlay—favors the slow, clean path.

4.6 Line Width: the Overlooked Time Factor
Every time the laser starts a new line, there's a tiny mechanical delay — roughly 0.03 seconds — before it's back up to speed. On a small design with many short lines, that delay adds up fast: for a 1mm line width, it can eat over half your total engraving time. Stretch the line width to 50mm, and the same delay barely registers, around 10% of total time.
The practical takeaway: a small, detailed logo will always engrave slower per unit of area than a large, simple one—and that's mostly line-start overhead, not raw material removal.
4.7 Preheating: a Trick Worth Knowing for Aluminum
Aluminum reaches the temperature needed for ablation faster when it's already warm. Published testing shows preheated aluminum parts engraving up to 40% deeper in the same processing time compared to room-temperature stock.
It's a niche technique—most desktop setups don't have built-in heating plates—but it's worth knowing if you're chasing maximum depth on aluminum specifically.
5. What Types of Materials Are Ideal for Deep Laser Engraving?
A CO₂ laser engraver handles deep engraving on non-metal materials well because of its ~10.6 µm infrared wavelength—organic and semi-organic materials absorb that wavelength efficiently. Based on a 38W RF tube (the XRF model), here's how the common materials actually compare:

| Material | Suitability | Recommended Power | Max Depth |
|---|---|---|---|
| Wood | Excellent | 90–100% / 50–100mm/s / 3–6 passes | Up to 6mm |
| Acrylic (Cast) | Excellent | 80–100% / 100–200mm/s / 3–5 passes | Up to 4mm |
| Rubber (Laserable) | Good | 90–100% / 80–150mm/s / 3–5 passes | Up to 3mm |
| Leather | Good | 70–90% / 150–250mm/s / 2–4 passes | Up to 2mm |
| Stone (Slate, Marble, Granite) | Moderate | 90–100% / 60–100mm/s / 4–7 passes | Up to 1.5mm |
| Ceramics (Unglazed) | Moderate | 90–100% / 60–100mm/s / 3–5 passes | Up to 0.8mm |
| Glass | Moderate | 40–60% / 250–400mm/s / 1–2 passes (masking tape) | Up to 0.3mm (surface) |
| Paper/Cardboard | Poor for deep engraving | 10–20% / 400–600mm/s / 1 pass | Up to 0.3mm |
| Fabric/Textiles | Poor for deep engraving | 10–20% / 500–700mm/s / 1 pass | Up to 0.2mm |
| Anodized Aluminum | Not suitable (surface marking) | 100% with marking spray / 80–120mm/s / 1–2 passes | Surface marking only |
Learn more: OneLaser Laser Engraving Settings for Different Materials
6. Backfilling and Deep Engraving Applications
One reason people chase depth in the first place: a shallow mark can't hold a filling. A deep one can.
6.1 Why Depth Matters for Backfilling
"Backfilling" means packing an engraved cavity with a contrasting material—paint for color or, in construction applications, sand and soil for texture and stability. It needs somewhere to physically sit, and a groove that's too shallow just won't hold it under normal handling or weather.
As a practical minimum, paint backfill generally needs at least about 0.6 mm (roughly 0.025") of depth to adhere reliably. Heavier construction fills—sand, soil, and stone—need dramatically more, often 2 inches or beyond, which is a different scale of project entirely.

6.2 Where This Shows Up in Real Projects
Logos and decorative designs are the most common use—deep engraving them and then filling with a contrasting color makes the design pop far more than a same-color engraving ever could.
Traceability marks like serial numbers and barcodes rely on the same depth for a different reason: durability. A deep mark survives handling, cleaning, and years of wear that a shallow surface mark simply won't.
7. How to Deep Laser Engrave with OneLaser Machines
Theory only goes so far. Here's an actual project, start to finish, on the OneLaser X Series.
7.1 What You Need
A piece of 5mm cherry wood (200×200mm), a OneLaser X Series laser engraver, and an air gun for cleanup.
7.2 Step-by-Step
Step 1 — Bed placement. Set the cherry wood on the bed, flat and parallel to the ground. A tilted surface throws off focus, and focus is everything for consistent depth.

Step 2 — Import and set parameters. Connect via USB, open the design file, and dial in:
- Engraving: 95% power, 200mm/s
- Cutting: 99% power, 50mm/s
- Expected engraved depth: 4mm
Treat these as a starting point, not gospel—every machine and every board of cherry is slightly different. Test first.

Step 3 — Focus. One touch of the focus button and AutoFocus™ handles it. Run a frame afterward to confirm the whole design sits within the material.

Step 4 — Run it. Press Start and let the machine work through its passes.

Step 5 — Clean up. Brush or blow away loose wood particles once it's done. Water works too, but it can warp the piece — brush or compressed air is the safer call.
View this post on Instagram — A post shared by OneLaserHQ (@onelaserhq)
8. What to Expect on Lower-Power or Desktop Machines
Worth being upfront about this: everything above assumes reasonably capable equipment. If you're running a lower-power or entry-level machine, deep engraving is still achievable—it just takes real patience.
8.1 The Real Relationship Between Power and Passes
Lower power doesn't mean you can't reach depth. It means you need proportionally more passes to get there, since each pass removes less material. This isn't a linear trade—the gap widens fast as power drops.

8.2 Knowing When You've Hit a Real Ceiling
There's a difference between "this process needs more passes" and "this machine physically can't do this." If you're already running double-digit passes and depth has essentially stalled, that's usually the material reaching thermal equilibrium—heat is dissipating as fast as the laser adds it, so more passes stop adding meaningful depth. At that point, more patience won't fix it; more power will.
A reasonable rule of thumb: if a target depth is taking more than roughly 8–10 passes on a well-focused, well-maintained machine, it's worth asking whether the project actually needs a higher-power source rather than continuing to push the current one.
9. Safety Considerations of Deep Laser Engraving
Protective equipment. Laser safety goggles and proper ventilation are nonnegotiable—you're being exposed to both direct laser risk and the fumes from vaporized material.
Fumes and debris. Deep engraving vaporizes far more material than a quick surface pass over a longer window of time. A real fume extractor, not just an open window, matters more here than on lighter jobs.
Standards. Follow recognized safety standards like ANSI Z136 for laser use and workplace safety—it's the reference point most professional shops build their safety protocol around.
10. FAQs About Deep Laser Engraving
What is the maximum depth achievable with deep laser engraving?
For metals, depth typically ranges from 0.5mm to 5mm depending on material and settings. For wood and acrylic on a desktop CO₂/RF machine, expect up to around 6 mm and 4 mm, respectively.
Can deep laser engraving be done on non-metal materials?
Yes—wood, acrylic, leather, and rubber all deep engrave well. Materials like paper, fabric, and glass are poor candidates for true depth and are better suited to surface marking.
Can deep laser engraving be done on stainless steel safely?
Yes, but plan for it: engraving removes the protective oxide layer, so apply a sealant, paint, or plating afterward to prevent corrosion—especially for anything exposed to moisture or handling.
What's the difference between deep engraving and 3D engraving?
Deep engraving removes material to a consistent, significant depth. 3D engraving varies that depth across the design to create a sculpted, dimensional appearance—it's an extension of the same technique, not a different process.
Do I need a fiber laser for deep metal engraving?
Yes. CO₂ and RF lasers work well for wood, acrylic, and leather, but metal needs a fiber laser's wavelength to absorb the energy properly and ablate cleanly.
How long does deep laser engraving take?
Deep laser engraving always takes longer than standard engraving because it requires multiple passes by design. Exact time depends on material, power, and target depth; see Section 8 for how power level affects pass count.
Does deep laser engraving affect material strength?
Minimal impact for most materials at reasonable depths. On thin stock, though, excessive depth can genuinely compromise structural integrity—this is part of why some industries, like aerospace, restrict how deep certain components can be engraved.
How do I increase the depth of laser engraving?
To increase the depth of laser engraving, you can increase power, lower speed, add more passes, or switch to a shorter focal-length lens—Section 4 covers the real trade-offs behind each option.
Conclusion
Deep laser engraving isn't one recipe—it's a set of trade-offs between power, speed, passes, and material, with genuinely different rules for metal versus wood and acrylic. Get the fundamentals right — the right laser type for your material, a lens choice that matches your goals, and an honest read on your machine's real ceiling — and the results hold up: durable, precise, and worth the extra time it takes to get there.
Start your engraving journey today with the OneLaser Group and put these numbers to work on your next project.