 Liquid error (sections/image-banner line 171): invalid url input
QR codes have become part of daily life — from contactless payments to product tracking to the little "scan me" sign taped to a coffee shop counter. QR code laser engraving takes that everyday convenience and makes it permanent. Instead of a sticker that peels or a print that fades, you get a code etched directly into wood, acrylic, metal, or glass — one that still scans perfectly years later.
I've engraved hundreds of QR codes at this point, for everything from WiFi coasters to asset-tracking tags, and I'll be honest: the actual engraving is the easy part. The part nobody warns you about is that a QR code can look absolutely perfect and still fail to scan. This guide covers both halves of that—how to engrave a beautiful, durable code and how to make sure it actually works when someone points a phone at it.
1. What Is QR Code Laser Engraving?
Definition and Key Principles
QR code laser engraving involves using a precision laser to etch a QR code onto a surface with high accuracy. Unlike printing, which relies on ink sitting on top of a surface, engraving permanently alters the material itself—so a laser-engraved QR code stays legible under conditions that would destroy a printed sticker in weeks.
How It Differs from Traditional Methods
| Aspect | Laser Engraving | Traditional Methods (Print/Sticker) |
|---|---|---|
| Durability | Permanent; resistant to abrasion, moisture, chemicals, and extreme temperatures | Prone to wear, fading, peeling, and damage under harsh conditions |
| Precision | Micron-level accuracy, even for high-density codes | May suffer smudging, misalignment, or lost detail on uneven surfaces |
| Environmental Impact | No consumables like ink or adhesives required | Generates waste from ink cartridges and adhesive backing |
| Scalability | Consistent quality across large production runs | Quality varies, especially at volume |
| Customization | Adjustable depth, integrated branding, custom shapes | Limited by the printing method and material |
| Material Compatibility | Works on metals, plastics, wood, glass, and acrylic | Adhesives don't reliably bond to every surface |
| Longevity | Stays clear and functional indefinitely, even in industrial settings | Deteriorates faster, often needing reapplication |
Advantages of Laser-Engraved QR Codes
- Durability — resistant to abrasion, weather, and chemicals
- Precision — high enough resolution to hold up even in dense, detailed codes
- Scalability — equally suited to a single custom gift or a production run of thousands
2. Engineering a QR Code That Actually Scans
Here's the part most guides skip and the part that actually determines whether your project works. A laser-engraved QR code project can look flawless and still fail at the counter, on the shelf, or in front of a customer—and it's almost always one of the four things below.
2.1 Error Correction Level: Pick More Than You Think You Need
Every QR code is generated with an error correction level — L, M, Q, or H — which determines how much of the code can be damaged, dirty, or obscured and still scan correctly.
- L (Low, ~7% correction) — fine for pristine digital displays, but risky for anything physical.
- M (Medium, ~15% correction) — the default most generators use; okay for smooth, clean materials.
- Q (Quartile, ~25% correction) — a safer choice for engraved surfaces, since char, texture, and minor smoke residue can "damage" part of the pattern from a scanner's point of view.
- H (High, ~30% correction)—the best choice if you're adding a logo in the center of the code, engraving onto a textured or reflective material, or you just want the widest safety margin.
My rule of thumb: for anything laser engraved, use Q or H, not the default M. The extra correction data costs you almost nothing in code size, and it's the single easiest way to prevent a "why won't this scan" support message later.
2.2 Module Size and the Quiet Zone
Every QR code is made of small squares called modules, and two things about them matter enormously for a QR code engraving laser:
- Module size relative to your laser's spot size. If a single module is only barely bigger than your laser's beam spot, adjacent modules can blur together into one blob, and the scanner can no longer tell where one square ends and the next begins. As a simple guide, keep each module comfortably larger — at least 3–4 times your laser's spot size — rather than pushing detail to the absolute limit.
- The quiet zone. This is the blank, unmarked border around the entire code. Scanners use this empty margin to recognize where the code starts and stops. A commonly used rule is to leave a border at least 4 modules wide on all sides—don't crop your design too tight to save space, and don't engrave text or logos directly against the edge of the code.
2.3 How Big Should Your QR Code Be?
Size should match how far away someone will be standing when they scan it, not just how much room you have on the material.
- Close-range scanning (a coaster, a business card, a product tag someone holds in their hand): roughly 15–20mm per side is comfortable.
- Mid-range scanning (a counter sign, a menu, or a desk plaque): 25–35 mm gives more margin for error.
- Longer-range scanning (a wall plaque, signage viewed from a few feet away): 40mm or more keeps modules large enough to resolve from a distance.
When in doubt, size up. An oversized QR code that scans instantly beats a beautifully compact one that makes customers fumble with their camera.
2.4 Raster vs. Vector: Which Actually Scans Better?
Most QR generators export as vector files (SVG), and most tutorials tell you to use them. In practice, I've found that a clean raster (bitmap) fill at a high enough DPI often scans more reliably than a vectorized QR code.
Here's why: vectorizing a QR code can round or slightly smooth the corners of each square module during conversion, and on some materials that subtle softening is enough to confuse a scanner reading tight, high-density codes. A crisp raster image, engraved at sufficient DPI, preserves the hard, square edges scanners are actually looking for.
Practical takeaway: If you're getting inconsistent scans despite good settings, try switching your QR code from a vector cut/engrave to a raster (image) engrave at 300+ DPI before you start changing your power and speed.
3. Best QR Code Laser Engraving Machine
Choosing the right laser is genuinely the difference between "this QR code scans every time" and "this works most of the time, I think." Here's how OneLaser's current lineup maps to QR code work.
3.1 For Precision Desktop Engraving
The OneLaser X Series — the XRF (38W RF) and XT (55W Glass) — is designed for this kind of detailed, high-resolution engraving work. The RF laser source produces a tighter beam spot than a standard glass tube, which directly is relevant for QR codes: a finer spot means smaller, cleaner modules and more resolution headroom before you run into the module-blur issue described above.

3.2 For Industrial Volume and Dual-Material Work
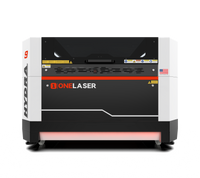
The OneLaser Hydra Gen2 Series (Hydra 7, 9, 13, and 16 Gen2) pairs a high-power glass CO₂ source with a precision RF laser in one machine, with an optional Q-Switch Fiber upgrade for metal marking. If you're producing QR-coded asset tags on metal alongside acrylic or wood signage, this model is the platform built to handle both without owning separate machines.

3.3 For Beginners Starting on a Diode Laser
If you're just getting started with a lower-cost diode machine, QR codes are very achievable—you just need to respect the module-size and quiet-zone rules above a little more carefully, since diode lasers typically have a larger minimum spot size than RF or CO₂ sources.
As a starting point on a common hobby diode setup, something like low power (around 5–10%); a high resolution setting (300+ DPI or a "4K" image resolution if your software offers it); and a single clean pass tends to produce a legible code on acrylic or coated materials—always verify with a real scan before finalizing.
If you find yourself fighting your diode's resolution ceiling on smaller codes, stepping up to an RF machine like the XRF is a natural next move, since the finer beam spot gives you more room before modules start to blur.
3.4 For Curved Surfaces: Drinkware and Cylindrical Items
QR codes aren't limited to flat signage. If you're engraving a scannable code onto a tumbler, water bottle, or drinkware line, a flat-bed machine with a bolt-on rotary attachment can work, but it's fussy to set up correctly every time.
VertiGo is a dedicated vertical rotary engraver built specifically for cylindrical items, with a self-centering rotary that removes the recalibration hassle between pieces—genuinely useful if a QR-coded tumbler or water bottle line is part of your regular product mix.

You can browse the full OneLaser lineup here to compare machines side by side.
4. Choosing the Right Material for QR Code Engraving
Common Materials Used
- Plastics — lightweight, good for contrasting color layers
- Wood — a rustic aesthetic for awards or promotional items
- Glass — a sleek, modern look for decorative or functional pieces
- Acrylic—versatile and one of the best all-around choices for laser-engraved QR codes
- Metals—stainless steel, aluminum, and brass for durability and contrast (fiber laser for bare metal, or CO₂ with a marking spray for coated metals)
Each material comes with its own quirks. Here's the honest rundown:
| Material | Challenge | Solution |
|---|---|---|
| Plastics | Melting or warping | Use lower power settings and faster speeds |
| Wood | Burn marks and low contrast | Optimize speed, and mask with tape to reduce charring |
| Glass | Chipping or cracking | Use specialized low-power settings or a wet-paper-towel technique |
| Acrylic | Lack of contrast on clear stock | Use backlighting, paint fill, or engrave on the reverse side |
| Metals | Reflectivity | Adjust power and focus carefully; use marking sprays on bare metal with CO₂. |
Enhancing Contrast for Better Scanning: High contrast between the modules and the background isn't just about looks—it's directly tied to scan reliability. Filling engraved areas with contrasting paint or using pre-treated/anodized material can significantly improve scan success rates on materials that do not naturally engrave with strong contrast.
5. Step-by-Step Process of QR Code Laser Engraving
Step 1: Choose Your Material — Taking Acrylic as an Example
Material choice drives everything else about your settings. For this walkthrough, we'll engrave a QR code on a transparent acrylic panel using the OneLaser XRF.

Step 2: Designing the QR Code
Generate a high-quality QR code using a tool like QR Code Monkey, or create one directly in LightBurn. Choose a size appropriate to your material and intended scan distance (see Section 2), and set your error correction level to Q or H before exporting.
For this project, we designed a 150×150×5mm QR code and used a 250×250×5mm acrylic plate as the raw material to carve and cut.

Step 3: Importing QR Code Designs
Import the QR code into your engraving software and position it on the virtual workspace to match your material's dimensions. Use the real-time preview, where available, to catch alignment issues before engraving.
Step 4: Configuring the Laser Engraver
Set your parameters based on the material and laser type. Critical settings include the following:
- Power — enough to engrave without over-penetrating or scorching
- Speed — slower for deeper engraving, faster for delicate materials
- Resolution — match your DPI setting to how much detail the QR code needs
For a 38W RF machine like the XRF on acrylic, a good starting point is moderate power with a resolution of 300–500 DPI, engraved as a raster image rather than a vector outline (see Section 2).
If you're working from a diode laser instead, start lower—around 5–10% power, a similarly high resolution setting, and a single pass—and always confirm with a scan test before finalizing.
Learn more: What is DPI in Laser Engraving?
Run a preliminary test on scrap material of the same type, then fine-tune as needed.

Step 5: Engraving the QR Code
Place the acrylic panel securely on the honeycomb table, making sure the workspace is stable to prevent vibration or misalignment during the job.
Learn more: How to Use a Laser Engraver

Locate the origin point using RedDot laser positioning—typically the top-right of the pattern.

Press the OneTouch™ autofocus button and let the machine find focus automatically with the motorized laser head.

Start the engraving process and let it run.

Step 6: Testing and Verifying
Don't just glance at it and call it done—see Section 6 below for the full verification process I'd actually recommend it before you consider a piece finished.

Step 7: Post-Engraving Enhancements
To improve contrast, fill the engraved sections with a contrasting paint or coating—especially effective on glass or acrylic where the mark can appear faint. Clean the surface thoroughly afterward to remove any residue that might interfere with scanning.
6. Testing and Troubleshooting
This is the section I wish existed the first time I engraved a QR code that looked perfect and then sat there refusing to scan for a confused customer. Don't skip this step.
How to Actually Verify a Code Before You Call It Done
- Use at least two different scanner apps or phone cameras, not just one. Different phones and apps handle decoding slightly differently, and a code that scans instantly on an iPhone camera can occasionally stumble on an older Android scanner app.
- Test from a few different angles, not just straight-on. A glare or shadow from an angle can hide part of the code in a way a straight-on test won't reveal.
- Test under different lighting—bright overhead light, dim indoor light, and outdoor daylight if the piece will live outdoors. Reflective materials especially can behave differently depending on glare.
Common Failure Modes and How to Fix Them
| Symptom | Likely Cause | Fix |
|---|---|---|
| The code won't scan at all | Incomplete etching — power too low or speed too fast | Increase power slightly or slow down; re-test on scrap first |
| Scans inconsistently and works sometimes | Low contrast between modules and background | Add paint fill, or switch to a higher-contrast material |
| The scanner can't find the code | Quiet zone too small or design cropped too tight | Add more blank border space—at least 4 modules wide on all sides |
| Modules blur together at close inspection | Module size too small relative to laser spot size | Increase the physical code size, or reduce module density in your generator |
| The code scans as garbled/wrong data | Design mirrored or inverted during export | Re-check orientation before engraving; re-export and re-test |
| Works when new, fails after months of use | Error correction level too low for real-world wear | Regenerate at Q or H level rather than the default M |
If a code isn't scanning and you can't immediately tell why, work through this table roughly top to bottom — it covers the large majority of real-world failures I've run into.
7. Overcoming Common Challenges
Ensuring Precision
The OneLaser X Series and Hydra Gen2 models are built with calibration features for micron-level accuracy, preventing pixel misalignment in intricate QR code designs. Automated focusing and real-time power monitoring stabilize output, reducing errors from energy fluctuations.
Achieving Contrast
The X Series delivers strong contrast through precise power adjustment and optimized frequency settings—exactly what a laser-engraved QR code needs to stay clearly scannable. Hydra Gen2's dual-laser capability adds further control over surface treatment for enhanced visibility.
Preventing Distortion
Vibration-resistant platforms and secure clamping keep material stable during engraving, while automatic focus adjustment maintains exact QR code proportions—even on uneven or delicate surfaces.
8. Applications of QR Code Laser Engraving
Industrial Uses
Asset Tracking: Permanent QR codes make managing tools, equipment, and inventory far more reliable than printed labels that peel off in a workshop environment.
Inventory Management: Engraved codes streamline supply chain operations with durable, scannable identifiers.
Consumer Products and Drinkware
Personalization: engraved QR codes on gadgets, jewelry, and gift items add a genuinely unique touch.
Drinkware and Curved Items: A scannable QR code engraved onto a tumbler or water bottle—linking to a recipe, a loyalty program, or a personal message—is a growing product category, and one where a rotary machine like VertiGo removes most of the setup friction compared to a bolt-on rotary attachment.
Branding: businesses can engrave QR codes on products linking to websites, warranties, or user manuals.
Marketing Applications
Engraved codes bridge physical products with digital experiences — directing customers to promotions, augmented reality content, or exclusive offers. From elegant engravings on awards to discreet codes on high-value items, jewelers are even incorporating QR codes into pieces that link to personalized messages or authentication data.
Explore Ideas with Our Community!
9. Innovative Trends
3D QR Code Engraving
Emerging techniques enable QR codes to be engraved on three-dimensional surfaces, opening new possibilities for product design and branding.
Colored QR Codes
Advanced methods — multiple laser passes or added pigments — allow for visually striking, colored QR codes that still scan reliably.
Miniaturized QR Codes
Cutting-edge precision now allows tiny, yet still scannable, QR codes for compact applications like microchips and jewelry — though at this scale, following the module-size and error-correction guidance in Section 2 is essential rather than optional.
10. FAQs
Can you laser engrave a QR code?
Yes, absolutely. A laser QR code engraver can etch a permanent, high-resolution QR code onto acrylic, wood, glass, coated metal, or bare metal (with a fiber laser), and the result is far more durable than a printed or adhesive alternative.
What error correction level should I use for a laser-engraved QR code?
Use Q or H rather than the default M. Engraved surfaces have texture, char, and sometimes glare that a scanner can interpret as damage, so the extra error correction built into Q or H levels gives you real-world headroom — especially if you're adding a logo inside the code.
How big should a laser-engraved QR code be?
Roughly 15–20mm for close-range scanning (a coaster or business card), 25–35mm for mid-range (a counter sign or desk plaque), and 40mm or more for anything viewed from a few feet away, like wall signage.
Can a diode laser engrave a scannable QR code?
Yes, though diode lasers typically have a larger beam spot than RF or CO₂ machines, so it's especially important to keep your modules larger and your quiet zone generous. Start with low power, high resolution, and a single pass, and always verify with a real scan.
Why isn't my QR code scanning even though it looks fine?
This is almost always one of four things: contrast is too low, the quiet zone (blank border) is too small, modules are too small relative to your laser's spot size, or the design was mirrored/inverted during export. Work through the troubleshooting table in Section 6 to isolate the cause.
What are the best materials for laser-cut QR codes?
Cast acrylic is a top choice for clarity and frosted contrast. Stainless steel and anodized aluminum work well with fiber engraving for outdoor durability, and birch plywood or hardwood are solid choices for a warmer, rustic look.
Can laser engraving be customized for different QR code designs?
Yes—logo integration inside the code, decorative frames and borders, custom shapes, and personalized branding around the code are all possible, as long as the core QR pattern stays intact and contrast is preserved.
What equipment is recommended for professional QR code engraving?
A CO2 or RF laser for acrylic, wood, and coated materials; a fiber laser for bare metal; a rotary attachment (or a dedicated rotary machine like VertiGo) for cylindrical items; proper ventilation; and reliable design software such as LightBurn or RDWorks.
Conclusion
QR code laser engraving sits at a nice intersection of craft and function — it needs to look good, but more importantly, it needs to work every single time someone scans it.
Get the engineering right (error correction, module size, quiet zone), choose the right material and machine for your project, and build in a real verification step before you call anything finished.
Do that, and a laser-engraved QR code becomes one of the most durable, reliable pieces you can put in front of a customer.
Have a QR code project you're not sure how to approach? Reach out to our team — we're happy to help you get it right the first time.