 Liquid error (sections/image-banner line 171): invalid url input
A stone laser engraver offers a precise, non-contact method for etching intricate designs without compromising structural integrity. Unlike carving or sandblasting, it vaporizes the surface, creating crisp, permanent markings on materials like granite, marble, and slate.
Preferred for its precision and efficiency, a stone laser engraver minimizes waste, requires no physical contact, and allows for detailed customization. Digital control enables depth, contrast, and resolution adjustments for professional results.
In this article, we will have a trip to know as completely as we can about laser engraving stone.

1. How Does a Stone Engraving Laser Work?
Laser engraving on stone works through a process called laser ablation. The machine directs a concentrated beam onto the stone's surface, which heats the targeted area almost instantly—we're talking temperatures that can exceed several hundred degrees Celsius in a fraction of a second. That intense, localized heat causes micro-fractures in the stone's crystalline structure and vaporizes a thin top layer of material, leaving behind a permanent, crisp mark. No chiseling, no sandblasting media, no physical contact at all.
Think of it like using a magnifying glass to burn a leaf on a sunny day, except instead of relying on sunlight, you're using a computer-controlled beam that can be aimed with sub-millimeter precision, thousands of times per second, to "paint" an image pixel by pixel.
1.1 Why Wavelength Matters
Different lasers emit light at different wavelengths, and stone doesn't absorb every wavelength equally well. A CO₂ laser produces light at roughly 10.6 micrometers — a wavelength that most silicate and carbonate minerals (the building blocks of granite, marble, and slate) absorb efficiently. That's the core reason CO₂ dominates this category: the energy goes into the stone instead of bouncing off it.
Fiber lasers operate at a much shorter wavelength (around 1.06 micrometers), which is fantastic for metal but less consistently absorbed by stone—though it still works well on certain dark, mineral-dense surfaces. Diode lasers vary depending on the specific diode, but generally sit in a range that works reasonably well on darker stones and struggles more on light, reflective ones.
1.2 The Physics of Contrast
Ever wonder why some engravings turn bright white and others barely show up? It comes down to what's happening at a mineral level:
- Carbonate-based stones (marble, limestone) tend to ""frost"—the laser breaks down calcium carbonate into calcium oxide and CO₂ gas, leaving a porous, light-scattering surface that reads as white or pale gray.
- Silicate-based stones (granite and basalt) tend to fracture at a microscopic level rather than chemically change, which scatters light differently and often produces a lighter gray mark rather than a true white.
- Layered stones (slate) simply have their top mineral layer removed, exposing a different-colored layer underneath—which is why slate gives such reliable, high contrast with minimal fuss.
Knowing this helps you predict results before you even run a test: if a stone is carbonate-heavy and light-colored to begin with, don't expect much contrast without a finishing step.
1.3 What Type of Laser is Required to Engrave Stone?
Selecting the appropriate laser type is crucial for effective laser engraving stone. The primary laser types used include:
- CO₂ Lasers — The industry favorite. Granite, marble, and slate readily absorb their wavelength, producing clean, high-contrast results across a wide range of stone colors and densities. Typical power for serious stonework ranges from about 30W on the low end up to 100W+ for industrial machines. If you're only buying one machine for stone, this is the category to choose.
- Fiber Lasers — Best known for metal, but capable of high-contrast marking on certain darker stones, especially with MOPA or galvo configurations. It's less commonly used for general stone engraving because the beam profile is optimized for reflective metal surfaces, not porous stone—but for fast, fine surface marks on dense, dark stone, it's a legitimate option.
- Diode Lasers— usually in the 10W–40W optical power range. They can engrave darker stones, like black granite, reasonably well, but usually need multiple passes to reach the depth and contrast that a CO₂ laser achieves in one pass.
1.4 Grayscale Engraving Techniques
To achieve nuanced shading and depth in stone engravings, grayscale techniques are employed:
Grayscale Matrix Method:
This technique involves varying the laser's power and speed to create different shades, resulting in a matrix of grayscale values. By adjusting these parameters, it's possible to achieve detailed shading effects, enhancing the visual complexity of the engraving.

Grayscale Gradient Method:
In this approach, the laser's intensity is modulated to create smooth transitions between different shades. By controlling the depth and energy applied to the stone's surface, stunning visual gradients can be achieved, adding a three-dimensional appearance to the engraving.

For optimal results, it's recommended to use the grayscale matrix method on stone surfaces with at least a 3x3 cm flat area and to conduct sufficient testing to fine-tune the laser settings.
By understanding the science behind laser engraving stone and selecting the appropriate laser type and techniques, one can achieve precise and aesthetically pleasing engravings on various stone materials.
2. Best Types of Stone for Laser Engraving
2.1 Soft vs. Hard Stones
The composition and density of stone play a critical role in determining engraving quality.
Softer stones, such as limestone and sandstone, are easier to engrave but may lack fine detail due to their porous nature.
Harder stones, like granite and marble, provide crisp, high-contrast engravings but require higher laser power to achieve deep and lasting marks.
How Stone Density Affects Engraving Quality
|
Stone Type |
Density (g/cm³) |
Engraving Characteristics |
Ideal Use Cases |
|
Soft Stones (Limestone, Sandstone) |
2.0 - 2.6 |
Easy to engrave, lower contrast, porous surface may absorb residue |
Rustic signage, textured designs |
|
Medium Stones (Slate, Basalt) |
2.5 - 2.9 |
Smooth engravings, good contrast, matte finish |
Home décor, artistic plaques |
|
Hard Stones (Granite, Marble) |
2.6 - 3.0 |
High precision, sharp detail, excellent contrast |
Memorial plaques, luxury engravings |
2.2 Granite
Granite is one of the most durable stones for laser engraving. Its fine-grained composition allows for highly detailed designs with exceptional contrast, especially when using a CO₂ laser.
The engraved areas often appear lighter against the dark surface, creating a striking visual effect. Granite is widely used for memorial plaques, signage, and architectural applications due to its longevity and resistance to environmental factors.

2.3 Marble
Marble engraves with a refined, sophisticated look. The laser interacts with the calcium carbonate composition, producing a smooth white engraving that contrasts beautifully with darker marble shades.
This stone is ideal for intricate artwork, decorative tiles, and commemorative plaques where a classic aesthetic is desired. The polished surface enhances the engraved details, making them more visible under proper lighting.

2.4 Slate
Slate has a naturally layered structure that produces a unique, matte finish when engraved. The laser removes the top layer, revealing a lighter shade beneath, creating a subtle yet visually appealing contrast.
Unlike polished stones, slate provides a rustic, artistic feel, making it popular for customized coasters, wall art, and personalized gifts. Its smooth but slightly textured surface ensures excellent engraving results.

Ideas from Milestone Mercantile
2.5 River Rock & Pebbles
Laser engraving on river rocks and pebbles presents a unique challenge due to their irregular shapes and varying mineral compositions.
However, when properly positioned, these stones can be customized with names, symbols, or small graphics, making them excellent for personalized gifts, garden markers, or decorative keepsakes.
Lighter-colored stones generally yield better contrast, while darker stones may require post-processing to enhance visibility.

2.6 Other Materials: Exploring Quartz, Limestone, and Basalt
Basalt
Dense and volcanic in origin, basalt engraves with smooth, solid contrast—similar to slate but with a heavier, more substantial feel. It is popular for whiskey stones, spa items, and mandala-style art, where a clean, natural-looking mark matters more than deep relief.
Soapstone
One of the softest stones you'll encounter, which makes it forgiving but also more prone to surface scratching after engraving if it's not handled carefully. Commonly found in kitchen items such as trivets and cutting boards, as well as in small decorative carvings.
Travertine
A porous, textured stone often used in tile and architectural work. Engraving quality is decent, but the natural pitting in the surface can interrupt fine detail, so bolder designs generally photograph and engrave better than intricate line art.
Quartz, Limestone, and Other Materials
Quartz produces a delicate frosted effect but is genuinely temperamental (see the warning below). Limestone gives a soft, weathered look that suits rustic signage. Each of these responds differently to laser settings, so treat any new material as an experiment until you've run your own tests.
2.7 Comparison Table of Stone Engraving Characteristics
Stone Type |
Density (g/cm³) |
Engraving Characteristics |
Ideal Use Cases |
Soft Stones (Limestone, Sandstone) |
2.0 - 2.6 |
Easy to engrave, lower contrast, porous surface may absorb residue |
Rustic signage, textured designs |
Medium Stones (Slate, Basalt) |
2.5 - 2.9 |
Smooth engravings, good contrast, matte finish |
Home décor, artistic plaques |
Hard Stones (Granite, Marble) |
2.6 - 3.0 |
High precision, sharp detail, excellent contrast |
Memorial plaques, luxury engravings |
2.8 Stones to Avoid — or Test Very Carefully First
This is the step a lot of beginners skip, and it's the one that saves the most headaches and wasted material:
- High-quartz rocks have a crystalline structure that tends to fracture or crack along internal lines rather than engraving cleanly. If you're not sure whether a stone is quartz-heavy, run a low-power test pass in an inconspicuous corner first, and watch closely for hairline cracks spreading beyond the engraved area.
- Light sandstone engraves, but contrast is often weak and may require paint fill afterward to look intentional rather than accidental.
- Concrete and brick can be marked, but the rough, inconsistent texture usually limits you to shallow etching rather than a defined engraving — think "logo visible up close" rather than "crisp memorial text."
- Wet or freshly sealed stone—moisture trapped in the surface can flash to steam under laser heat and cause the surface to crack or pop, sometimes violently enough to damage the lens. Always let stone dry completely (ideally 24–48 hours after cleaning) before engraving.
- Stones with visible internal fractures or cleavage lines — even in "safe" materials like granite, an existing hairline crack can propagate under thermal stress and split the piece.
Quick rule of thumb: if a stone feels chalky, crumbly, or damp, or you can see internal veining that looks like it might be a weak point, test a scrap piece before you commit your good material. It takes five extra minutes and saves you from ruining a $40 granite blank.
3. How to Choose the Best Laser Engraver for Stone?
I get asked, "What's the best laser engraver for stone?" more than almost any other question. Here's what actually matters when you're shopping and what's mostly marketing noise.
3.1 Laser Power & Wattage
Clarity and depth on stone come down to power more than almost any other spec. A machine like the OneLaser XRF runs a 38W CO₂ laser, delivering deep, high-contrast engravings on granite, marble, and slate that lower-power desktop machines simply can't match without multiple slow passes.
As a general guideline, under 20W struggles with dense hard stone, 30–40W handles most desktop stone projects comfortably, and 50W+ starts moving into faster production-speed territory.

3.2 Work Area
A bigger bed means bigger, bolder projects without repositioning. The XRF offers a 600mm x 300mm workspace with adjustable bed height, which comfortably handles both small coasters and bulkier slabs. If you're planning larger architectural pieces or batch production, you'll want to look at machines with a larger bed and more bed-height clearance.
3.3 Cooling & Ventilation
Stone generates real heat and fine dust during engraving — more so than wood or acrylic. Look for industrial-grade water cooling and proper air filtration. The XRF's Fumeguard™ system keeps the workspace clean and protects the machine's internals from stone dust buildup over time, which matters a lot for long-term reliability.
Cheaper desktop machines that rely on basic fans often see inconsistent results and more frequent maintenance once you start running them regularly.
3.4 Software Compatibility
A stone laser engraving machine is only as good as the software driving it. LightBurn and RDWorks compatibility (both supported on OneLaser machines) means you're not stuck with clunky, restrictive proprietary software when you want to fine-tune vector or raster designs, adjust dithering for grayscale work, or import complex file formats.
3.5 User-Friendly Features
Autofocus and red dot positioning remove a lot of the guesswork—especially useful on stone, where getting the focal height wrong by even a millimeter can mean the difference between a crisp engraving and a shallow, muddy one. If you're engraving a lot of irregular river rocks, autofocus alone will save you an enormous amount of trial and error.

3.6 Support, Warranty, and Financing
This one gets overlooked constantly. Stone is hard on a machine — more dust, more heat cycling, more wear on optics. A solid warranty (OneLaser backs its machines with a 3-year warranty) and access to real, responsive technical support matter more once you're running stone regularly than they do for someone only engraving wood. If you're not ready to pay full price upfront, financing options can make sense—OneLaser offers financing for qualifying small businesses.
3.7 Which One-Laser Machines Can Engrave Stone?
This is a question I get constantly, so let's make it simple: most of the OneLaser lineup can handle stone, with the right machine depending on your workload and budget.
| Series | Best For | Stone Performance |
|---|---|---|
| X Series (XRF, XT) | Hobbyists, small businesses, desktop-scale projects | Great for coasters, plaques, and small-to-medium memorial pieces |
| Cobra Series | Growing workshops with regular stone orders | More power and a larger bed for bigger signage and décor pieces |
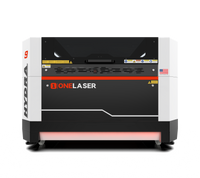
| Hydra Series | High-volume businesses | Industrial-grade output for memorial work, architectural signage, and bulk orders |
You can browse the full OneLaser machine lineup here to compare power, bed size, and pricing side by side and find the right fit for how much stone work you're actually planning to do.
4. Ultimate guide for Laser Engraving Stone
4.1 Materials to Prepare
- OneLaser XRF Laser Engraving Machine
- A piece of rock slate (or your stone of choice)
- Varnish spray
- Modeling clay, double-sided tape, or clamps (for irregular stones)
- Isopropyl alcohol or a damp microfiber cloth
- Painter's tape or acrylic paint
4.2 Step-by-Step Guide to Laser Engrave Stone
Step 1: Clean the Rock Slate
Before engraving, thoroughly clean the slate to remove dust, dirt, and surface residue. A microfiber cloth or soft brush works best to clear away loose particles, ensuring an even engraving surface. Any impurities left on the stone can interfere with laser penetration, leading to inconsistent results.
Step 2: Spray Varnish on the Surface
A thin, even layer of varnish spray enhances contrast and protects the engraved details. Lightly coat the slate and allow it to dry completely before proceeding.
This step is especially useful when engraving on darker stones, as it helps the laser create sharper, more visible markings.

Step 3: Upload the Design and Check the Parameters
Import the engraving design into LightBurn, connect to the OneLaser XRF. Adjust settings for power, speed, and resolution based on the material’s density.
Higher power levels may be needed for deep engravings, while lower settings work well for surface etching. A test run on a small section of the slate can help fine-tune these parameters for the best results.
Recommended settings:
- Speed: 467mm/s
- Laser Power: 38W RF Laser
- Max Power: 80%
- Min Power: 10%

Step 4: Locate the Design on the Rock Slate
For flat stones: Use Red Dot Positioning to align your design, and let autofocus handle the height. This is the fast, straightforward path for slate, tile, and cut granite blanks.
For irregular stones like river rocks: This is where a lot of beginners get frustrated. Uneven surfaces need a defocusing technique—set the focal point 2–4 mm above the highest point of the stone so the beam stays sharp even as the surface rises and dips beneath it. Then secure the stone firmly with modeling clay, double-sided tape, or a clamp. Even a slight shift during engraving can blur or distort your design, and on a curved stone, this can ruin an otherwise perfect run in the final ten seconds.
A trick I use often: press the stone into a small mound of modeling clay so it sits flat and stable, then check with a small level or by eye that the engraving face is roughly perpendicular to the laser head before running the job.

Step 5: Start Laser Engraving
Once everything is aligned, run the job. The XRF's Fumeguard™ filtration keeps dust and debris from settling back onto your workspace mid-process, which matters more with stone than almost any other material—stone dust is fine, gritty, and gets everywhere if it's not being actively extracted.
Watch the first 20–30 seconds of any new job closely. If you see excessive smoke, sparking, or the stone surface discoloring unexpectedly, pause and check your settings before continuing.

Step 6: Clean the Surface
After engraving, gently wipe the slate with a damp cloth to remove any residual dust or varnish. For a polished look, a second coat of varnish can be applied to enhance contrast and protect the design. This final step ensures the laser engraved stone retains its detail and clarity over time.

Step 7: Inspect and Finish
Hold the piece up to natural light and check contrast from a few different angles—stone often reads differently under warm indoor lighting than it does outdoors. If contrast is weaker than you'd like, this is the point to move on to the finishing techniques in Section 6 rather than assuming the piece is a loss.
5. Dialing In Your Settings for Every Stone Type
Every stone reacts differently, so think of the numbers below as starting points for a 38W-class CO₂ laser, not rules carved in, well, stone. Always confirm with a test grid on your specific material batch.
| Stone Type | Power | Speed | Passes | Notes |
|---|---|---|---|---|
| Slate | 70–80% | 400–500mm/s | 1 | Reliable, high contrast, minimal tweaking needed |
| Granite (dark) | 70–90% | 150–250mm/s | 1–2 | Slower speed for deeper, sharper marks |
| Granite (light) | 60–75% | 150–250mm/s | 1–2 | May still need paint fill even with good settings |
| Marble | 50–65% | 200–300mm/s | 1 | Lower power to avoid cracking; frosted white result |
| Basalt | 70–85% | 200–300mm/s | 1–2 | Similar to granite, consistent contrast |
| River Rock | 60–80% | 150–250mm/s | 1–3 | Varies hugely by stone; always test each piece |
| Soapstone | 30–50% | 300–400mm/s | 1 | Very soft, easy to over-engrave |
| Sandstone/Limestone | 40–60% | 250–350mm/s | 1 | Porous: expect lower natural contrast |
General Guidelines
- DPI: 500+ for fine detail work; lower DPI for bold, simple designs. For photo work, stick closer to 250–333 DPI as noted in Section 4.
- Focus: Autofocus handles most flat surfaces well. On uneven stone, a slightly raised focal point (2–4mm) improves clarity, as covered in the tutorial.
- Z-offset: A small negative Z-offset deepens engravings when you need more presence in the mark, particularly on granite where subtle relief adds to the effect.
- Air assist: Clears debris in real time, keeping edges crisp instead of hazy — this matters more on stone than almost any other material because of how much fine particulate the process generates.
- Passes: Multiple lighter passes usually beat one aggressive pass—it prevents over burning while still achieving depth, especially on granite and basalt where you want both contrast and a bit of tactile relief.
6. Making Low-Contrast Stone Pop: Finishing Techniques
Some stones — especially light marble, pale granite, and sandstone — don't give you much natural contrast straight off the laser. That doesn't mean the project's a bust; it just means you finish it the way stonemasons have for generations, with a little post-processing.
- Color Fill: Once the engraving is done and cleaned, brush acrylic paint into the engraved grooves, let it dry, then gently wipe the excess off the raised surface with a slightly damp cloth or fine sandpaper. This is the go-to technique for making text and fine lines pop on light-colored stone, and it's the same basic method used on trophies and awards for decades.
- Mineral Oil Treatment: For slate specifically, wiping the surface with mineral oil darkens the background stone, which makes the lighter engraved area stand out more sharply—no paint required, and it's reversible if you don't like the result.
- The Painter's Tape + Spray Paint Method: For stones with no natural contrast, mask the surface with painter's tape before engraving. The laser cuts through the tape and into the stone; you then spray paint over the exposed engraved pockets (gold, black, and white are popular choices) and peel the tape away for crisp, colored detail without getting paint on the surrounding surface.
- A Second Coat of Varnish: As covered in the tutorial, this both protects the piece and subtly boosts contrast by giving the surface a slight sheen that catches light differently in the engraved versus non-engraved areas.
- Sealing for Outdoor Use: If a piece is heading outside—a garden marker or memorial stone—apply a stone sealant after any color fill has fully cured. This protects both the engraving and any paint from weather, UV fading, and moss growth over time.
A quick example from my own testing: a plain piece of white marble that looked almost invisible right off the machine turned into a genuinely striking house-number plaque after five minutes with a paintbrush and black acrylic. Don't judge a stone engraving until you've finished it.
7. Troubleshooting: Why Stone Engravings Go Wrong
Even experienced makers run into these issues. Here's the fast diagnosis for the most common problems.
| Problem | Likely Cause | Fix |
|---|---|---|
| Stone cracked or popped mid-engraving. | Trapped moisture, or an existing internal fracture | Dry stone fully before starting; inspect for hairline cracks first |
| Engraving looks patchy or uneven | Dirty surface, or uneven stone thickness/focus | Clean thoroughly; use autofocus or defocus technique on uneven pieces |
| Almost no visible contrast | Light-colored, carbonate-heavy stone (marble, light granite) | Use a finishing technique from Section 6—paint fill or oil treatment |
| Edges look blurry or "fuzzy." | Stone shifted during the job, or focus was off | Secure the stone firmly with clamps or clay and recheck focal height |
| Excessive chipping around the design | Power set too high, especially on brittle or layered stone like slate | Reduce power; add an extra lighter pass instead of one aggressive pass |
| Smoke residue staining the surface | Insufficient air assist or ventilation | Increase air assist and clean surface immediately after engraving |
| The design looks fine up close but disappears from a distance | Line weight or detail too fine for the stone's natural texture | Bump up line thickness or font size for textured stones like travertine |
8. Safety Considerations You Shouldn't Skip
Stone engraving generates fine particulate dust, and depending on the stone type, that dust can contain crystalline silica—a material that's genuinely hazardous to breathe in over repeated, unprotected exposure. This isn't meant to alarm you, just to make sure it's on your radar the same way it would be for any woodworker running a table saw without eye protection.
- Ventilation and filtration matter more with stone than most other laser materials. A proper fume/dust extraction system, like the Fumeguard™ filtration built into the XRF, is worth prioritizing rather than treating as optional.
- Wear a properly rated dust mask (N95 or better) when cleaning stone dust off a finished piece, especially if you're doing this regularly or working with sandstone, granite, or other silica-containing stone.
- Eye protection appropriate for your laser class should always be worn or the enclosure kept closed during operation, same as with any other material.
- Never engrave wet stone. Beyond the cracking risk covered earlier, trapped moisture flashing to steam can occasionally send small stone fragments flying.
- Clean your workspace regularly. Stone dust settles into surfaces and mechanical components more readily than most other material dust, and it can affect rails, belts, and optics over time if left unaddressed.
None of this should discourage you from engraving stone—thousands of makers do it safely every day—but treating ventilation and dust control as a real priority, not an afterthought, is part of doing this well long-term.
9. Laser Engraving vs. Sandblasting and Hand Carving
If you've only ever seen stone engraved by hand or sandblasted, the differences are worth knowing before you decide which approach fits your project.
| Factor | Laser Engraving | Sandblasting | Hand Carving |
|---|---|---|---|
| Physical contact | None | Abrasive media contact | Direct tool contact |
| Consistency across a batch | Very high | Moderate | Low (varies by carver) |
| Detail/photo capability | Excellent | Good for bold designs | Limited for fine detail |
| Speed | Fast (minutes) | Moderate | Slow (hours) |
| Ongoing consumable cost | Very low | Higher (media, compressed air) | Labor-intensive |
| Depth/relief capability | Shallow to moderate | Can achieve deep relief | Can achieve deep, sculptural relief |
| Best for | Personalized items, text, photos, logos | Large surfaces, deep architectural relief | One-of-a-kind, artisanal stonework |
No physical contact means no wear on tools and no risk of the material chipping under uneven hand pressure.
Digital repeatability — once you've dialed in settings, every piece in a batch comes out identical, something that's nearly impossible with hand carving.
Lower ongoing cost—sandblasting requires compressed air and abrasive media that need regular replenishing; a laser's "consumable" cost is close to zero.
Speed—a design that might take a stonemason hours by hand can often be engraved in minutes.
Fine detail—laser engraving handles photographs and intricate line work at a resolution that sandblasting and hand tools simply can't replicate.
The trade-off: sandblasting can achieve much deeper, more sculptural relief on very large surfaces, and skilled hand carving still has a place in high-end, one-of-a-kind stonework. But for most personalized, business, and memorial applications, laser engraving wins on precision, consistency, and cost.
10. Where the Stone Engraving Market Is Headed in 2026
If you're thinking about turning this skill into a business, the timing is good. Laser-engraved stone product market trends for 2026 point toward steady growth in a few specific areas:
- Personalized memorial and pet-memorial products continue to be one of the fastest-growing categories, driven by demand for affordable, meaningful keepsakes that don't require the cost or lead time of a traditional monument company.
- Small-batch custom home décor (engraved coasters, house plaques, and garden markers) is increasingly sold direct-to-consumer through platforms like Etsy and local craft markets, rather than through traditional stone suppliers—cutting out the middleman and improving margins for independent makers.
- Hybrid businesses that combine stone with other materials—wood, metal, acrylic—are becoming more common, since a single stone laser engraving machine paired with the right accessories can serve multiple product lines instead of just one, spreading equipment cost across more revenue streams.
- Faster turnaround expectations are pushing more small operators toward higher-wattage desktop machines (like the XRF) instead of slower diode setups, since customers increasingly expect quick custom orders rather than multi-week waits from traditional engravers.
- Corporate and event demand for durable, premium-feeling branded items (awards, table numbers, signage) is growing as businesses move away from disposable printed materials toward reusable, higher-perceived-value pieces.
If you're weighing whether to invest in a laser engraver for stone this year, the market data suggests demand for personalized, fast-turnaround stone products isn't slowing down anytime soon — and desktop-scale machines are increasingly capable of meeting that demand without an industrial-size investment.
11. The Business Side: What Can You Actually Charge?
If you're considering this as a side hustle or full business, it helps to know what similar products typically sell for. These are general market ranges—your local market, material cost, and finishing time will shift things up or down.
- Personalized slate coasters (set of 4): Often sold in the $25–$45 range.
- Small engraved river rocks / word rocks: Typically $8–$20 each, depending on detail and finishing.
- Photo-engraved granite or marble plaques: Commonly $60–$200+, scaling with size and photo complexity.
- Pet memorial stones: Frequently priced between $30–$80 depending on size and material.
- Custom stone house signs or address plaques: Often $80–$300+, reflecting larger material size and installation considerations.
- Corporate awards or recognition plaques: Frequently $50–$150 per piece, sometimes more for large-batch corporate orders.
A few pricing tips from experience: material cost is usually a small fraction of your final price — your time, design work, and machine investment are what you're really charging for. Photo engravings and anything requiring paint fill or sealing should be priced higher than simple text engravings, since the finishing step adds real time. And batch orders (like wedding favors or corporate gifts) are where a higher-wattage machine like the XRF pays for itself quickly, since faster engraving speed directly translates to more completed orders per hour.
12. Top Applications of Laser Engraved Stone
Laser engraving on stone is a durable and elegant way to create personalized, artistic, and professional designs. From gifts to business signage, it adds a unique touch to various applications.
12.1 Personalized Gifts
Laser-engraved stone gifts are timeless keepsakes.
- Custom stone coasters: Engrave names or special dates to create functional yet sentimental items perfect for weddings, anniversaries, or housewarming gifts. Learn more: How to Make a Laser Engraved Coaster
- Photo plaques: Capture memories in stone by engraving cherished photographs, creating a lasting tribute to special moments.
- Decorative tiles: Add meaningful quotes, intricate patterns, or family crests to tiles, making them ideal for home décor or personalized gifts.

12.2 Memorials & Headstones
Laser engraving stone ensures lasting tributes.
- Granite headstones: Create detailed inscriptions, portraits, or religious symbols on granite, offering a dignified and permanent memorial.
- Memorial plaques: Honor loved ones with personalized text, dates, or images, perfect for indoor or outdoor remembrance spaces.
- Garden remembrance stones: Engrave heartfelt messages or names on stones, creating serene and lasting memorials for gardens or outdoor spaces.

12.3 Architectural & Decorative Pieces
Engraved stone enhances interiors and exteriors.
- Stone wall art: Add intricate patterns, landscapes, or abstract designs to stone walls, transforming them into stunning focal points.
- Engraved tiles: Create unique accents for homes and offices by engraving tiles with custom designs, logos, or artistic elements.

12.4 Signage & Business Branding
Stone signage is professional and long-lasting.
- Corporate logos: Engrave logos on stone for office spaces, creating a sophisticated and enduring representation of your brand.
- Outdoor plaques: Craft durable signs for businesses, featuring engraved names, addresses, or promotional messages that withstand the elements.
- Directional markers: Guide visitors with engraved stone signs, combining functionality with elegance for parks, campuses, or corporate spaces.

12.5 Art & Jewelry
Laser engraving stone adds detail to creative works.
- Engraved pendants: Customize jewelry with names, symbols, or intricate designs, offering unique and meaningful accessories.
- Sculptures: Enhance stone artwork by adding text, images, or textures, making each piece a personalized masterpiece.

Laser engraved stone is versatile, elegant, and built to last, making it ideal for both personal and professional uses. Its durability and aesthetic appeal ensure that each engraved piece becomes a cherished or impactful creation.
Explore Ideas with Our Community!
7. FAQs
How does laser engraving differ from traditional stone carving?
Laser engraving uses a focused beam to etch designs without physical contact, while traditional carving relies on chisels and manual tools. Laser is faster and more precise for text or images; hand carving allows deeper, sculptural effects.
What's the difference between stone engraving and laser etching?
Engraving typically involves deeper material removal (often mechanical or sandblasted). Laser etching creates surface-level marks by vaporizing or discoloring the stone—best for fine detail, logos, and photos.
Can you laser engrave sandstone?
Yes, and it produces good contrast thanks to its porous texture, though it may need paint fill for maximum visibility.
Can you laser engrave marble?
Yes, but use careful, conservative settings—excessive heat can cause cracking on marble more easily than on denser stones like granite.
Can brick or concrete be laser engraved?
Both can be marked, though concrete's rough texture usually requires more power and slower speeds, and results lean toward shallow etching rather than deep engraving.
Can a laser actually cut through stone or just engrave the surface?
Standard laser engravers — including CO₂ machines like the XRF — mark and engrave the surface of stone; they don't cut through thick slabs. If you need to cut stone, that requires different, specialized equipment entirely.
Can you laser engrave quartz?
Technically yes, but proceed carefully. Quartz's crystalline structure makes it prone to cracking or fracturing unpredictably rather than engraving cleanly. Always test on scrap material first, and expect inconsistent results compared to granite or slate.
What laser settings work best for stone engraving?
There's no universal setting—mineral content, color, and finish all affect the outcome. Start conservative, run a small test grid on scrap material, and adjust from there using the settings table in Section 5 as a starting point.
How heavy can the stone be for a laser engraver?
This depends on your machine's bed size and load capacity but ranges from a few pounds up to several hundred pounds for larger industrial setups.
How deep is decorative laser stone engraving?
Typically 0.1–0.5mm, depending on settings and stone density.
What are the best materials for engraved stones or "word rocks"?
Slate, marble, granite, river rocks, and basalt are the most popular. Slate and marble offer strong contrast for decorative and gift items; granite and basalt hold up better outdoors.
Can I engrave different stone types with the same laser machine?
Yes — one machine can handle many stone types, but you'll need to adjust settings for each. Always test on scrap material before running your final piece.
Does laser-engraved stone fade or wear off over time?
No — unlike printed or painted-only designs, the engraving itself is a permanent physical change to the stone's surface. Any color fill may fade with prolonged sun exposure, but the engraved mark itself remains.
Can I engrave stone tumblers or curved stone surfaces?
Yes, with a rotary attachment designed for cylindrical or curved objects, though most home stone projects (coasters, plaques, and flat pebbles) don't require one.
Is it safe to engrave stone indoors?
Yes, as long as you have adequate ventilation and dust extraction—see the safety section above. A machine with built-in filtration, like the XRF's Fumeguard™ system, makes indoor use significantly more comfortable and safer for regular work.
How do I know if a stone is safe to test before engraving my final piece?
Check for visible cracks or veining; make sure it's completely dry, and if you're unsure of the mineral composition, run a small low-power test pass in an inconspicuous spot first.
Have Questions? Contact Us Now!
Conclusion
Mastering stone engraving requires precise control of laser power, speed, and focus. Air assist prevents debris, while dithering enhances grayscale textures for intricate designs. A polished approach ensures professional results.
Choosing the right laser depends on wattage, beam quality, and durability. CO₂ lasers offer versatility, fiber lasers provide depth, and diode lasers serve as budget-friendly options for smaller laser engraving projects.
Proper surface preparation is key. Clean stones yield sharper engravings, test runs refine settings, and ventilation prevents smoke interference. Sealing or inking enhances contrast and longevity. Precision, patience, and experimentation define exceptional craftsmanship.