If you’re a gardening enthusiast or plant lover, you know how quickly plant pots, raised beds, and garden patches can become a guessing game. That’s where laser cut plant labels come in. These durable, customizable markers not only help you identify your plants but also add a touch of personality to your garden.
Key Takeaway
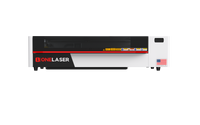
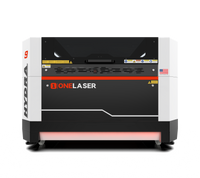
In this guide, we’ll walk you through how to make laser cut plant labels and stakes using plywood, a laser engraver, and some creativity. We’ll be using the OneLaser Hydra 9 along with LightBurn software to create professional-quality plant markers right at home.
1. Why Make Your Own Laser Cut Plant Labels?
Sure, you can buy ready-made plant labels from the store—but making them yourself offers benefits that store-bought versions can’t match:
- Custom Designs: Add plant names, dates, or even small illustrations.
- Durable Material: Plywood is weather-resistant and long-lasting.
- Eco-Friendly: Wooden labels are biodegradable, unlike plastic ones.
- Personal Touch: Perfect for home gardens, plant sales, or gifts for fellow gardeners.
- Cost-Effective: One sheet of plywood can produce dozens of plant labels.
Whether you’re labeling herbs in your kitchen window, vegetables in your backyard, or flowers in your greenhouse, laser cut plant markers make your garden organized and beautiful.

2. Tools & Materials You’ll Need
Before getting started, prepare these materials and tools:
- Plywood sheets – Sturdy, flat, and smooth for clean cutting.
- Laser cut plant label and stake file – A ready-to-use design template for LightBurn.
- LightBurn software – For importing, adjusting, and sending the design to your laser cutter.
- OneLaser Hydra 9 – A CO₂ laser engraving and cutting machine perfect for precision wood projects.
- Paint – Acrylic paint or outdoor wood paint for decoration and protection.
3. Step-by-Step: How to Make Laser Cut Plant Labels
Step 1: Prepare the Plywood Sheet
Place your plywood sheet securely on the Hydra 9 working bed.
- Make sure it’s flat and aligned to avoid uneven cuts.
- If your plywood has a protective film, remove it from the engraving area for better results.

Step 2: Add the Design File to LightBurn
- Open LightBurn software on your computer.
- Import your laser cut plant label template file.
- Adjust the size depending on your needs. For small herb pots, 4–5 inches is ideal; for outdoor garden beds, go larger.
- If you want to customize names, select the text tool in LightBurn and type in plant names like “Basil,” “Mint,” or “Tomatoes.”
Step 3: Laser Cutting Settings
Since we’re cutting plywood, here’s the recommended setting for the Hydra 9:
Cutting:
- Speed: 15 mm/s
- Max Power: 90%
- Min Power: 10%
These settings ensure clean edges without scorching the wood too much.
Step 4: Set Up Auto Focus and Start Cutting
- On the Hydra 9 TouchScreen, enable Auto Focus for perfect depth accuracy.

- Double-check your material thickness and confirm the laser head position.
- Press start and let the laser work its magic.

You’ll see the laser cut plant markers taking shape in just a few minutes.
Step 5: Paint and Assemble
Once the cutting is complete:
- Lightly sand the edges for a smooth finish.
- Paint your labels with weatherproof paint if they’ll be outdoors.
- Let them dry completely.
- If your design includes separate stakes and label tops, glue them together.

💡 Decoration Ideas:
- Use different colors for herbs, vegetables, and flowers.
- Add waterproof clear coat for extra durability.

4. Design Inspiration for Laser Cut Plant Labels
One of the best things about making your own plant markers is the flexibility in design. Here are some creative ideas:
- Rustic Garden Look: Use natural wood finish with engraved lettering only.
- Color-Coded Plant Families: Assign green to herbs, yellow to vegetables, and pink to flowers.
- Themed Shapes: Cut labels in shapes like leaves, shovels, or watering cans.
- Engraved Plant Care Info: Add sunlight and watering instructions for each plant.
- Gift Sets: Bundle labeled stakes for friends who love gardening.
5. Benefits of Using Laser Cut Plant Markers in Gardening
Laser cutting offers several unique advantages compared to traditional handwritten or plastic markers:
- Precision and Clarity: Laser engraving produces crisp, legible text that won’t fade like ink.
- Long-Lasting: Wooden labels are resistant to sun and rain, especially when painted or coated.
- Customizable for Any Garden: From tiny balcony herb pots to large farm rows.
- Eco-Friendly Choice: No plastic waste—just biodegradable wood.
- Time-Saving for Large Gardens: Quickly produce dozens of labels at once.
6. Care Tips for Your Wooden Plant Labels
To make your laser cut plant labels last longer outdoors:
- Apply a clear polyurethane coating to seal the wood.
- Store them indoors during extreme winter.
- Repaint faded designs annually for a fresh look.
7. FAQs
Q1: Can I use acrylic instead of wood?
Yes! Acrylic is waterproof and very durable. However, wood offers a natural look and is biodegradable.
Q2: Do I need a high-power laser cutter?
For thin plywood (3mm), a machine like the OneLaser Hydra 9 works perfectly.
Q3: Will the engraving fade outdoors?
With a good sealant or outdoor paint, engraved text can last for years without fading.
Q4: Can I make plant labels without LightBurn?
LightBurn is recommended for ease and precision, but you can use other compatible laser software.
8. Selling Laser Cut Plant Labels as a Small Business Idea
If you’re looking for a side hustle, laser cut plant markers are an excellent product to sell on Etsy, local markets, or garden supply shops. They’re lightweight, customizable, and perfect for seasonal promotions.
You could offer:
- Personalized sets with customer’s plant names.
- Bulk orders for nurseries.
- Decorative garden label gift packs.
Making your own laser cut plant labels is a fun, practical, and creative way to organize your garden. With the OneLaser Hydra 9, LightBurn software, and a little paint, you can produce professional-quality markers that will last season after season.
Whether you’re crafting them for your own garden or as a small business product, these labels combine function and style in a way that store-bought tags can’t match.

 Liquid error (sections/image-banner line 171): invalid url input


