Liquid error (sections/image-banner line 171): invalid url input
If you’ve ever hosted a backyard party or picnic, you know how valuable a sturdy, creative beer holder can be. Whether it's for personal use or a unique product to sell, creating a laser cut beer holder is a fun, functional project that’s perfect for laser cutting enthusiasts. In this guide, you’ll learn how to make one from start to finish — from choosing the right material to getting clean, precise cuts using a CO₂ laser cutter.
Let’s dive into how you can make your own laser cut beer holder, along with ideas for laser cut bottle holders and laser cut cup holders to expand your product lineup or DIY portfolio.

1. Why Laser Cut a Beer Holder?
Beer holders are a staple for social gatherings, tailgate parties, home bars, and gifts. When crafted with a laser cutter, they become more than just functional — they turn into personalized, professional-grade products that reflect your creativity.
Here’s why laser cutting is perfect for this type of project:
- Precision – Create clean cuts and intricate shapes.
- Customization – Add names, designs, logos, or patterns.
- Speed – Cut multiple units efficiently for personal use or resale.
- Versatility – Design for bottles, cans, cups, or even snacks.
By using laser cutting, you can make a beer holder that’s stylish, portable, and built to last.
2. Materials and Tools Needed
Before diving into the cutting process, make sure you have everything ready:
Materials:
- 3mm plywood board (Size: 35'' x 23'')
- Wood glue for final assembly
Learn more: How to Choose the Best Wood for Laser Cutting?
Tools & Equipment:
- OneLaser Hydra 9 CO₂ Laser Cutter
- LightBurn software (for design and machine control)
- Soft cloth (for cleaning the plywood surface)
- Optional: Sandpaper, clamps, finish (stain or paint)
3. Step-by-Step: How to Laser Cut Beer Holder
Follow these 4 simple steps to design, cut, and assemble your laser cut beer holder with professional results.
Step 1: Clean and Prepare Your Plywood Board
Start by cleaning your 3mm plywood sheet to ensure no dust, grease, or residue interferes with your engraving and cutting.
- Use a soft cloth to wipe both sides of the board.
- Place the plywood firmly on the working bed of the OneLaser Hydra 9.
- Make sure the board lays flat and is securely placed to prevent movement during cutting.
The size of your board (35.43'' x 23.62'') offers enough space to cut a full 6-pack beer holder or multiple cup holders in one session.

Step 2: Design and LightBurn Settings
Use LightBurn software to prepare your vector design file. You can create your own beer holder design or download a ready-made SVG file from an online marketplace. Make sure your design includes:
- A base with circular holes (approx. 2.6'' in diameter) for beer cans or bottles
- Side panels with finger joints or tab slots
- Optional handle slots or a solid grip piece
Once your file is ready, set your engraving and cutting parameters in LightBurn.
Engraving Settings:
- Speed: 800 mm/sec
- Max Power: 80% (for bold designs) to 70% (for lighter engraves)
- Min Power: 50%–20% (depending on detail level)
Use these settings for text, logos, or artwork you want etched into the surface of your beer holder.

Cutting Settings:
- Speed: 5 mm/sec
- Max Power: 35%–95% (adjust depending on wood density)
- Min Power: 10%–70%
We recommend testing your settings on a small scrap piece before starting the full cut to ensure clean edges and proper depth.

Step 3: Adjust Autofocus
Before you hit “Start,” don’t forget to adjust the autofocus of your Hydra 9 directly on the touchscreen control panel.
- Tap the autofocus button on the touchscreen.
- The machine will automatically calibrate the correct height between the laser head and the material surface.
Accurate focus is essential for crisp cuts and deep, even engravings.
Once focused, perform a frame preview in LightBurn to ensure the design aligns with your material layout. This minimizes the risk of errors and wasted wood.

Step 4: Assemble Your Laser Cut Beer Holder
Once your Hydra 9 finishes the cut, it's time to bring your beer holder to life.
Assembly Tips:
- Remove and sort all the cut parts.
- Use fine-grit sandpaper to smooth out the edges and any burn marks.
- Dry-fit the parts first — base, side panels, handles — to ensure all slots align.
- Apply wood glue to the slots and tabs, then fit the pieces together securely.
- Use clamps or rubber bands to hold everything in place while the glue dries (about 20–30 minutes).

Your holder should be sturdy and balanced enough to carry 4 to 6 full cans or bottles. Add a finish or sealant for extra durability, especially if used outdoors.
4. Meet the Machines Behind the Magic
Whether you're just getting started or already a seasoned laser-cutting pro, choosing the right machine makes all the difference in your results. That’s where OneLaser comes in — trusted by creators, crafters, and small business owners across the U.S.
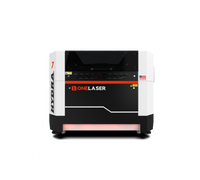
4.1 OneLaser Hydra Series – Power Meets Precision
The Hydra Series is built for serious makers who need high-speed engraving, deep cuts, and long-lasting reliability. It’s the perfect high-performance CO₂ laser cutter for medium to large production runs, detailed designs, and demanding materials like wood, acrylic, leather, and more.
Key Features:
- RF CO₂ laser tube for consistent, crisp engraving lines
- Auto-focus touch screen for easy setup
- Large working bed – perfect for full-size plywood sheets
- Excellent for both engraving and cutting
- Ideal for workshops, Etsy sellers, and custom product makers
In our beer holder project, the OneLaser Hydra 9 handled every engraving and cut with speed and precision — making clean lines and tight-fitting joints with ease.

4.2 OneLaser X Series – Compact and Creator-Friendly
If you’re looking for a user-friendly desktop laser cutter that fits your desktop but still delivers pro-level results, the OneLaser X Series is a fantastic choice. It’s made for hobbyists, small business starters, and DIY designers who want plug-and-play convenience with powerful performance.
Key Features:
- Compact footprint, perfect for home studios
- CO₂ laser tube and RF glass tube – excellent for engraving and cutting wood, acrylic, leather, cardboard, and more
- High-speed engraving and cutting
-
Compatible with LightBurn for smooth workflow
Learn more: Best Laser Engraving Software

With either series, you get access to OneLaser’s U.S.-based support team, live chat help, flexible financing options, and an active OneLaser maker community ready to share tips, inspiration, and troubleshooting advice.
5. Expand the Idea: Bottle and Cup Holder Variations
One of the biggest advantages of laser cutting your own designs is the ability to experiment. Here are a few ways to take your project further:
Laser Cut Bottle Holder
Design a more vertical style with taller side panels and rounded slots for beer or soda bottles. Add a handle for carrying and optional dividers to keep bottles from clinking.

Laser Cut Cup Holder
Create a picnic tray with multiple cup slots, a central food area, or snack compartments. Great for outdoor events, stadium tailgates, or even festivals.

Wall-Mounted Holders
Turn your flat-pack beer holder into a wall-mounted version that holds cups, bottles, or mugs — perfect for rustic home bars or man caves.

Each of these designs can be made using the same 3mm plywood board and Hydra 9 cutting settings.
6. Selling Your Laser Cut Beer Holders
If you’re running a small business or Etsy store, this is a great product to add to your inventory.
💡 Pro Tips for Selling:
- Offer custom engravings like names, wedding dates, or brand logos.
- Bundle products with coasters, bottle openers, or matching trays.
- Target seasonal sales like Father’s Day, Christmas, or tailgate season.
- Share behind-the-scenes videos of the cutting process on TikTok, Instagram Reels, or YouTube Shorts to attract potential buyers.
With OneLaser machines and the flexibility of LightBurn, you can produce personalized products quickly and consistently.
7. Maintenance Tips for Clean Cuts
To keep your laser cuts clean and your Hydra 9 running smoothly:
- Clean your lens and mirrors regularly.
- Check the air assist system to prevent smoke buildup and burns.
- Wipe down the honeycomb bed after every few cuts.
- Use masking tape or transfer paper on plywood to reduce charring and make cleaning easier.
These small steps lead to sharper cuts and professional-looking results.
8. FAQs
Q1: Can I use thicker plywood than 3mm?
Yes, you can use 4mm–6mm plywood, but you'll need to adjust the cutting speed and power. Thicker material makes the holder more durable but takes longer to cut.
Learn more: Laser Engraving & Cutting Chart
Q2: What’s the difference between engraving and cutting settings?
Engraving is for marking the surface (logos, text), using fast speeds and lower power. Cutting goes through the material and requires slower speed and higher power.
Q3: Do I need to sand laser-cut edges?
It's optional, but sanding improves aesthetics and makes your holder smoother and safer to touch.
Q4: Can I sell these designs as digital files?
Yes! Selling SVG or DXF files of your beer holder design is a great passive income stream for DIY crafters and laser owners.
Q5: How many beer holders can I cut from one plywood sheet?
Depending on your design, you can usually cut 2–3 full beer holders (for 4–6 cans) from a single 35.43'' x 23.62'' plywood board.
Final Thoughts
Creating a laser cut beer holder is both a fun project and a practical product. Whether you're crafting for fun, creating gifts, or building a business, this project offers room for creativity, customization, and scalability. Pair it with your own branding, or sell the design files for extra income.